
How underfloor heating works
Underfloor heating is one of the most popular ways to heat family houses and apartments today – and it's not just a fashion trend. It's a system that changes the rules of the game compared to classic radiators: heat doesn't flow from one narrow source under the window, but evenly from the entire floor surface you walk on. The result is a pleasant, "warm" feeling underfoot and the absence of cold corners that owners of homes with classic radiator heating know all too well.
In this article we explain in detail how underfloor heating works – from the principle of heat transfer through pipes embedded in the floor, through the differences between wet and dry systems, choosing suitable floor covering, the role of thermal insulation, all the way to manifolds and pipe-laying methods. We also pay special attention to the question of whether underfloor heating should be the sole heat source in a room, or just a pleasant addition to classic radiators.
If you're planning underfloor heating for a new build or a renovation, we also recommend reading our article on which system to choose – wet or dry, since this choice fundamentally affects the entire subsequent installation process and material selection.
How underfloor heating works
Two basic types of underfloor heating – hydronic and electric.
Underfloor heating warms a room over a large area through pipes embedded in the floor (or laid using a so-called dry system under the covering), through which hot water flows from a boiler or heat pump – this is called a hydronic system. The other variant is electric underfloor heating, where heat is generated directly in electric heating cables or mats laid under the covering, without the need for water or a manifold.
The key difference compared to a radiator lies in how heat spreads through the space. A radiator heats the air in its immediate vicinity, which rises upward, so the room heats up "from the top down" – it tends to be warmer near the ceiling and cooler near the floor. With underfloor heating it's exactly the opposite: heat is generated directly in the floor, over the whole surface, from where it rises evenly upward. This gives a much more pleasant temperature distribution in the room – it's warmest where people feel it most, namely at foot level, and the temperature drops slightly toward the ceiling. This is precisely why people have grown so fond of underfloor heating, especially in bathrooms, children's rooms and living rooms, where people often walk barefoot.
A hydronic system operates with a significantly lower heating water temperature than radiators – this is important to know especially if you combine underfloor heating with a condensing boiler or a heat pump, since a lower return water temperature improves the efficiency of the heat source. Electric underfloor heating, on the other hand, needs no boiler or manifold – the heating cable or mat connects directly to the electrical grid via a thermostat, which simplifies installation, but operating costs then depend on the price of electricity rather than the fuel used in a boiler.
Wet or dry system – what's the difference
With hydronic underfloor heating, pipes are laid using one of two basic methods – a wet system or a dry system. Choosing between them is one of the most important decisions to make before installation even begins, since it fundamentally affects the floor's construction height as well as the work schedule.
The wet system lays the pipe directly into a layer of concrete screed – the pipe is literally embedded in the concrete. This variant achieves the best heat accumulation and the most even heat distribution across the whole floor surface, because the concrete screed acts as a thermal accumulator that distributes heat evenly and keeps it even after the circulation pump switches off. The downside is a greater construction height – typically 7 to 10 cm of screed is needed – and a fairly long concrete drying time before the system can be put into operation, which is counted in weeks.
The dry system lays the pipe into system installation panels or between mounting rails, without a wet screed. The distribution layer is thinner, most often made of gypsum fibreboard panels. This system is suitable especially for renovations where the floor cannot be raised by many centimetres (for example because of door or staircase height), or in situations where the heating needs to be put into operation quickly, without weeks of waiting for concrete to dry.
The choice between a wet and a dry system is therefore not just a question of price, but above all of the construction possibilities of the specific building. You'll find a more detailed comparison of both variants, including when it's worth reaching for which solution, in a separate article Wet vs. dry underfloor heating system.
With a wet system, a system insulation panel with studs is almost always used under the pipe – the pipe simply clips into the studs and stays exactly in place even while the screed is being poured. An example of such a panel is:
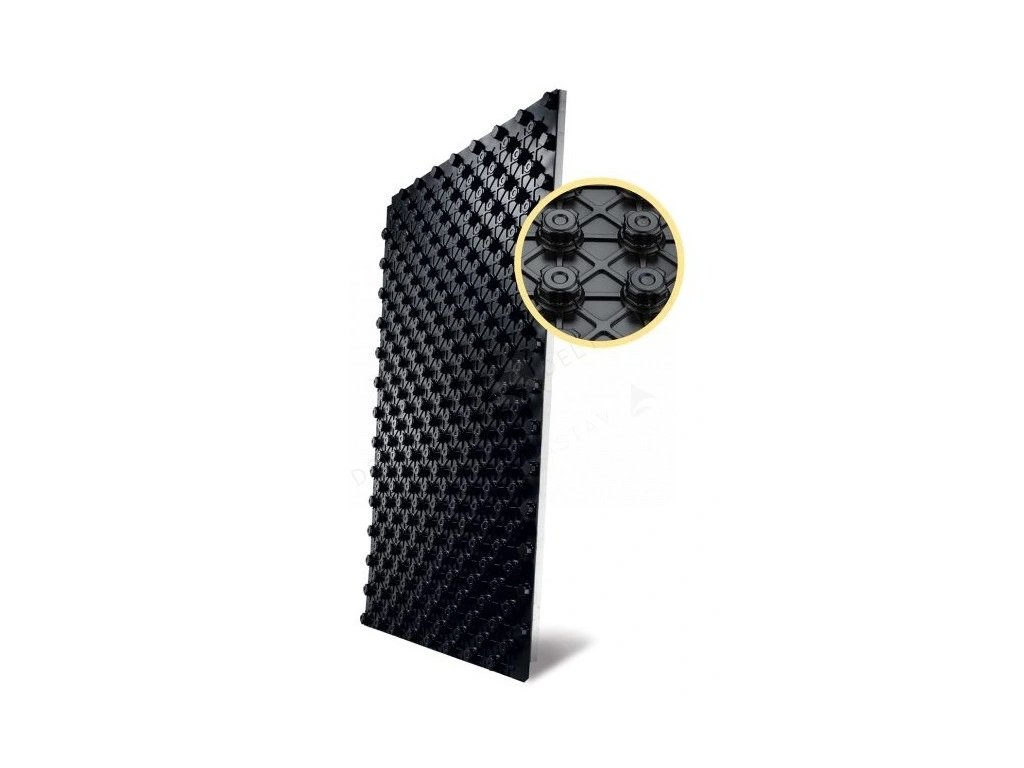
STIROTERMAL DUO 20 system insulation panel
Price: €12.26
A polystyrene system insulation panel with studs for securing the pipe – designed for wet underfloor heating systems.
Which floor covering is suitable for underfloor heating
The choice of floor covering has a direct effect on how efficiently underfloor heating will work. The most suitable covering for underfloor heating is tile and stone – these materials have high thermal conductivity, which means heat from the pipes passes quickly through into the room and the system responds flexibly to thermostat setting changes. This is exactly why tiles are so often combined with underfloor heating in bathrooms, kitchens and hallways.
Laminate and wood flooring are also compatible with underfloor heating, but they must be specifically certified for use with underfloor heating. Certified covering has a declared lower thermal resistance, and the manufacturer usually also states a maximum permitted floor surface temperature, which for wood and laminate coverings is typically up to 27–29 °C. This restriction is no accident – a higher temperature could gradually dry out the wood and cause it to warp or develop gaps between the boards. When choosing wood or laminate flooring for underfloor heating, it is therefore essential to check the product's technical data sheet and make sure it is specifically suitable for use with underfloor heating.
Carpet coverings, on the other hand, significantly worsen heat transfer into the room, because textile fibres have high thermal resistance and act more as insulation than as a heat conductor. Carpets are therefore generally not recommended with underfloor heating, or only thin types with a declared low thermal resistance. If you're planning to combine underfloor heating with carpet, it's worth discussing this choice already at the project stage, so the system's output is designed with sufficient reserve.
You'll find more details on individual covering types and their suitability for underfloor heating in the article Which floor covering is suitable for underfloor heating.
Thermal insulation under the pipe – why it's essential
A thermal insulation layer is always placed under the underfloor heating pipe. Most often this is a system polystyrene panel with studs into which the pipe clips directly (the STIROTERMAL DUO panel mentioned above is exactly such an example), or smooth polystyrene, on which the pipe is fixed with clips or mounting rails.
The role of this insulation is clear – to direct heat from the pipe upward, into the heated room, while preventing it from escaping downward, that is into the ceiling of the neighbour in the flat below you, or directly into the ground beneath a ground-floor slab. Without quality insulation, a large part of the heat produced would escape where you don't need it, which would increase operating costs without any benefit to thermal comfort in the room.
In general, a thicker and better-quality insulation layer reduces heat losses downward and also improves the response time of the whole system – heat isn't lost "into nothing" and shows up faster where it should, namely on the floor surface. This is precisely why it's worth paying attention to the thickness and quality of insulation under underfloor heating already at the project stage, not only during installation itself.
A detailed overview of insulation types, system panels and recommendations for various building types can be found in the article Insulation under underfloor heating – polystyrene and system panels.
The manifold – the control centre of underfloor heating
The manifold is the central element of the entire hydronic underfloor heating system. Its job is to distribute water from the boiler to the individual circuits, or loops, of the underfloor heating, and then to carry the cooled water back to the boiler for reheating. Each room or larger zone usually has its own separate loop, which is connected precisely to the manifold.
On the manifold, flow is set for each circuit according to the length of the specific loop and the area of the given room – a longer loop or a larger room requires a different flow than a short loop in a small bathroom. Actuators are also mounted on the manifold, controlled by the room thermostats of the individual zones – thanks to this, you can set a different temperature in each room, and the system automatically regulates the water flow into the relevant circuit according to what that zone currently needs.
Manifolds are made either of brass or stainless steel – both materials are commonly used and differ mainly in surface finish and price. They are placed in a manifold cabinet, which can be either recessed (built into the wall) or surface-mounted (mounted on the wall surface), depending on what better suits the specific space.
We go into detail on exactly how to set up the manifold, balance the individual circuits and what to do at first start-up in the article Underfloor heating manifolds – how they work and how to set them up.
Price comparison of a stainless steel and a brass manifold from our range.
Our range includes manifolds in both common versions:

Stainless steel 6-way manifold for underfloor heating
Price: €115.72
A stainless steel manifold for 6 separate underfloor heating circuits – suitable for flats and family houses with multiple heating zones.

Brass 6-way manifold for underfloor heating
Price: €111.56
A brass manifold for 6 underfloor heating circuits – a common and proven alternative to the stainless steel version.
Pipe-laying methods – serpentine or spiral
Serpentine is faster to install, spiral distributes heat more evenly.
The way the pipe is laid in the floor affects how evenly the floor will heat up. In practice you'll most often come across two basic laying methods – serpentine (meander) and spiral (double meander, sometimes also called snail or coil).
Serpentine (meander) is the simplest laying method – the pipe runs in parallel rows across the whole room, similar to mowing a lawn in strips. This method is faster to install, since it requires less complex route planning. The downside is that it creates a slight temperature gradient within the room – near the point where hot water from the manifold enters the loop, the floor is somewhat warmer, while near the end of the loop, where the already cooled water returns, the floor is somewhat cooler.
Spiral (double meander) runs the supply and return pipe alternately next to each other, so the warmer and cooler parts of the circuit interleave across the whole room surface. This averages out the temperature differences, and the floor surface is overall more evenly warm than with a simple serpentine. Spiral laying is therefore preferred especially along perimeter walls and in rooms with higher heat loss, where it's important for that part of the room to be sufficiently and evenly heated.
The choice between serpentine and spiral shouldn't be random – in practice both methods are often combined even within a single room, for example spiral along the perimeter wall with windows and serpentine over the rest of the area. You'll find a detailed guide on when to reach for which method and how to plan it in the article Pipe-laying methods – serpentine vs. spiral.
Whichever laying method you choose, the pipe itself must be specifically designed for underfloor heating – meaning resistant to the temperature and pressure of the water in the system, and fitted with an oxygen barrier that prevents oxygen from entering the heating water and causing subsequent corrosion of the system's metal parts (boiler, pump, manifold). An example of such a pipe is:

HEPWORTH pipe for underfloor heating, 16 mm
Price: €1.48/m
PE-RT pipe with an oxygen barrier, 16 mm diameter – specifically designed for underfloor heating, suitable for both serpentine and spiral laying.
Underfloor heating as the main or a supplementary heat source
Even before starting the underfloor heating project itself, one fundamental question needs to be clarified – should the underfloor heating in the given room cover the entire heat loss as the main heat source, or will it just be a supplementary comfort feature alongside another heating appliance?
Underfloor heating designed as the main heat source must cover the room's entire heat loss. This requires a thorough calculation of output and pipe-laying density already at the project stage, since the density of the piping in the floor cannot be changed afterwards once the screed has been poured (or once installation is complete with a dry system). If this stage is underestimated, it can happen that on freezing days the underfloor heating simply can't keep up with the room's heat losses, and the flat or house will be cooler than you'd expect.
As a supplementary heat source – typically, for example, just in a bathroom alongside a radiator – underfloor heating primarily addresses the comfort of a warm floor underfoot, while the room's main heat loss is covered by another source, most often the radiator itself. In this case the output requirements for the underfloor heating aren't as high, since its job isn't to heat the whole room, but only to provide a pleasant feeling of warmth directly at your feet.
Combining underfloor heating with radiators within a single heating system is quite common in practice and works reliably – however, it requires correct hydraulic balancing of both circuits. The reason is that underfloor heating operates with a significantly lower heating water temperature than radiators, so both circuits need their own temperature control (for example via a mixing valve for the underfloor heating circuit) in order to work simultaneously and reliably.
You'll find more on how to clarify in advance whether underfloor heating should be the main or just a supplementary heat source, and how this affects the project and the budget, in the article Underfloor heating as the main or a supplementary heat source. If you already have a finished project and are getting ready for the actual installation, also read our guide Underfloor heating installation – step by step.
Real examples from practice
Key decisions in a project with underfloor heating as the main heat source.
Example 1 – a family house with underfloor heating as the main heat source. A new-build family house with a ground floor and upper floor, where the investor already planned for underfloor heating as the sole heat source in all living rooms at the project stage. Tile was chosen for the ground floor, which made full use of this covering's high thermal conductivity and the system's fast response to thermostat setting changes. On the upper floor, in the bedrooms, the investor preferred certified wood flooring suitable for underfloor heating – given the limited maximum surface temperature of such a covering, the project already had to allow for more densely laid pipe and a slightly higher output, so that despite the lower surface temperature the floor would reliably cover the rooms' heat losses. In rooms with a larger glazed area (a living room with large windows to the garden) the pipe was laid using the spiral method, so heat would be distributed evenly even near the cooler perimeter wall with windows, while in smaller rooms without large windows a simpler serpentine was sufficient. A wet system with a system insulation panel was used, since in a new build there was no problem designing sufficient floor construction height already at the project stage, and the manifolds were placed in recessed cabinets in the hallway on each floor separately.Example 2 – a flat in a panel building, underfloor heating only in the bathroom as a supplement to radiators. The owner of a flat in a panel building decided, during a complete bathroom renovation, to supplement the original radiator with electric underfloor heating under the tiles. The goal wasn't to replace the radiator, but to ensure a pleasantly warm tiled floor underfoot after showering, since it's precisely in the bathroom that people most often walk barefoot. Since this was a flat renovation without the option to significantly raise the floor, an electric solution with a thin heating mat was more practical in this case than a hydronic dry system, which would still have required a connection to a manifold and water piping, for which there was neither space nor purpose in the small bathroom of a flat. The radiator in the bathroom continues to cover the room's main heat loss, while the underfloor heating exclusively addresses comfort – exactly an example of a situation where underfloor heating functions as a supplementary, not a main, heat source.
Frequently asked questions about underfloor heating
Can underfloor heating be installed in a flat in a panel building, or is it only for family houses?
Yes, underfloor heating can also be installed in a flat. For a renovation where the floor cannot be significantly raised, a dry system or electric underfloor heating is more suitable, as it manages with a thinner construction height than a wet system with concrete screed.
Does the heating pipe need to run under the entire floor, or is part of the room enough?
This depends on whether the underfloor heating is meant to be the main or just a supplementary heat source. As the main source it must cover a sufficient area to cover the heat loss of the whole room, while as a supplementary comfort feature (for example in a bathroom alongside a radiator) it can just heat part of the floor.
What's the difference between a wet and a dry system from an ordinary user's point of view?
A wet system with the pipe embedded in concrete provides better heat accumulation and more even heat, but requires a greater construction height and a longer drying time before start-up. A dry system is faster to install and suitable especially for renovations with limited floor height.
Can I have wood flooring over underfloor heating, or must it always be tile?
Tile is the most suitable thanks to its high thermal conductivity, but wood and laminate floors are also possible – they must, however, be specifically certified for underfloor heating, with a declared maximum surface temperature, typically up to 27–29 °C.
Why is insulation needed under the pipe if the heat is supposed to go upward anyway?
Without insulation, part of the heat would escape downward – into the neighbour's ceiling or into the ground – instead of being used to heat the room above it. Insulation directs heat upward and also improves the system's response time to thermostat setting changes.
What exactly is the manifold for, and does every room need one?
The manifold is the central element that distributes water from the boiler to the individual underfloor heating circuits and back. It isn't needed in every room – it's usually placed centrally (for example in a manifold cabinet in the hallway), and separate loops run from it to individual rooms or zones.
What's the difference between laying the pipe in a serpentine and a spiral, and do I have to pick just one method for the whole house?
Serpentine is simpler to install, but creates a slight temperature gradient in the room. Spiral averages out the temperature differences and is more suitable along perimeter walls with higher heat loss. Both methods can be combined even within a single house, depending on the needs of the specific room.
Can underfloor heating be combined with radiators in one house?
Yes, this combination is common and works reliably. However, it requires correct hydraulic balancing, since underfloor heating operates with a lower heating water temperature than radiators – a separate temperature control is therefore usually used for the underfloor heating circuit.
Is electric underfloor heating worse than hydronic?
It's not a question of "worse" or "better", but of suitability for the given situation. Electric underfloor heating simply connects directly to the electrical grid via a thermostat without the need for a manifold and water piping, which is advantageous especially for smaller areas or additional installation, for example in a bathroom during a renovation.
Related topics
- Wet vs. dry underfloor heating system
- Which floor covering is suitable for underfloor heating
- Insulation under underfloor heating – polystyrene and system panels
- Underfloor heating manifolds – how they work and how to set them up
- Pipe-laying methods – serpentine vs. spiral
- Underfloor heating as the main or a supplementary heat source
- Underfloor heating installation – step by step
- Servicing, air venting and common underfloor heating faults
- Frequently asked questions about underfloor heating
Have a question about underfloor heating?
Not sure what to decide, or dealing with a specific situation in your home? Write to us – we're happy to help.