
Wet vs. dry underfloor heating system
Sooner or later, every builder and every apartment owner planning a renovation runs into the same question when planning underfloor heating: wet or dry system? There's no universal answer – it depends on whether you're building from the foundations up or changing floors in an already inhabited flat, how many centimetres of height you have available, how quickly you need the system up and running, and what floor covering you plan to use. In this article we'll break down both systems in detail – how they work, how they differ, what requirements they have for construction height and drying time, how they relate to insulation, manifolds, pipe-laying methods and covering choice, and finally, how to decide in a specific situation.
Underfloor heating as such works on a simple principle – we covered how underfloor heating works in detail in a separate article; here let's just recall the essence: heat spreads over a large area through pipes embedded in the floor (wet system) or laid in a dry system under the covering, through which hot water flows from a boiler or heat pump (hydronic system), or through electric heating cables or mats (electric underfloor heating). Heat spreads evenly across the entire floor surface and rises upward, creating a pleasant feeling of warmth at foot level without the cold corners we know from classic radiator heating. It's precisely the way the pipe is laid in the floor – embedded in concrete, or set into dry system panels – that distinguishes the wet system from the dry one, and that has a fundamental impact on the entire course of construction or renovation.
The layers of underfloor heating are laid in this order, for both wet and dry systems.
The wet underfloor heating system – how it works
The wet system is the classic and most widespread solution, especially for new builds. The pipe is laid into a layer of concrete screed – it's literally embedded directly in the concrete, which then forms the layer that distributes heat across the whole room. This construction achieves the best heat accumulation of all commonly used underfloor heating solutions, along with the most even heat distribution across the floor surface. The concrete screed acts as a thermal accumulator – it absorbs heat from the pipe and gradually, evenly releases it into the room, smoothing out any fluctuations and maintaining a stable surface temperature even after a short heating outage.
This advantage, however, comes at the cost of two practical limitations. The first is construction height – wet screed with an embedded pipe typically requires 7 to 10 cm of thickness above the insulation, which needs to be accounted for already in the house design (door height, staircases, thresholds and the overall clear height of the rooms). The second limitation is the screed's drying time – it usually takes weeks before the screed is sufficiently cured for the heating to be started up and the final covering laid on top. This period needs to be built into the construction schedule and can't be significantly shortened without risking damage to the screed.
This is precisely why the wet system is most often used in new builds, where the thickness of the floor build-up is already accounted for in the project documentation, and where the construction schedule naturally includes technological breaks for wet processes to cure (concrete foundations, plastering, screed). With the wet system, the pipe is laid on a system insulation panel, secured at the required spacing according to the project (serpentine or spiral, more on that below), and then covered with anhydrite or cement screed. Typically this is a pipe with a 16 mm diameter – for example the HEPWORTH pipe for underfloor heating, 16 mm, a PE-RT pipe with an oxygen barrier specifically designed for underfloor heating, which prevents oxygen diffusion into the heating water and thereby extends the lifetime of the whole system as well as the boiler.

HEPWORTH pipe for underfloor heating, 16 mm
PE-RT pipe with an oxygen barrier, 16 mm diameter, specifically designed for underfloor heating – used in both wet and dry systems.
Price: €1.48/m
View productThe dry underfloor heating system – how it works
The dry system solves exactly the two limitations we described for the wet system. Instead of embedding the pipe in concrete screed, the pipe is laid into system panels (for example polystyrene panels with milled grooves, or gypsum fibreboard panels with metal heat-distribution sheets), or between mounting rails, without any wet screed at all. The distribution layer above the pipe is significantly thinner – instead of centimetres of concrete, it's usually gypsum fibreboard panels with the minimum thickness needed to distribute heat and mechanically cover the pipe.
This gives the dry system two fundamental advantages. First, significantly lower requirements for construction height – where wet screed needs 7 to 10 cm, the dry system manages with a considerably thinner build-up, which is key especially in renovations where the floor cannot be raised by many centimetres (for example because of existing door frames, staircase height, or the connection to neighbouring rooms without underfloor heating). Second, the absence of wet screed means the system can be put into operation practically immediately after installation – there's no need to wait weeks for the screed to dry and cure, which is a major advantage wherever a renovation needs to be finished quickly and the flat or house needs to be inhabited as soon as possible.
The dry system is therefore typically used precisely in renovations of flats and houses where only the floor covering is being changed and there's no plan to raise the whole floor build-up by tens of centimetres, or where the investor needs the shortest possible interruption to using the space. Just as with the wet system, a pipe with an oxygen barrier is also used here (for example the same PE-RT HEPWORTH 16 mm pipe) – only the way it is laid and covered differs.
The key differences between wet and dry underfloor heating systems.
Wet vs. dry system – direct comparison
Let's now summarise the key differences between both systems side by side, so it's clear when to reach for which solution:
- Construction height: the wet system typically requires 7–10 cm of screed above the insulation, the dry system is significantly lower and suits situations where there's no room to raise the floor.
- Time to start-up: the wet system needs weeks for the screed to dry and cure before the heating can be started and the covering laid, the dry system can be started practically immediately after installation.
- Heat accumulation: thanks to the mass of the concrete screed, the wet system accumulates heat best and distributes it most evenly, the dry system responds faster to changes (faster heat-up and faster cool-down) but with somewhat less thermal inertia.
- Typical use: the wet system dominates in new builds, where the build-up thickness is already accounted for in the project, the dry system is the first choice for renovating flats and houses.
- Pipe: both systems commonly use the same type of pipe (PE-RT with oxygen barrier, 16 mm diameter), only the way it is laid and covered differs.
Neither of these two systems is universally "better" – they're two different technical solutions to the same heating principle, and the choice depends mainly on the construction stage (new build vs. renovation), the available construction height and the time schedule.
Insulation under the pipe – the foundation of both systems
Regardless of whether you choose a wet or dry system, a thermal insulation layer is always placed under the pipe. Most often this is a system polystyrene panel with studs for clipping in the pipe, which also serve as an installation aid when laying it (the pipe is simply pressed between the studs at the required spacing), or smooth polystyrene, on which the pipe is fixed with clips or mounting rails. You'll find a detailed overview of insulation types and how to choose the right one in the article Insulation under underfloor heating – polystyrene and system panels.
The role of this layer is to direct heat upward into the room and prevent it from escaping downward – into a neighbour's ceiling in a flat, or directly into the ground beneath a ground-floor slab in a family house. As a rule, thicker and better-quality insulation reduces heat losses downward and also improves the response time of the whole system – less heat is "lost" into the structure beneath the pipe, and more of it goes where it should, namely to you in the room. With the wet system, screed is then poured onto the system insulation panel; with the dry system, distribution panels with the pipe are laid on top of it – in both cases, however, quality insulation is the foundation on which the efficiency of the whole system rests.
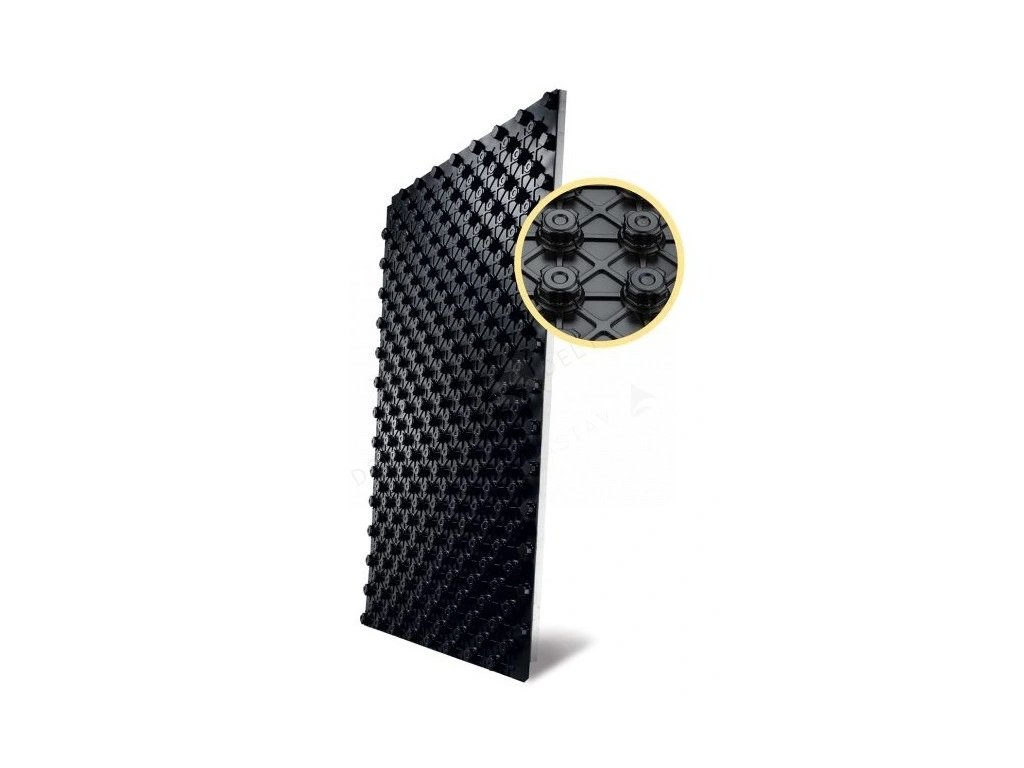
STIROTERMAL DUO 20 system insulation panel
A polystyrene system insulation panel with studs for securing the pipe – used in wet underfloor heating systems as the base under the screed.
Price: €12.26
View productWhich floor covering suits the wet and dry system
Choosing the covering above underfloor heating is just as important as choosing the system itself, since the covering is the final layer through which heat must pass into the room. We covered this topic in detail in the article Which floor covering is suitable for underfloor heating; here let's summarise the key points in relation to choosing a wet or dry system.
The most suitable covering for underfloor heating is tile and stone – they have high thermal conductivity, so heat passes through them quickly into the room. Tile is an excellent match for the wet system (a common combination in new builds) as well as for the dry system in bathroom and kitchen renovations. Laminate and wood flooring are also possible, but must be specifically certified for use with underfloor heating – meaning they must have a declared lower thermal resistance and a set maximum surface temperature. Manufacturers of such flooring usually limit the maximum surface temperature to roughly 27–29 °C, so the wood doesn't dry out excessively and warp. This restriction applies equally to the wet and dry system, since it's a property of the covering itself, not a property of the structure beneath it.
Carpet coverings significantly worsen heat transfer into the room, because textiles have high thermal resistance and act as an insulator – in effect "trapping" heat where you don't want it (in the floor), instead of letting it out. Carpets are therefore generally not recommended with underfloor heating, or only those with a declared low thermal resistance that explicitly states this property. This limitation is important to consider with the dry system in renovations just as much as with the wet system in new builds – which is exactly why it's worth thinking through the choice of covering before deciding on the type of underfloor heating, since some combinations (for example a thick carpet with a dry system in a bedroom) can significantly reduce the real heating output of the whole solution.
Manifolds and circuit connection
Regardless of whether you choose a wet or dry system, every hydronic underfloor heating installation needs a manifold. The manifold is the central element that distributes water from the boiler to the individual circuits (loops) of the underfloor heating and back – each room or zone usually has its own loop connected to the manifold. We go into detail on exactly how manifolds work and how they're set up in the article Underfloor heating manifolds – how they work and how to set them up.
Flow is set on the manifold for each circuit according to the loop length and the area of the given room – longer loops or larger areas need higher flow so heat is distributed evenly throughout the flat or house. Actuators are also mounted on the manifold, controlled by the room thermostats of the individual zones – thanks to this, each room can have its own, independently regulated temperature. Manifolds are usually made of brass or stainless steel and are placed in a manifold cabinet, which can be recessed (built into the wall, aesthetically discreet) or surface-mounted (simpler installation, visible on the wall surface).
Price comparison of a stainless steel and a brass 6-way manifold.
The choice between brass and stainless steel is mainly a matter of preference and budget – both materials are commonly used in practice and are reliable:

Stainless steel 6-way manifold for underfloor heating
A stainless steel manifold for 6 separate underfloor heating circuits.
Price: €115.72
View product
Brass 6-way manifold for underfloor heating
A brass manifold for 6 circuits, an alternative to the stainless steel version.
Price: €111.56
View productPipe-laying method – serpentine vs. spiral
With both systems, wet and dry, you also need to choose how the pipe is laid out in the room. We cover this topic in detail in the article Pipe-laying methods – serpentine vs. spiral; here let's recall the essence of both variants.
Serpentine (meander) is the simplest laying method – the pipe runs in parallel rows across the whole room. It's faster to install, since it requires a simpler calculation and simpler handling of the pipe while laying it, but it creates a slight temperature gradient – near where water enters the loop the floor is somewhat warmer, toward the end of the loop (where the water has already partly cooled) it's somewhat cooler.
Spiral, that is a double meander, runs the supply and return pipe alternately next to each other. This averages out the temperature differences, and the floor surface is more evenly warm across the whole room. Spiral is therefore used mainly along perimeter walls and in rooms with higher heat losses (for example corner rooms with several outer walls, or rooms with large glazed areas), where evenness of heat distribution matters more than simplicity of installation.
The choice between serpentine and spiral is made already at the underfloor heating project stage, together with the calculation of pipe density – and this applies equally to the wet and dry system, since it concerns how the pipe is distributed across the area, not how it is laid into the screed or panels.
Underfloor heating as the main or a supplementary heat source
Another important decision closely tied to choosing a wet or dry system is what role underfloor heating should play in the given room. We cover this in detail in the article Underfloor heating as the main or a supplementary heat source.
Underfloor heating designed as the main heat source must cover the room's entire heat loss – this requires a thorough calculation of output and pipe density already at the project stage, since the density of the piping in the floor can't be changed afterwards (with the wet system the pipe is embedded in concrete, with the dry system it's laid in system panels – in both cases, changing the pipe density after completion is practically impossible without intervening in the entire floor structure). This is precisely why, in new builds where underfloor heating is meant to work as the sole heat source, a wet system is almost always chosen – it allows a more precise definition of the build-up already at the project stage and makes better use of the screed's accumulation properties for stable, even comfort.
As a supplementary source (typically in a bathroom alongside a radiator), underfloor heating primarily addresses the comfort of a warm floor underfoot, while the room's main heat loss is covered by another source – the radiator. A dry system is often used precisely in this role, since during a bathroom renovation in a flat there's often no room to raise the floor by many centimetres. Combining underfloor heating with radiators in one system is common in practice and works reliably, but requires correct hydraulic balancing – underfloor heating operates with a significantly lower heating water temperature than radiators, so both branches need to be set at the boiler and manifolds so they don't "compete" with each other and each part of the system receives water at the correct temperature.
How to decide – new build vs. renovation
Summarising everything above into a simple rule of thumb: for a new build, where the thickness of the floor build-up is already accounted for in the project and where the construction schedule naturally includes technological breaks for wet processes to cure, the wet system is in the vast majority of cases the first choice – thanks to better heat accumulation and more even distribution it's more comfortable long-term, and in a new build none of its limitations (height, drying time) is a real problem, since they're accounted for from the start.
For renovating a flat or house, where you're only changing the floor covering and don't want to or can't raise the floor by several centimetres, or where you need to get the space back into use as quickly as possible, the dry system is the natural choice. Its lower construction height and immediate readiness after installation make it a practical solution exactly for this type of situation – albeit with slightly lower heat accumulation compared to a wet screed.
In both cases, the pipe type itself (PE-RT with an oxygen barrier, 16 mm), the quality of the insulation under the pipe, a correctly designed manifold with actuators for the individual zones, and a suitably chosen floor covering are equally important – the difference between the wet and dry system lies in how the pipe is laid and how quickly and with what construction height the system can be realised, not in the basic principle of how underfloor heating works.
Real examples from practice
Two real examples from practice – a new build with a wet system and a renovation with a dry system.
A family house under construction with underfloor heating as the main heat source. In a new-build family house, underfloor heating was designed as the sole heat source in all living rooms. Since the build-up thickness was already accounted for in the project (foundation slab, insulation, screed), a wet system was chosen with a system insulation panel, 16 mm pipe laid using the spiral method in perimeter rooms with larger glazed areas and the serpentine method in inner rooms with lower heat losses. The manifold was placed in a recessed cabinet in the hallway, with individual circuits for each room and separate control via room thermostats. The screed was given the necessary time to dry and cure before laying tiles in most rooms and certified wood flooring in the living room and bedrooms, so the construction schedule accounted for this technological break from the start, without any delay to the other work.A flat in a panel building, bathroom and kitchen renovation. During the renovation of a flat in a panel building, the goal was to minimise disruption to living there while preserving as much clear room height as possible, since the existing door frames and thresholds between rooms didn't allow for a significant floor rise. In both the bathroom and the kitchen, a dry underfloor heating system was therefore chosen as a supplementary heat source alongside the original radiators – in the bathroom mainly for the comfort of a warm tiled floor underfoot, in the kitchen as a pleasant addition alongside the existing heating appliance. Thanks to the thinner build-up without wet screed, it was possible to lay the tiles practically immediately after installing the system panels with the pipe, without weeks of waiting for drying, which significantly shortened the overall renovation time and allowed the family to move back into the flat according to the original schedule.
Frequently asked questions about wet and dry underfloor heating systems
In this section we answer the most common questions about choosing between a wet and dry system. You'll find further general questions about underfloor heating in the article Frequently asked questions about underfloor heating.
Can a dry system also be used in a new build?
Yes, the dry system isn't reserved only for renovations – it can also be used in a new build, for example in a loft conversion or in timber-frame buildings, where low construction height or structural weight matters more than maximum heat accumulation. In practice, however, the wet system clearly dominates in new builds, since there the dry system's advantages (lower construction height, faster start-up) usually aren't the deciding factor.
Can a wet system be used in a renovation?
Theoretically yes, if the flat or house has sufficient clear height and you can accept a several-week technological break for the screed to dry. In practice, however, in flat renovations (especially in panel buildings with limited height and low tolerance for long interruptions to use) the dry system is chosen considerably more often, precisely because of these two limitations of the wet system.
Which system is cheaper?
Specific material and installation costs vary from project to project, since they depend on the area, number of circuits, chosen pipe, manifold type and local conditions. Instead of a general price comparison, we therefore recommend basing your decision on the technical parameters described above (construction height, drying time, typical use) and having the price calculated for your specific project.
Does there always need to be insulation under the pipe, even with a dry system?
Yes, the thermal insulation layer under the pipe is always laid, regardless of whether it's a wet or dry system. Its job is to direct heat upward into the room and prevent it from escaping downward, so it's part of the build-up in both cases.
What type of pipe is used in wet and dry systems?
In both cases the same type of pipe is commonly used – PE-RT with an oxygen barrier, standardly with a 16 mm diameter. The difference between the systems isn't in the pipe type, but in how it is laid and covered (embedded in concrete with the wet system, laid in system panels with the dry system).
Can I have a combination of wet and dry systems in one flat?
Yes, in practice this is a common solution in renovations, where a wet system is used in some rooms (for example where the whole floor is being demolished anyway) and a dry system in other rooms (where a low construction height needs to be preserved). Both branches connect to a shared manifold, which ensures the correct flow for each circuit according to its length and the room's area.
Does the choice of covering affect whether I choose a wet or dry system?
Not directly – the covering requirements (tile and stone as the most suitable choice, certified wood and laminate with a limited surface temperature of 27–29 °C, carpets only with low thermal resistance) apply equally to the wet and dry system. What matters more is the overall floor build-up and how much height the covering, together with the underfloor heating system, will take up.
Can a dry system be combined with radiators in the same room?
Yes, that's exactly the common case where underfloor heating works as a supplementary heat source – for example in a bathroom, where the dry system provides the comfort of a warm tiled floor and the radiator covers the room's main heat loss. With such a combination, both circuits need to be correctly hydraulically balanced, since underfloor heating operates with a lower water temperature than the radiator.
How long does it take before you can heat after installing a dry system, compared to a wet one?
The dry system can be put into operation practically immediately after installation, since it contains no wet screed that would need to dry. The wet system, by contrast, requires the screed to cure sufficiently – this process usually takes weeks, and only after it's finished can the system be started up and the final covering laid.
Related topics
- How underfloor heating works
- Which floor covering is suitable for underfloor heating
- Insulation under underfloor heating – polystyrene and system panels
- Underfloor heating manifolds – how they work and how to set them up
- Pipe-laying methods – serpentine vs. spiral
- Underfloor heating as the main or a supplementary heat source
- Underfloor heating installation – step by step
- Servicing, air venting and common underfloor heating faults
- Frequently asked questions about underfloor heating
Have a question about underfloor heating?
Not sure what to decide, or dealing with a specific situation in your home? Write to us – we're happy to help.