
Which floor covering is suitable for underfloor heating
Underfloor heating is one of the most comfortable ways to heat a home – heat spreads evenly across the whole room and rises upward, so it's always pleasantly warm at foot level and no cold corners form in the room, unlike with classic radiators. However, for the system to work exactly as it should, it's not enough to just design the piping and boiler well. The floor covering you choose above the underfloor heating also plays a decisive role – the covering is the final layer through which heat must pass into the room, and its properties can significantly affect the output and efficiency of the whole system.
In practice, we still often see households choose tiles or flooring based on looks first, and only afterwards deal with whether it's even suitable for underfloor heating. Yet the right choice of covering can make the difference between a "lukewarm" and a genuinely warm floor, between a fast and a slow system response to outdoor temperature changes, and between low and needlessly high energy consumption. Conversely, a poorly chosen covering can literally "dampen" even the best-designed underfloor heating system.
In this article we therefore take a detailed look at which types of floor covering are most suitable for underfloor heating, why that is, and how the choice of covering relates to other parts of the system – insulation under the pipe, the type of system (wet or dry), the pipe-laying method, and whether the underfloor heating is meant to work as the main or just a supplementary heat source. At the end you'll also find two real examples from practice and answers to the most common questions we receive from customers on this topic.
What underfloor heating is and why the covering matters so much
Underfloor heating warms a room over a large area through pipes embedded in the floor (or laid in a dry system under the covering), through which hot water flows from a boiler or heat pump – this is called a hydronic system. There's also electric underfloor heating, where heat is generated directly in heating cables or mats laid under the covering. In both cases the same principle applies: heat is generated beneath the floor surface and must "pass" up through the covering into the room for you to feel it.
This is exactly why the covering is a much more important part of the system than it might seem at first glance. While with radiator heating heat goes directly into the room's air and the floor type is practically irrelevant from a heating point of view, with underfloor heating the covering is the last – and often the limiting – link in the whole chain. If the covering has high thermal resistance (that is, it conducts heat poorly), the system has to work with a higher water temperature in the pipes to achieve the same comfort, which increases energy consumption and extends the time it takes for the room to warm up to the desired temperature. Conversely, a covering with low thermal resistance lets heat pass through quickly and evenly, so the system can work with lower water temperatures – which is also ideal for the efficient operation of heat pumps.
If you're interested in how underfloor heating works as a whole – from the heat source through the piping to the controls – we cover it in detail in the article How underfloor heating works.
Which floor covering is most suitable for underfloor heating
Three main types of floor covering and their suitability for underfloor heating.
When choosing a covering for underfloor heating, one property is key – the material's thermal conductivity, that is, how quickly and how efficiently it can "carry" heat from the floor into the room. The higher the thermal conductivity, the better the covering suits underfloor heating.
Tile and stone are clearly the most suitable choice from this point of view. Ceramic tile, natural stone, and also large-format stone cladding have high thermal conductivity, so heat passes through them quickly and almost without loss. The floor therefore warms up pleasantly even at a relatively low water temperature in the pipes, the system responds fairly quickly to thermostat setting changes, and the energy efficiency of the whole heating system is the highest possible. This is also why tile is so often combined precisely with underfloor heating in bathrooms, hallways, entrance halls or kitchens – that is, in spaces where a cold tiled floor without underfloor heating would be unpleasant, but with underfloor heating becomes one of the most comfortable options of all.
Laminate and wood flooring can also be used with underfloor heating, but with an important condition – they must be specifically certified for use with underfloor heating. Such products have a declared lower thermal resistance than ordinary laminate or wood flooring, and the manufacturer also states the maximum surface temperature the floor can withstand without damage – typically a value of around 27 to 29 °C. This restriction is no accident: wood is a natural material sensitive to heat and moisture, and if it were overheated above this limit long-term, it risks drying out, boards warping, gaps cracking open, or delamination from the subfloor. When choosing wood or laminate flooring for underfloor heating, it's therefore essential to always check the product's technical data sheet and make sure it's explicitly designed for underfloor heating – an ordinary, non-certified laminate floor could restrict the system or become damaged over time.
It's also worth bearing in mind that even certified wood or laminate flooring will have higher thermal resistance compared to tile, so the system will need a somewhat higher water temperature in the pipes to achieve the same comfort, and the response to a setting change will be somewhat slower. For ordinary living rooms (living room, bedroom, children's room), however, this is a fully acceptable trade-off between appearance, the feeling of "warm wood" underfoot, and heating functionality.
Carpet coverings are the least suitable choice from the point of view of underfloor heating. Carpet, and especially its underlay, acts as a thermal insulator – exactly the opposite of what you need with underfloor heating. A thicker carpet with a foam or felt underlay can restrict heat transfer so much that even with a higher water temperature in the pipes, the surface stays noticeably cooler than you'd expect, and the system works less efficiently and less economically. If you still want carpet in a room with underfloor heating (for example as a supplementary area rug in the living room), it's recommended to choose a thinner type with the lowest possible declared thermal resistance, and to expect that heat transfer in that spot will be somewhat worse than on an open area of tile or certified wood.
| Covering type | Suitability for underfloor heating | What to watch out for |
|---|---|---|
| Tile, stone | Most suitable | Practically no restrictions, high thermal conductivity |
| Laminate, wood (certified) | Suitable with a condition | Must be certified for underfloor heating, max. surface temperature approx. 27–29 °C |
| Carpet | Not recommended | Significantly worsens heat transfer, if used choose the thinnest possible type with low thermal resistance |
Wet vs. dry system – it also affects which covering you choose
The wet system needs greater construction height, the dry system suits renovations.
The choice of floor covering is also often closely tied to the type of underfloor heating installed in the room. The wet system lays the pipe directly into a layer of concrete screed – the pipe is literally embedded in concrete. This method achieves the best heat accumulation and the most even distribution of heat across the whole floor surface, but requires greater construction height (typically 7 to 10 centimetres of screed) and a longer drying time before start-up, counted in weeks. Thanks to the massive concrete layer that accumulates heat, the wet system pairs excellently with tile and stone coverings – both combinations together create a very stable and evenly warm surface.
The dry system, by contrast, lays the pipe into system panels or between mounting rails without wet screed, with a thinner distribution layer – most often gypsum fibreboard panels. This type of system is suitable especially for renovations where the floor can't be raised by many centimetres, or where the system needs to be put into operation quickly, without weeks of waiting for concrete to dry. The dry system is often combined in practice precisely with certified laminate or wood flooring, since both solutions are typically chosen for the same reason – low construction height and faster realisation, for example when modernising a flat in a panel building.
A detailed comparison of both systems, including advantages, disadvantages and recommendations on when to choose which variant, can be found in the article Wet vs. dry underfloor heating system.
Insulation under the pipe – the foundation that affects efficiency with any covering
Regardless of which covering you ultimately choose, one thing must always be right – a quality thermal insulation layer under the underfloor heating pipe. Insulation is always laid under the pipe, most often in the form of system polystyrene panels with studs for clipping in the pipe, or smooth polystyrene with the pipe secured by clips or rails. The role of this layer is to direct heat upward, into the room, and prevent it from escaping downward – into a neighbour's ceiling in an apartment building or into the ground beneath a ground-floor slab.
Thicker and better-quality insulation reduces heat losses downward and also improves the response time of the whole system – heat isn't "wasted" in a direction you don't need, and more of it passes precisely through the covering into the room. This is especially important with coverings that have higher thermal resistance, such as certified laminate or wood flooring – quality insulation under the pipe partly compensates for the fact that the covering itself lets heat through more slowly, by ensuring that practically all the heat produced heads upward and nothing is lost downward.
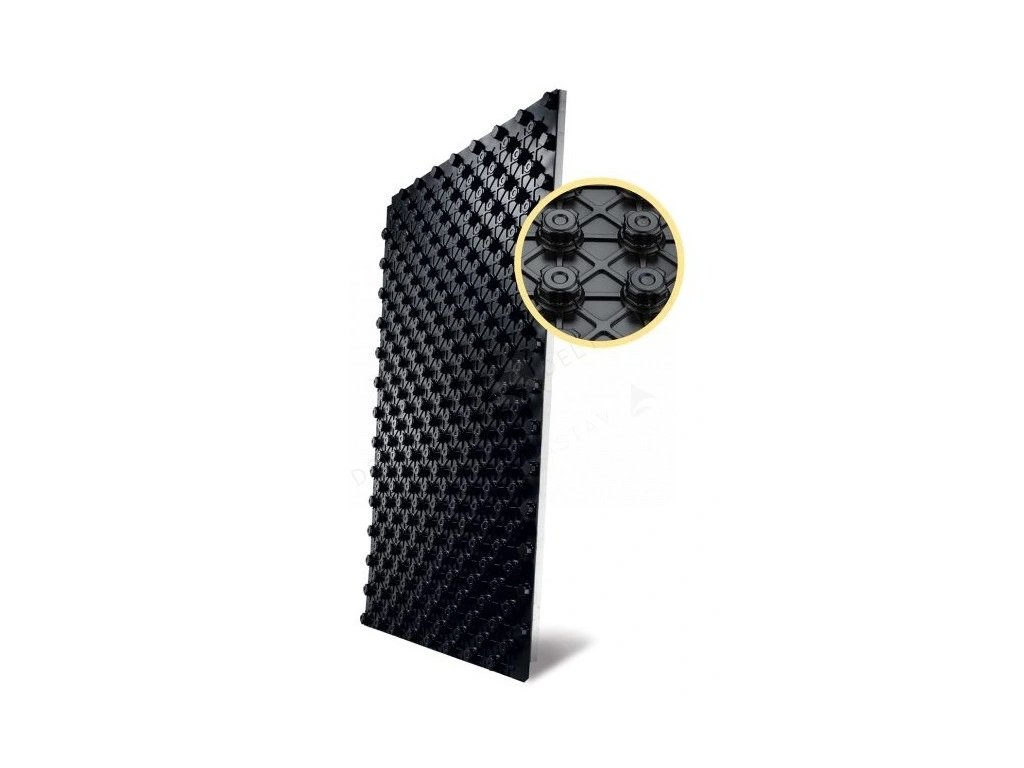
A polystyrene system insulation panel with studs for securing the pipe, designed for wet underfloor heating systems.
price: €12.26
You can read more about how to choose the right thickness and type of insulation in the article Insulation under underfloor heating – polystyrene and system panels.
Manifolds and circuit setup – why they relate to your covering choice too
A stainless steel manifold is only a few euros more expensive than a brass one, both 6-way.
The manifold is the central element that distributes water from the boiler to the individual circuits (loops) of the underfloor heating and back. Each room or zone usually has its own loop connected to the manifold. On the manifold, flow is set for each circuit according to the loop length and the area of the given room, and actuators are mounted on it, controlled by the room thermostats of the individual zones. Manifolds are usually brass or stainless steel and are placed in a manifold cabinet, which can be recessed or surface-mounted.
Why is this important from the covering's point of view too? If you have a combination of different coverings in the house – for example tile in the bathroom and hallway, certified laminate in the living room and bedroom – the manifold and correctly set flow in each circuit lets you "tailor" the water temperature to the specific covering and its thermal resistance in each room. Thanks to this, the tiled bathroom can have its circuit set somewhat differently than the living room with certified wood, while both spaces still achieve the same feeling of comfort without needlessly wasting energy.

A stainless steel manifold for 6 separate underfloor heating circuits – suitable for family houses with multiple rooms and different covering types.
price: €115.72

A brass manifold for 6 circuits, an affordable alternative to the stainless steel version with the same functionality.
price: €111.56
We cover how to correctly set the flow on each circuit and everything you can regulate on the manifold in the article Underfloor heating manifolds – how they work and how to set them up.
Pipe-laying methods – serpentine or spiral
The way the pipe is laid in the floor also affects how evenly the covering above it will heat up. Serpentine (meander) is the simplest laying method – the pipe runs in parallel rows across the whole room. It's faster to install, but creates a slight temperature gradient: near the water inlet the floor is somewhat warmer, toward the end of the loop it's slightly cooler.
Spiral, that is a double meander, runs the supply and return pipe alternately next to each other, so the temperature differences average out and the floor surface is more evenly warm across the whole area. This laying method is therefore preferred especially along perimeter walls and in rooms with higher heat losses, where evenness of surface temperature matters more.
With coverings that have higher thermal resistance, such as certified laminate or wood, unevenness caused by serpentine laying shows up somewhat more noticeably on the surface than with tile, which naturally "evens out" temperature differences in the pipe thanks to its high conductivity. That's why spiral laying is often recommended for rooms with more demanding coverings or higher heat losses (for example rooms with large glazed areas).

PE-RT pipe with an oxygen barrier, specifically designed for underfloor heating, 16 mm diameter.
price: €1.48/m
You'll find a detailed comparison of both laying methods, including recommendations for specific room types, in the article Pipe-laying methods – serpentine vs. spiral.
Underfloor heating as the main or a supplementary heat source – impact on covering choice
Another factor to consider when choosing a covering is whether the underfloor heating in the given room is meant to work as the main heat source or just as a supplementary comfort feature. Underfloor heating designed as the main heat source must cover the room's entire heat loss – this requires a thorough calculation of output and pipe density already at the project stage, since the density of the piping in the floor can't be changed afterwards. In this case, choosing a covering with good thermal conductivity (tile, stone) is especially important – with a covering with high thermal resistance, a system designed as the sole heat source might not be enough to cover the room's heat loss on freezing days.
As a supplementary heat source – for example only in a bathroom alongside a radiator – underfloor heating primarily addresses the comfort of a warm floor underfoot, while the room's main heat loss is covered by another source, usually the radiator. In this case there's somewhat more freedom in choosing the covering, since you're not relying solely on the underfloor heating's output. Combining underfloor heating with radiators in one system is common and fully functional, but requires correct hydraulic balancing, since underfloor heating operates with a lower heating water temperature than radiators.
You'll find more on when to choose underfloor heating as the sole heat source and when it's better to combine it with radiators in the article Underfloor heating as the main or a supplementary heat source.
Installation and start-up – what it means for choosing a covering
The covering is laid only after the heating test and once the screed has dried.
The choice of covering also relates to the installation and start-up procedure. With the wet system, it's essential to wait until the screed has dried sufficiently and until the so-called heating (warm-up) test is carried out – that is, a gradual, controlled increase in the system's water temperature before the final covering is laid on the floor. This procedure matters for any covering, but is especially sensitive for wood and laminate flooring – residual moisture in the screed needs to be verified, and the system needs to be "warmed up" gradually so the covering doesn't start to warp or crack at the joints after it's laid.
With the dry system the process is faster, since there's no long wait for wet screed to dry, but here too the final covering should only be laid after testing the piping's function and setting the individual circuits on the manifold. We describe the entire installation procedure step by step, including subfloor preparation, laying insulation, the pipe and the screed, in the article Underfloor heating installation – step by step. If, on the other hand, your system has already been in use for a while and you're dealing with maintenance, air venting or a fault, see the article Servicing, air venting and common underfloor heating faults.
Real examples from practice
Example 1: A family house with an open-plan living room and kitchen
In a new-build family house with a large connected living room and kitchen space of around 45 m², the investor chose a wet underfloor heating system as the main heat source for the entire ground floor. Given the size of the area and the requirement for a uniform, modern look, the choice fell on large-format tile, which, thanks to its high thermal conductivity, allowed the system to work with a lower heating water temperature and respond quickly to thermostat setting changes as sunny and overcast days alternated. Since the room has large glazed areas facing the garden, and therefore higher heat losses along that wall, the pipe was laid using the spiral method in that section, while a simpler serpentine was sufficient in the middle of the room. The manifold for the whole ground floor was placed in the utility room, and each zone (living area, kitchen island, dining corner) received its own circuit with individually set flow.
Example 2: A flat in a panel building – living room and bathroom renovation
During the renovation of a flat in a panel building, only limited construction height was available, since raising the floor by more than a couple of centimetres would have caused problems with doors and thresholds between rooms. In the bathroom, which originally had only a radiator, the investor decided to add underfloor heating as a supplementary heat source under the new tiles – here the dry system with its thinner distribution layer proved to be the ideal solution given the low construction height, while the original radiator continues to cover the room's main heat loss. In the living room, where the owner wanted to keep the feeling of a warm wood floor, certified wood flooring with a declared maximum surface temperature was used – also laid with the dry system, again because of the limited floor height. Thanks to the manifold with adjustable flow on each circuit, both spaces – the tiled bathroom and the living room with certified wood – could be operated at different water temperatures according to the needs of the given covering, while still connected to a shared heat source.
Frequently asked questions about choosing a floor covering for underfloor heating
What's the best covering for underfloor heating?
The most suitable choice is tile or natural stone – they have high thermal conductivity, heat passes through them quickly, and the system can therefore work efficiently even with a lower heating water temperature.
Can you put laminate over underfloor heating?
Yes, but it must be laminate (or wood) flooring explicitly certified for use with underfloor heating. Such products have a declared lower thermal resistance, and the manufacturer states a maximum surface temperature, usually around 27 to 29 °C, which the floor shouldn't exceed.
Why does certified wood flooring have a limited maximum temperature?
Wood is sensitive to heat and moisture. If overheated above the recommended limit long-term, it risks drying out, individual boards warping, and joints cracking. That's why manufacturers of floors certified for underfloor heating set a specific maximum surface temperature that must be observed.
Can I have carpet over underfloor heating?
Carpet is not recommended with underfloor heating, since it significantly worsens heat transfer – the underlay beneath the carpet acts as a thermal insulator. If you still want to use it, choose the thinnest possible type with a low declared thermal resistance, and expect heat transfer beneath it to be worse than on an open area.
What's the difference between a wet and dry system when choosing a covering?
The wet system embeds the pipe in concrete screed, achieves the best heat accumulation, but requires greater construction height (typically 7–10 cm) and a longer drying time. The dry system lays the pipe into system panels with a thinner distribution layer (e.g. gypsum fibreboard) and is suitable especially for renovations with limited floor height or when the system needs to be put into operation quickly. Both systems work with all the covering types mentioned; the main difference is construction height and realisation time.
Why is insulation under the pipe important if I'm mainly dealing with the covering?
Quality insulation under the pipe (most often system polystyrene panels) directs heat upward into the room and prevents it from escaping downward. The better the insulation, the more of the heat produced actually passes through the covering into the room – which partly compensates even for coverings with higher thermal resistance, such as certified laminate or wood.
Does every room need its own circuit on the manifold?
Yes, as standard, each room or zone has its own loop connected to the manifold, on which flow is set according to the loop length and the room's area. This allows the water temperature to be tailored to the specific room according to what covering it has too.
Serpentine or spiral – which pipe-laying method is better?
Serpentine (meander) is simpler and faster to install, but creates a slight temperature gradient in the room. Spiral (double meander) distributes the supply and return pipe evenly next to each other, so the floor surface is more temperature-balanced – it's preferred especially along perimeter walls and with coverings more sensitive to uneven temperature.
Can underfloor heating be the sole heat source for the whole house?
Yes, if it's designed as the main heat source already at the project stage – with a thorough calculation of output and pipe density for the given heat loss of the rooms. In that case it's also important to choose a covering with good thermal conductivity, such as tile, so the system can cover the heat loss even on the coldest days.
Related topics
- How underfloor heating works
- Wet vs. dry underfloor heating system
- Insulation under underfloor heating – polystyrene and system panels
- Underfloor heating manifolds – how they work and how to set them up
- Pipe-laying methods – serpentine vs. spiral
- Underfloor heating as the main or a supplementary heat source
- Underfloor heating installation – step by step
- Servicing, air venting and common underfloor heating faults
- Frequently asked questions about underfloor heating
Have a question about underfloor heating?
Not sure what to decide, or dealing with a specific situation in your home? Write to us – we're happy to help.