
Installing and Connecting a Home Water Pump System
Installing and Connecting a Home Water Pump System
A home water pump system looks, at first glance, like a simple device - a pump, a pressure tank, a switch, and a few metres of pipe. In practice, though, it's exactly the type of installation where most mistakes happen at the installation stage, not when choosing components. Badly routed suction pipework, a missing check valve, an undersized pressure tank, or an incorrectly set pressure switch can turn even a good-quality pump system into a source of constant problems - frequent pump cycling, fluctuating pressure in the house, noise, or a shortened motor lifespan. In this article we'll go step by step through the whole installation process, from the water source to the plumbing in the house, including specific dimensions, pressures, and the mistakes we see most often during installations and warranty claims.
This article is aimed primarily at households dealing with a water supply from a well, borehole, or utility tank - that is, where the public water mains with sufficient pressure isn't available, or where the owner wants to cut drinking-water costs by using utility water for the garden, toilet, or washing machine.
What a home water pump system consists of, and why the installation order matters
A complete home water pump system set-up always has the same basic parts, even though the specific components differ according to the water source and required output:
- Water source - a dug well, a drilled well (borehole), or a storage tank for rain/utility water.
- Suction pipework with a check valve (foot valve) - carries water from the source to the pump; not needed with submersible pumps, since the pump is directly in the water.
- Pump - self-priming (placed above the water level, suction depth usually up to 7-8 metres) or submersible (lowered directly into the well or borehole, handles much greater depths).
- Pressure tank (hydrophore) - a reservoir with an air cushion or diaphragm that maintains pressure in the system and reduces the number of pump cycles.
- Pressure switch and pressure gauge - controls the pump switching on and off according to the set pressure range.
- Distribution pipework into the house - carries water to the individual draw-off points.
The installation order isn't arbitrary - each part affects the next one. If the suction pipework is connected badly, the pump won't be able to draw water no matter how powerful it is. If the pressure tank is undersized, the switch will turn the pump on too often and shorten its lifespan. It therefore makes sense to go through the whole process in a logical sequence, exactly as you would proceed with a real installation.
Step by step: the procedure for installing a home water pump system
The following diagram shows the basic procedure that applies to most installations with a well or borehole - from the water source to the plumbing in the house:
1. Suction and drawing water from the source
The first thing that determines the whole installation concept is the type of source and the depth from which the water is drawn. Here two solutions diverge the most:
A self-priming pump placed above the water level - a typical solution for shallower wells or tanks, where the water level is up to about 7-8 metres from the pump. The pump is located in a utility room or a shaft and draws water through a suction pipe with a check valve (foot valve) at the end, which prevents the pipe from draining after the pump switches off. During installation it's critical for the suction pipe to rise from the source to the pump without "air pockets" - every dip where air can collect causes a loss of prime, and the pump then can't re-prime itself.
This category includes, for example, a petrol-engine pump, which is suitable especially as a mobile or backup solution when you need to pump water without an electrical connection - for example during a power outage, at a cottage without electricity, or for emergency draining of a flooded garden or cellar:
 |
BZP-10 petrol water pump, engine-driven, self-priming, portable, for the garden - independent of electricity, ideal as a backup or mobile pumping source, for example during a power outage or pumping from a tank over a greater distance. Price from 161.10 EUR. |
A submersible pump lowered directly into the water - a solution for deeper wells and especially for boreholes, where the water level is tens of metres down. The submersible pump is lowered on a steel cable or a discharge hose directly into the water column, which removes the issue of suction lift altogether - the pump doesn't push water up from below through suction, but pushes it outward, since it's already submerged in the water. This solution is more reliable at greater depths and less prone to losing prime:
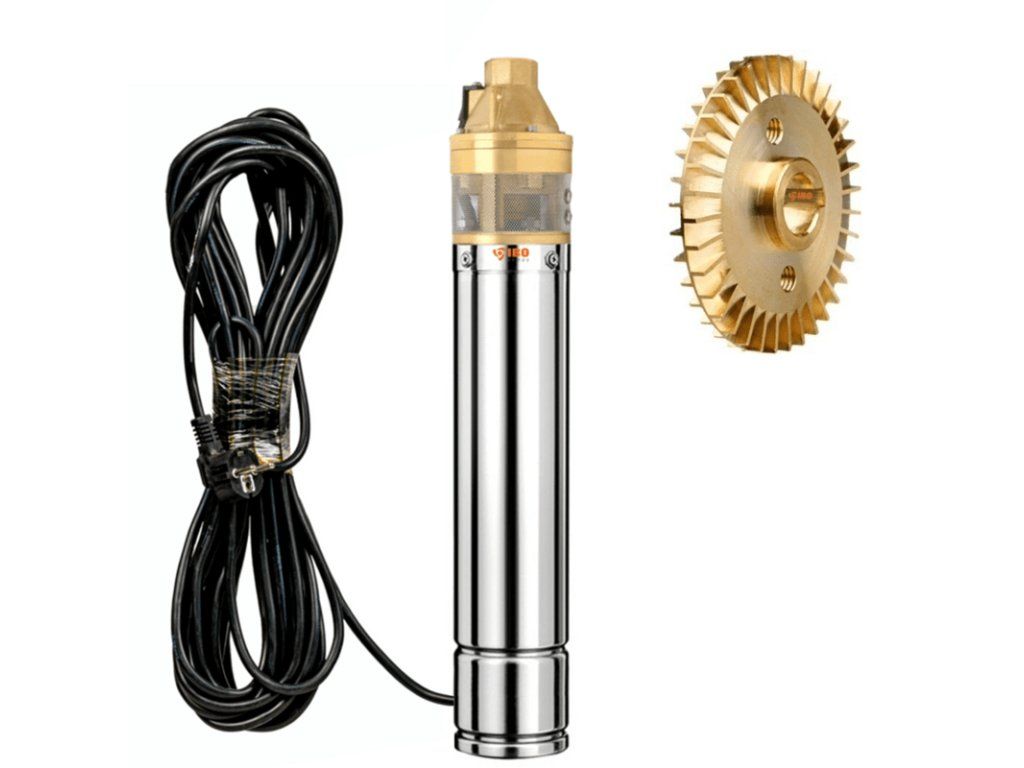 |
SKM 100 submersible pump for wells and boreholes - suitable for deeper wells as well as narrow boreholes, a reliable solution where a self-priming pump would struggle with sufficient suction performance. Price from 190.40 EUR. |
2. Suction pipework, check valve, and pipe diameter
With self-priming set-ups, the most common mistake is using suction pipework that's too thin or too long. The longer the suction run and the more elbows and transitions it has, the greater the resistance and the worse the pump's suction performance. In practice we recommend:
- choosing a suction pipe diameter at least as large as the pump's suction port - never narrowing it toward the pump,
- routing the suction pipe so it always rises slightly toward the pump, never with dips where air could collect,
- using a good-quality check valve (foot valve) at the end of the suction line - if it's worn or doesn't seat properly, water will drain back into the well after the pump switches off, and the pump will have nothing to draw on the next start-up,
- sealing all suction pipework joints thoroughly - even a small amount of air drawn in through a leaking joint can prevent priming, even when the water source itself is fine.
Based on our experience, a leaking suction pipe is the most common cause of "pump not working" complaints - in the vast majority of cases the pump itself is fine, and the problem lies in leaking or badly routed suction pipework.
The pressure tank - the heart of the pump system, and the part most often underestimated
The pressure tank (hydrophore) performs two jobs - it maintains pressure in the system even when the pump isn't running, and it reduces the number of pump cycles, which significantly extends its lifespan. Inside the tank is an air cushion (in direct contact with the water in simpler tanks, separated by a rubber diaphragm or bladder in better-quality ones), which compresses as the tank fills and acts as a reservoir of pressure energy.
The tank's size is chosen based on the household's consumption and on how often it's acceptable for the pump to switch on. A small tank means frequent pump cycling even with normal draws (for example while showering or doing laundry); a large tank, on the other hand, reduces the number of motor starts, which extends its lifespan and reduces pressure fluctuation in the supply. We offer three commonly used sizes that demonstrate this range:
The smaller horizontal AQUA OLA 24 l type tank is a typical solution for smaller cottages, garden pump systems, or supplementary supplies, where there's no room for a large tank and water draw is occasional rather than continuous:
 |
AQUA OLA 24l pressure tank, horizontal, for home water pump systems - a compact solution for smaller cottages and supplementary supplies with lower space requirements. Price from 64.30 EUR. |
The medium stainless steel tank with a volume of 90 l is a suitable compromise for a typical family home with standard consumption - it sufficiently reduces the number of pump cycles, and the stainless steel design extends lifespan especially with more aggressive well water:
 |
CH 90 L stainless steel pressure tank, vertical, for home water pump systems - a well-balanced solution for a typical family household; the stainless steel design also handles more aggressive well water. Price from 466.80 EUR. |
The large galvanised tank with a volume of 200 l suits households with higher consumption, multi-storey houses with several draw-off points at once, or situations where you want to minimise the number of pump cycles when watering the garden:
 |
HVP 200L galvanised pressure tank with sight glass, 6 bar, for home water pump systems, vertical, bladderless - suitable for higher consumption, several draw-off points at once, or irrigation; it significantly reduces the number of pump cycles. Price from 535.10 EUR. |
Setting the pressure switch - where mistakes happen most often
The pressure switch determines at what pressure the pump switches on (the so-called cut-in, switch-on pressure) and at what pressure it switches off (cut-out, switch-off pressure). A common, practically proven setting for a home water pump system is a switch-on pressure of approximately 1.5 to 2.0 bar and a switch-off pressure of approximately 3.0 to 4.0 bar. The difference between the switch-on and switch-off pressure (the so-called differential) should be sufficient, usually at least 1.0 to 1.5 bar - too small a difference causes the pump to cycle practically continuously, wearing it out quickly.
The safety valve, if the tank is fitted with one, is usually set just above the maximum operating pressure, typically around 4.5 to 5.0 bar, as a safeguard against overpressure in case the switch fails. The following diagram illustrates this relationship between the individual pressure levels:
The exact values always depend on the specific type of pump system and the manufacturer's recommendations - the ranges given above are common practice for most home installations, not a universal rule. For pump systems supplying upper floors or longer runs, a higher switch-off pressure is sometimes chosen so that sufficient pressure remains at the most distant draw-off point.
Electrical connection and safety
The pump's electrical connection should always go through a dedicated circuit breaker and, in the case of damp spaces (a well shaft, a utility room at risk of flooding), also through a residual current device (RCD). A few practical principles worth following:
- always route the cable to a submersible pump so that the joint isn't submerged in water - the connector or splice must be above the water level, ideally outside the shaft,
- use a safety cord to lower and secure submersible pumps, never hang the pump only from the power cable,
- protect both the pressure switch and the pump's terminal box from moisture - condensation in a shaft is common even outside of rainy periods,
- with a petrol-engine pump, only operate it outdoors or in a well-ventilated space because of exhaust fumes - never in an enclosed room or shaft.
Placement of the set-up and the water meter shaft
The pump system set-up itself (pump, tank, switch) is usually placed in a dry, temperature-controlled utility room, or in a separate water meter shaft if the water source is outside the house. The shaft protects the set-up from frost and mechanical damage while also allowing convenient access to the water meter, valves, and servicing.
When building or renovating a connection, a self-supporting round plastic shaft is a practical solution - it's simply placed in the excavation and doesn't require concreting like a traditional brick-built shaft:
 |
PP 1300x1000 round water meter shaft, plastic, self-supporting - fast installation without concreting, with enough space of 1300x1000 mm for the water meter, valves, and any pump. Price from 261.40 EUR. |
When placing the shaft, pay attention to laying the pipework below the frost line (in Slovakia commonly at least 1.0-1.2 m, more depending on location) and to making sure the shaft remains accessible for regular inspection and servicing - not built in, for example, under a terrace or paved area without an access hatch.
Self-priming vs. submersible pump - a quick comparison before installation
The choice between a self-priming and a submersible pump fundamentally affects the whole installation process - pipe routing differs, space requirements differ, and different electrical wiring needs to be prepared. The following overview summarises the main differences:
Trial run after installation
Once installation is complete, it's worth spending at least 30-60 minutes on a trial run before finally closing the set-up into the shaft or covering it with construction work. Recommended procedure:
- Fill the suction pipework and pump with water (self-priming pumps need an initial fill through the filling opening), and check the tightness of all joints.
- Start the pump and observe how long the first priming takes - with a correctly connected system this should be a matter of tens of seconds, not minutes.
- Open several draw-off points at the same time and watch the pressure gauge to see whether the pressure drops and rises within the expected range (for example between 1.5-4.0 bar, depending on the switch setting).
- Let the system switch on and off a few times and count how often this happens with normal draw - too-frequent cycling (more than a few times per minute at a small draw) signals an undersized tank or a poorly set switch.
- Check for noise and vibration - excessive noise can indicate air in the system or pump cavitation caused by insufficient suction performance.
The most common installation mistakes we see in practice
Over years of sales and consulting, a few mistakes keep recurring that cause most complaints and problems with home water pump systems:
- Leaking suction pipework - the most common cause of a pump "not drawing water" even though it's technically fine.
- Undersized pressure tank - the pump cycles several times a minute even with normal draw, which drastically shortens its lifespan.
- Missing or worn check valve - water drains back into the source after the pump switches off, and the pump has nothing to draw on the next start.
- Badly routed suction pipework with dips - creates air pockets that prevent smooth priming.
- Underestimated electrical wiring - a missing residual current device in the damp environment of a shaft or utility room.
- Incorrectly set pressure switch - too small a difference between the switch-on and switch-off pressure causes continuous cycling.
- Shaft or utility room without frost protection - in winter, water in the pipework or tank freezes and the set-up cracks.
When to leave the installation to a professional
Simpler set-ups (for example replacing an existing pressure tank or connecting a mobile petrol pump) can be handled by a capable DIY-er, if the principles above are followed. For new installations from a well or borehole, especially with a submersible pump lowered to a greater depth, or for electrical connections near water, we recommend calling in a professional - a mistake in electrical wiring in a damp environment is a safety risk, not just a matter of comfort. It's also true that groundworks, laying pipework below the frost line, and installing a water meter shaft are usually done once every decade or so, so it's worth investing in a good-quality job the first time round.
Frequently asked questions
How deep can a well be for a self-priming pump?
Standard self-priming pumps handle suction depths of up to roughly 7-8 metres from the water level to the pump. For greater depths, you need to switch to a submersible pump, which works directly in the water and isn't limited by suction lift.
Why does the pump switch on and off too often during operation?
The most common cause is an undersized pressure tank relative to the household's consumption, or too small a difference between the switch-on and switch-off pressure on the switch. The solution is a larger tank (for example 90 l or 200 l instead of 24 l), or adjusting the switch's differential setting.
Does the suction pipework have to rise the whole way?
Yes, ideally so. Any dip where air could collect makes priming harder or impossible. The pipe should rise smoothly from the source to the pump, without unnecessary bends and drops.
Is a residual current device needed for the pump system's electrical connection?
In a damp environment (a well shaft, a utility room at risk of flooding), a residual current device (RCD) on the pump system's dedicated protective circuit is a safety standard that shouldn't be skipped.
Can a petrol pump be used as a permanent solution for a house?
Not really - a petrol-engine pump is suitable as a mobile or backup solution (for example during a power outage), not as a permanent part of a home water pump system with automatic pressure-based switching, since it requires manual start-up and operation.
What pressure should a completed pump system have in the house's supply?
Commonly a switch-on pressure of around 1.5-2.0 bar and a switch-off pressure of around 3.0-4.0 bar are chosen, which in practice provides comfortable pressure at most draw-off points in a family home. The exact values are adjusted for the building's height and the length of the pipe runs.
Related topics
- How to Choose a Home Water Pump System
- What Pump Power and Pressure Do I Need
- Pressure Tanks for Home Water Pump Systems
- Most Common Home Water Pump System Faults
- Shafts and Tanks for Wells - How to Choose
You'll find the complete range of pumps, pressure tanks, and accessories in the main category Home Water Pump Systems and Filtration.
Do you have a question on this topic?
Not sure, or dealing with a specific situation in your household when installing a home water pump system? Write to us - we're happy to advise.