
Bathroom Fixtures and Tap Maintenance
Bathroom fixtures and tap maintenance
A bathroom tap, sink, trap or shower enclosure are among those parts of the household that we use several times a day and at the same time pay the least attention to - until they start dripping, squeaking or smelling. Yet most of the faults we encounter in our advisory service and in service claims do not originate from a manufacturing defect, but from missing or incorrect maintenance. Limescale in the aerator, a worn ceramic cartridge, a clogged trap or a burst supply hose - these are all things that can be prevented with minimal time and cost. This article is a practical guide to regular care of bathroom fixtures and taps, based on real experience with products we commonly sell and service.
This is not a theoretical manual - we deliberately stick to specific intervals, specific numbers and specific procedures that you can tick straight off on your calendar. At the end you will also find a maintenance schedule, frequently asked questions and links to related topics that will help you sort out neighbouring areas too - choosing a tap, installation, or troubleshooting.
Why it pays to pay attention to maintenance
A bathroom tap has a lifespan of 10 to 15 years under normal use, a granite or stainless steel sink can easily last 20 years or more, and a trap or supply hose are components that should work for a decade without major intervention. The reality, however, is different - in practice we see cartridges replaced after two years, aerators so clogged with limescale that they practically stop working, and hoses bursting after three to four years instead of the planned eight to ten. The cause is almost always a combination of hard water, high mains pressure and zero ongoing care.
The economics here are simple. Cleaning an aerator takes less than ten minutes and costs nothing, or at most the price of a new mesh for a few euros. Replacing the cartridge in a tap costs tens of euros and an hour of work. A burst-hose flood in your own bathroom or your neighbour's below you can mean damage worth hundreds or thousands of euros, plus stress, an insurance claim and weeks of waiting for repairs. That is exactly why it pays to make fixture maintenance just as much a matter of routine as cleaning kitchen drains or checking the seals in a washing machine.
Limescale - the bathroom's most common enemy
Water hardness is given in mmol/l (or in German or French degrees) and varies significantly by region in Slovakia - from relatively soft water in some mountain areas to very hard water typical, for example, of parts of southern and central Slovakia, where groundwater is saturated with calcium-rich rock. As a rough guide, the following classification applies:
- Soft water - up to 1.3 mmol/l - limescale forms only minimally
- Medium-hard water - 1.3 to 2.5 mmol/l - a common situation in most towns
- Hard water - 2.5 to 3.8 mmol/l - deposits visible within a few weeks
- Very hard water - above 3.8 mmol/l - limescale forms practically continuously
You can find out the exact value for your household either from your local water utility (usually published on their website or in the annual water quality report), or with a cheap water hardness tester from a hardware store. This value then determines how often it makes sense to clean the individual fixtures - the recommended intervals are given below in the text, and are also shown in the accompanying chart.
For soft water, cleaning the aerators and mesh once every three months is sufficient, for medium-hard water once a month, for hard water once every two weeks, and for very hard water it is realistic to expect a weekly interval if you want to maintain full flow and quiet operation of the tap.
How limescale actually damages a tap
Calcium carbonate deposits do not stop at the visible surface of the tap. The real problem occurs inside - in the aerator (the mesh at the end of the spout), in the cartridge that regulates flow and temperature, and in the seals. Limescale crystals act as an abrasive material - with every turn of the lever they rub against the rubber and silicone seals, which then wear out faster and lose their tightness. The result is a dripping tap that, even from an ordinary faucet, can "drip away" several cubic metres of extra water a year - simply because the seal has stopped seating properly due to accumulated deposits.
Cleaning the aerator - step-by-step procedure
The aerator (also called the mesh or the strainer) is the most frequently serviced part of the whole tap, and also the only one that really anyone can clean without tools. Recommended procedure:
- Carefully unscrew the aerator by hand or with small pliers from the end of the spout (some models require a special key supplied with the tap).
- Take the mesh apart into its individual layers and note the order in which they were assembled.
- Soak the parts for 30 minutes in a 1:1 solution of water and vinegar (up to 60 minutes for heavy buildup, or use citric acid).
- Use a soft brush (an old toothbrush is enough) to clean out any remaining deposits from the mesh holes.
- Rinse the parts under running water and reassemble them in the original order; screw the aerator back on hand-tight only (not with pliers, to avoid damaging the thread).
Cartridge, lever and tap seals
Most modern lever taps work with a ceramic cartridge - a pair of ground ceramic discs that rotate against each other and regulate both flow and temperature. Ceramic is resistant to wear, but not to mechanical debris. If, after years of use, a tap starts to squeak, becomes harder to operate, or no longer holds the exact set temperature at the middle position of the lever, it is almost always a sign of a worn or clogged cartridge.
The lifespan of a quality cartridge under normal household use is between 5 and 7 years, and closer to 3 to 5 years under more intensive use (a larger household, commercial use). The cartridge is a part that can be replaced on its own without replacing the whole tap - with most manufacturers it costs from a few euros to a few dozen euros depending on the model, and the work takes an experienced person 15 to 30 minutes. Before replacing it, always shut off the water supply using the ball valve under the sink or the main shut-off valve of the flat/house.
Why you should not tighten the lever with excessive force
A common mistake we see especially among the older generation of users accustomed to tap-and-spindle fittings - a lever tap can be closed "all the way" much more gently than a classic tap valve. A cartridge is a mechanism, not a valve with a seal that needs to be forced shut. Excessive force when closing the lever is one of the most common causes of premature cartridge wear, even when the water is otherwise clean and soft.
Water pressure - the silent killer of fixtures
High inlet water pressure is a factor that is often overlooked in an ordinary household, yet it has a direct impact on the lifespan of taps, hoses and appliances. The optimal operating pressure for an ordinary bathroom tap is in the range of 1 to 6 bar - this is also the range for which standard pressure reducing valves and most household fittings are rated. In multi-storey buildings, or when connected to the public water supply in lower-lying locations, however, the inlet pressure can commonly run to around 7 to 10 bar, which significantly shortens the lifespan of seals, cartridges and hoses over time.
The solution is to install a pressure reducing valve on the main supply, which lowers the inlet pressure to a safe and stable value regardless of fluctuations in the water mains. This is exactly the purpose of, for example, a pressure reducing valve 1/2", PN 25 bar, with a working range of 1-6 bar and a built-in pressure gauge 0-10 bar, which allows you to visually check the current pressure downstream of the valve at any time.
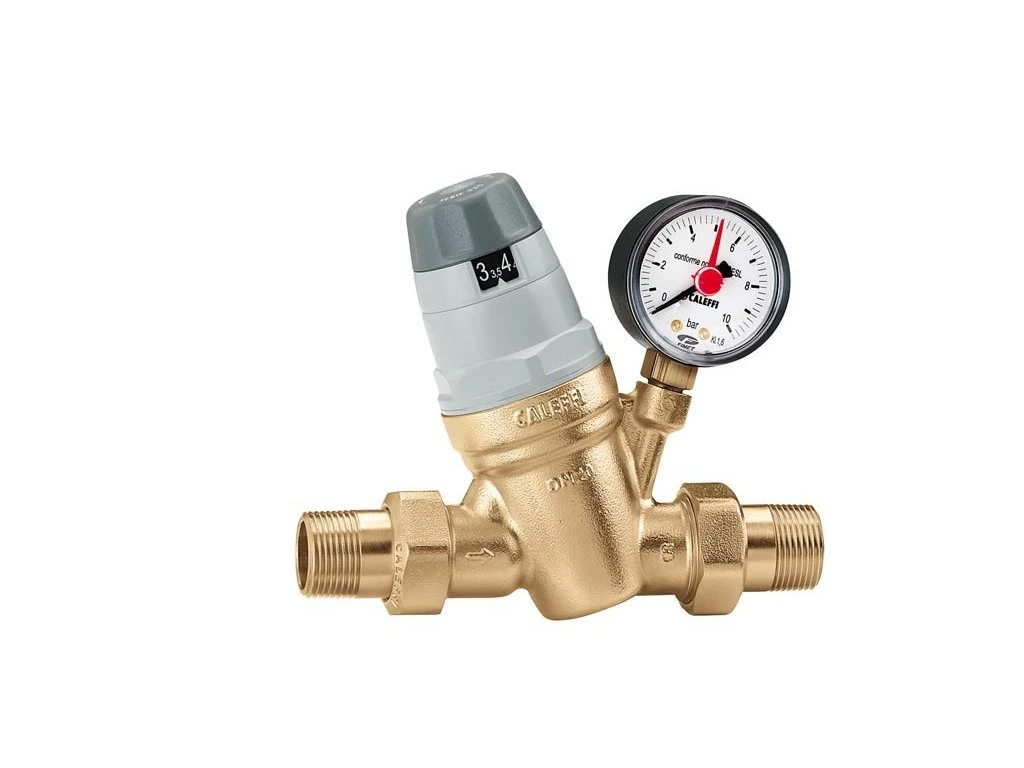 |
Pressure reducing valve 1/2", PN 25bar, working range 1-6 bar, T max. +40 °C, pressure gauge 0-10 bar - if the inlet pressure in your household exceeds the recommended 6 bar, this valve will stabilise it and thereby protect all the taps, hoses and appliances in your home. A built-in pressure gauge shows the exact value without the need for a separate meter. Price from 90.73 EUR. |
Traps and drain systems
A trap is a component that most households do not notice until an odour appears from the drain or water starts draining slowly. The principle of a trap is simple - a water seal in the bent section of the pipe prevents sewer gases from entering the room. If a trap is not used for a long time (for example a bathtub in a flat where no one has lived for a while), the water in the seal eventually evaporates and the odour returns - so it is enough to run water for a few seconds every so often, even in an unused room.
Routine trap maintenance consists of two steps - mechanically cleaning the grille/outlet of hair and debris (recommended once a month under normal use), and a more thorough cleaning of the whole trap including disassembly once every six months. For bath traps with an automatic fill and overflow function, such as the commonly used chrome automatic bath trap with fill overflow, it is also a good idea to check the outlet mechanism (lever or rotary control) during the six-monthly maintenance, as it can start to stick when clogged with limescale.
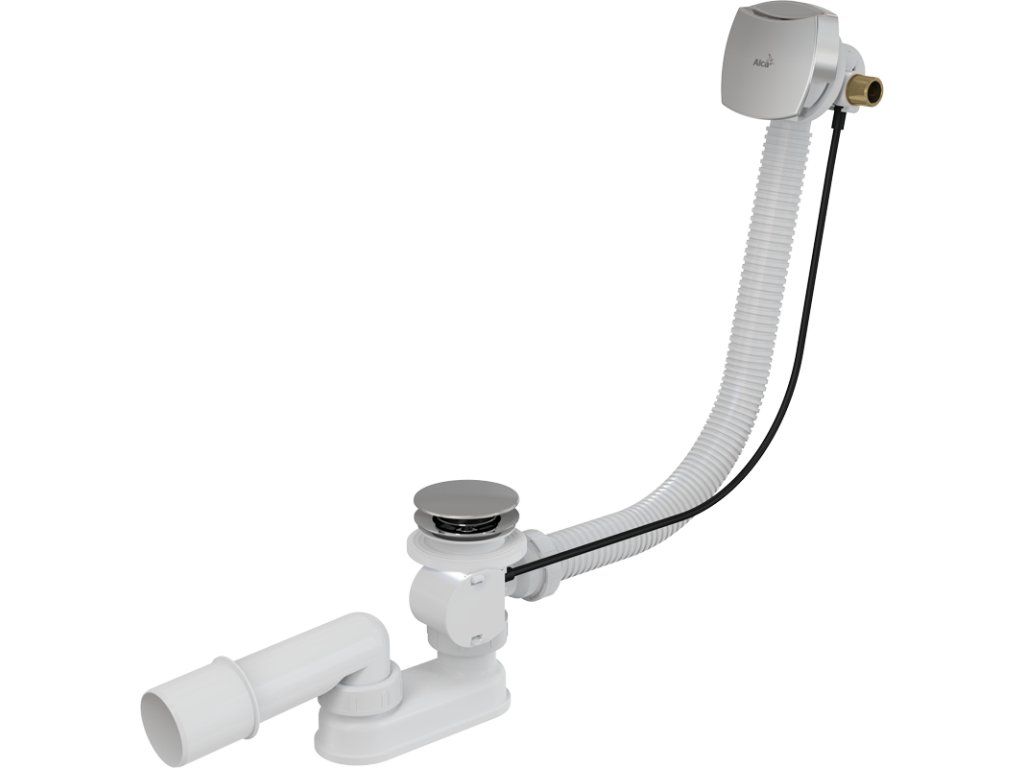 |
Bath trap, automatic, with filling overflow, chrome - a quality trap with an automatic mechanism is a trouble-free solution for many years with regular maintenance (cleaning the grille, checking the seals once every six months); the chrome finish also stands up well to everyday cleaning products. Price from 102.08 EUR. |
What should not go into a trap or drain
Fats, oils, large amounts of hair, wet wipes (even ones labelled "flushable") and cosmetic residues containing wax are the most common cause of clogging in traps and deeper drain pipes. If hair is regularly cut or shaved over the sink in a household, it is worth checking the trap grille more often than once a month - realistically at least once every two weeks.
Granite, stainless steel and ceramic sinks - maintenance specifics
The material of a sink or washbasin determines which cleaning method is suitable and which, on the contrary, causes damage. Granite sinks (a mix of quartz and acrylic resin) are resistant to scratching and high temperatures, but sensitive to abrasive sponges and aggressive degreasing agents with a high chlorine content, which dull the surface over time. The recommended approach is a soft cloth, washing-up liquid, and polishing once every two to three weeks with a special granite care product, which restores the original shine and seals the surface's micro-pores.
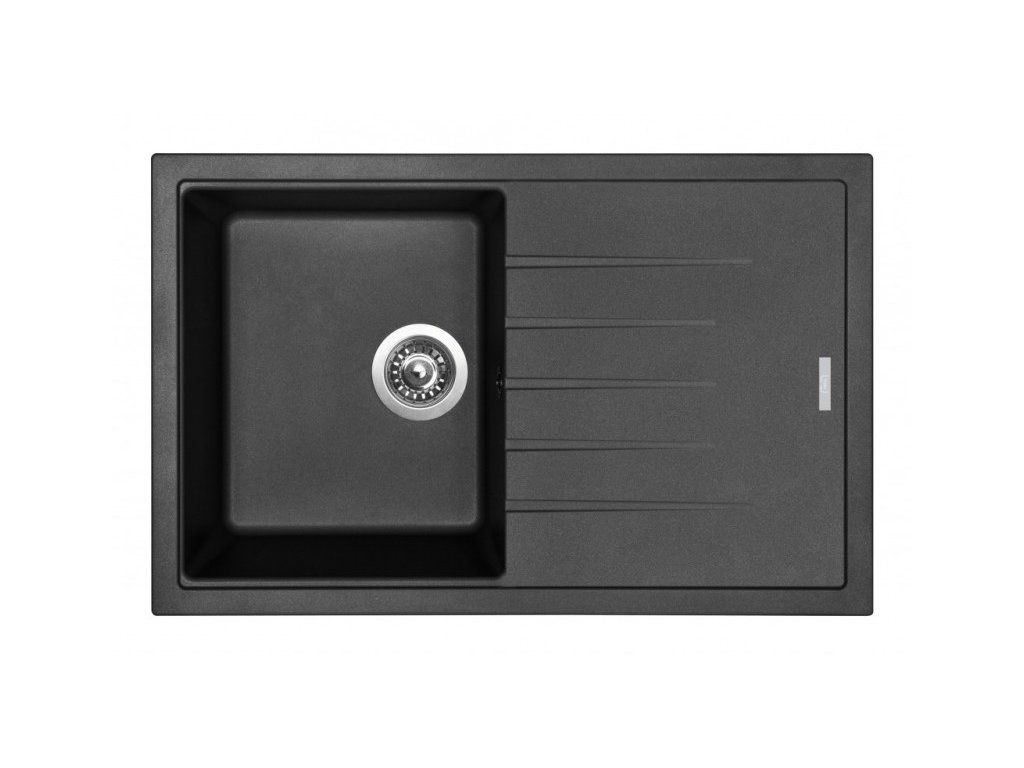 |
Granite sink Sinks BEST 780 Metalblack - a typical example of a granite sink where it is worth sticking to gentle cleaning without abrasive sponges, which keeps its matte, scratch-resistant surface for decades. Price from 170.98 EUR. |
Stainless steel sinks and basins, on the other hand, need protection from limescale deposits, which create visible white spots on the polished surface - wiping the surface dry with a cloth after each use is enough to prevent most spots entirely. Ceramic washbasins are the least demanding to maintain among the common materials, but they suffer the most from mechanical damage if heavier objects are dropped on them, so it is best not to use metal containers for storing cosmetics in a ceramic basin.
Taps with clever geometry - how pillar models are cleaned
Pillar-mounted sink and basin taps with a longer spout (typically kitchen or dual-handle models) usually have, in addition to the aerator, a pull-out spray or a flexible spout with its own seal in the docking point. This particular seal is the most stressed part during regular pulling-out, and it is worth visually inspecting it once a year for signs of wear or rubber cracking.
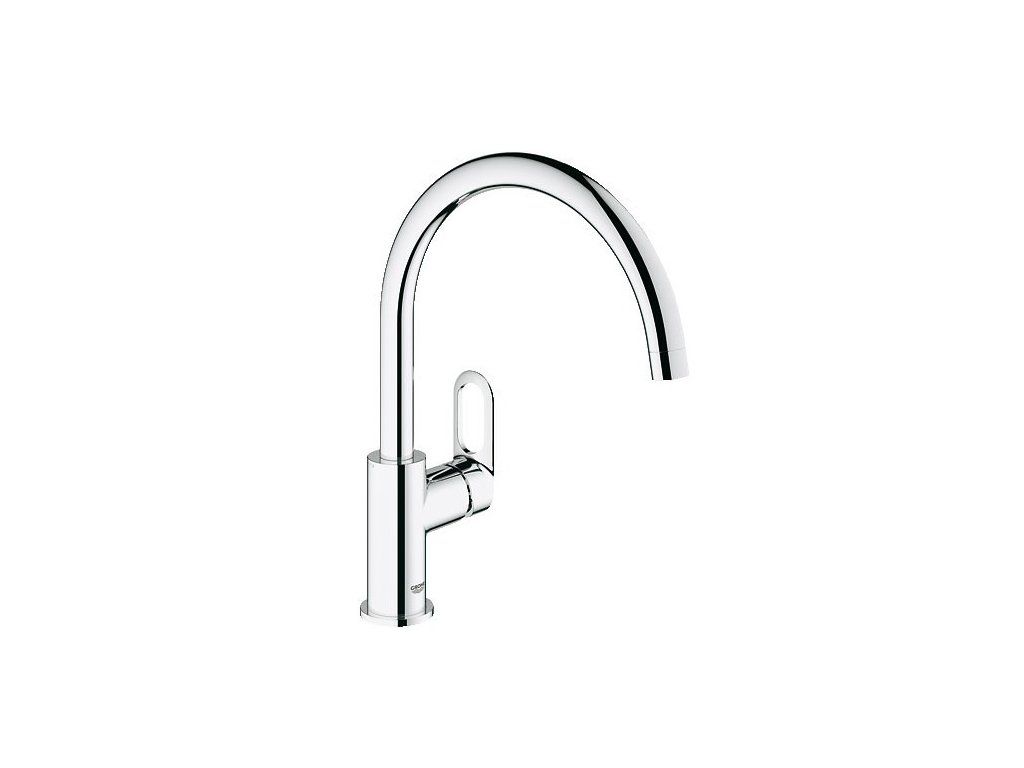 |
946487 pillar-mounted sink tap, LOOP - a modern pillar tap with a pull-out spout, on which it is worth checking the seal in the docking point once a year and regularly cleaning the aerator (monthly, depending on water hardness) using the same procedure as for a classic lever tap. Price from 114.75 EUR. |
Supply hoses - the most underestimated part of the installation
Supply hoses between the shut-off valve and the tap (or washing machine, dishwasher) are the component that causes the most flooding incidents, precisely because they are practically forgotten - as long as they work, nobody checks them. Braided rubber hoses have a lifespan of approximately 5 years, and quality extendable stainless steel hoses with stainless steel fittings last 8 to 10 years at correct pressure, but even these need a visual inspection once a year - look for cracks in the braid, corrosion on the fittings, bulging, or traces of moisture seeping around the joint.
 |
Stainless steel extendable hose PROFI S for drinking water with stainless steel fittings - a suitable replacement for an older braided rubber hose during preventive replacement after five years; the stainless steel fittings significantly reduce the risk of corrosion at the joint. Price from 11.07 EUR. |
The practical rule is this: if you cannot remember when you last replaced the hose, it is high time to check it. A preventive replacement for a few euros is always cheaper than repairing a flooded bathroom or your downstairs neighbour's flat.
Maintenance schedule at a glance
Let's summarise the recommended intervals we arrived at in the individual sections above - the aerator according to water hardness (shortest interval 1 month for ordinary medium-hard water), a thorough trap clean once every 6 months, a visual inspection of supply hoses once every 12 months, and cartridge replacement approximately after 84 months (7 years) of use.
A practical example from an ordinary household
A three-room flat in an apartment block, two adults and two children, inlet water pressure measured at the main shut-off valve around 7.5 bar, water hardness according to the local water utility 3.1 mmol/l (hard water category). Without any pressure adjustment and without regular aerator cleaning, this kind of household commonly follows this pattern: after 8 to 10 months, noticeably weaker flow due to a clogged aerator; after 2 to 3 years, a dripping lever tap at the sink (worn cartridge seal due to abrasive deposits); after 4 years, a burst rubber supply hose to the washing machine.
After installing a pressure reducing valve (stabilised to 3 bar) and introducing two-weekly aerator cleaning (matching the hard water category), the cartridge lifespan in the identical household was genuinely extended by several years, and supply hoses were replaced preventively after five years instead of being reactively replaced after a flood. This difference - preventive maintenance versus dealing with the consequences - is the core of this entire article.
Most common maintenance mistakes
- Using steel wool or an abrasive sponge on chrome-plated or granite surfaces - causes micro-scratches, in which dirt and limescale then settle even faster.
- Putting off aerator cleaning "for later" - a clogged aerator causes turbulent water flow, which in turn wears out the cartridge faster than if the aerator were clean.
- Ignoring high inlet pressure - without measuring the pressure, the problem is usually only discovered once a hose or seal has already burst.
- Chemical limescale removers with a high acid concentration left on the surface longer than the manufacturer recommends - damage the chrome-plated surface of the tap as well as the glaze on sanitary ceramics.
- Over-tightening the lever when closing a lever tap instead of gently closing it.
- Forgetting about unused traps - a dried-out water seal in a flat where no one has lived for a while causes sewer odour to seep through.
When to call a professional and when you can manage on your own
Cleaning the aerator, wiping surfaces, checking seals and hoses, or even cleaning a trap, is routine home maintenance that can be handled without professional help - basic tools and following the procedure above are enough. On the other hand, we recommend leaving cartridge replacement if you are unsure, any intervention in the internal water supply system (not just the visible fitting), installing a new pressure reducing valve on the main supply, or dealing with a recurring leak whose cause you cannot locate, to a plumber. The cost of a routine call-out is generally lower than the damage caused by an unqualified intervention in a functioning system.
Frequently asked questions
How often should I clean the aerator in a tap?
It depends on the water hardness in your area. For soft water, an interval of three months is sufficient; for ordinary medium-hard water we recommend once a month; for hard water once every two weeks; and for very hard water even once a week. Your local water utility will tell you the water hardness on request.
The tap still drips even after replacing the seal - what could be the cause?
If dripping continues even after replacing the rubber seal, the problem is most often a worn or clogged ceramic cartridge. The seal and the cartridge are two different parts, and replacing one does not fix wear on the other - if dripping persists, it is best to replace the cartridge as a whole.
Is it appropriate to use household products like vinegar or citric acid to remove limescale?
Yes, for aerators, small parts and chrome-resistant surfaces, diluted vinegar or citric acid is a gentle and effective method. For granite sinks and matte surfaces, however, it is worth using a specialised product instead, since acid can permanently change the appearance of the surface over time.
How do I know it's time to replace a supply hose?
During the annual visual inspection, look for cracks or fraying in the braid, corrosion or greenish spots on the fittings, any bulging of the hose under flow, or traces of moisture/mould around the joint. For braided rubber hoses, we recommend preventive replacement after five years regardless of whether visible damage is present.
Why does the bathroom drain occasionally smell even though the trap was recently cleaned?
The most common cause is not dirt, but a dried-out water seal - if the drain in question has not been used for a long time (for example a bathtub or basin in a secondary bathroom), the water in the bent section of the trap evaporates and sewer gases seep into the room. Simply run the water for ten to fifteen seconds and the smell usually disappears.
Do I need a pressure reducing valve if my taps are working fine so far?
If the inlet pressure in your household is higher than the recommended 6 bar, the damage occurs gradually and may not be immediately visible - it means a shortened lifespan of seals and cartridges, which will show up a few years earlier than expected. We recommend simply measuring the pressure with a pressure gauge (for example the one built into the pressure reducing valve) and deciding based on the result.
Related topics
How to choose bathroom taps
Installing a bathroom tap - a guide
Most common tap problems and how to solve them
Stainless Steel Hoses - How to Choose and When to Replace Them
Back to the main category: Bathroom, sanitary fixtures, taps
Have a question about this topic?
Not sure what to decide, or dealing with a specific situation in your home? Write to us - we're happy to help.