
How to Install a Bathroom Faucet - Guide
How to Install a Bathroom Faucet - Complete Step-by-Step Guide
Replacing or installing a new bathroom faucet is one of the most common home improvements that even an ordinary apartment owner without plumbing training takes on. With a bit of patience, the right tools and following a few basic rules, it's a job manageable in one afternoon - without needlessly calling a tradesman and without the risk of water leaking from under the sink the next day. In this article we'll go through the whole process from preparation, through the installation itself, to checking for leaks, we'll show the differences between deck-mounted and wall-mounted faucets, and point out the mistakes we see most often in warranty claims.
This article is written practically, based on real experience from service work and questions we get from our e-shop's customers. It's not marketing copy - the goal is that after reading it you'll be able to install a faucet yourself, or at least know exactly whether you're up to it or whether it's more sensible to call a professional.
When You Can Handle the Installation Yourself and When Not
A regular replacement of a bathroom faucet with the same type (deck-mounted for deck-mounted, wall-mounted for wall-mounted, with the same connection spacing) is usually a simple matter. The water connections are already in place, you just need to disconnect the old faucet and screw on the new one. More complicated situations, where we recommend calling in a professional, are:
- changing the faucet type (for example from wall-mounted to deck-mounted or vice versa) - requires intervening in the piping in the wall or under the sink,
- changing the connection spacing on a wall-mounted faucet (e.g. from 15 cm to 18 cm),
- old, corroded or seized shut-off valves that can't be safely unscrewed,
- suspicion of a leak inside the wall, which doesn't show up immediately but only after several hours,
- installation into a drywall partition with an in-wall system (pre-wall installation) - here you also need to consider reinforcing the structure.
If it's a standard replacement without intervening in the supply lines, go through the following procedure - it explains exactly what, in what order, and why.
Preparation - Tools and Materials
Before you unscrew anything, prepare everything you need. Nothing is worse than standing there with a half-disassembled faucet and realizing you're missing the right wrench, while the water in the apartment is shut off and the family is waiting for a shower.
Tools You'll Need
- an adjustable wrench, ideally two of different sizes,
- plumber's pliers or a flat wrench for union nuts,
- PTFE tape or hemp fiber with sealing paste for the threads,
- sanitary silicone sealant (for sealing to the sink or tub),
- a work light or flashlight - it's usually dark and cramped when installing under a sink,
- a cloth and a container for the leftover water in the pipe,
- a Phillips and flat screwdriver,
- in some cases a spirit level (for larger two-handle faucets on the edge of a tub).
Material Worth Having Ready in Advance
Besides the faucet itself, you'll probably also need new connection hoses - old rubber hoses harden and crack after a few years, and it's sensible to replace them along with the faucet even if they look fine on the outside. We recommend stainless steel braided hoses, which have a significantly longer lifespan than classic rubber ones:
 |
Stainless steel expandable hose PROFI S for drinking water with stainless steel fittings - an expandable length of 50-100 cm suits practically any installation under a sink or tub, the steel braid lasts substantially longer than a rubber hose, and the expandable mechanism makes precise length adjustment easier without unnecessary bending. Price from 11.07 EUR. |
For most installations, a pair of such hoses is enough - one for cold and one for hot water. With single-lever mixer faucets, hoses are sometimes included with the package directly from the manufacturer, but it's still worth having a spare pair on hand in case one gets damaged during handling.
Step-by-Step Installation Procedure
We divide the procedure itself into six steps. It's important to follow this exact order, because skipping or swapping steps (for example tightening the faucet before checking the seals) is the most common cause of additional problems.
Step 1 - Shutting Off the Water and Disconnecting the Hoses
First shut off the main water supply to the apartment, or at least the local shut-off valves under the sink/tub, if available. Open the faucet to release residual pressure from the pipe, and only then start unscrewing the union nuts of the hoses from the shut-off valves. Keep a cloth or a small container handy - there's always a bit of water left in the hoses, which will spill out once you unscrew them.
Step 2 - Removing the Old Faucet
The faucet is usually held by one central nut from below (deck-mounted) or two nuts on the connections (wall-mounted). Unscrew the nut with an adjustable wrench, carefully pull the faucet upward (deck-mounted) or away from the wall (wall-mounted). Check the condition of the original seal under the base - if it's hardened or cracked, that's one common reason the old faucet was dripping at the base.
Step 3 - Checking and Cleaning the Connections
This is the step that's most often skipped, yet it's exactly what determines whether the new faucet will seal long-term. Check:
- the condition of the threads on the shut-off valves - no bent or stripped threads,
- the presence of dirt, limescale or old seal residue in the connections,
- that the shut-off valves themselves function properly (they can be opened and closed without resistance),
- pressure in the system - if you don't know the pressure in your apartment and the faucet is sensitive to higher pressure, consider installing a reducing valve (more in a separate section below).
Step 4 - Sealing the Threads and Connecting the Hoses
Apply PTFE tape to the metal threads (a few wraps around in the direction of screwing) or hemp fiber with sealing paste. Connect the hoses first loosely by hand, only then tighten with a wrench - never force-thread against resistance, you could strip the thread. With stainless steel braided hoses with a rubber seal in the fitting, PTFE tape usually isn't needed, a nut firmly tightened by hand plus a quarter turn with a wrench is enough.
Step 5 - Fitting and Securing the New Faucet
Fit the faucet into the opening, place the seal underneath (if not already pre-installed), pull the hoses through the mounting nut from below and tighten. With a deck-mounted faucet, be careful that it doesn't twist into a crooked position while tightening - it's advisable to hold it with your other hand. With a wall-mounted faucet, check with a spirit level that the lever/handle is in a horizontal position.
Step 6 - Leak Test and Flow Adjustment
Slowly open the shut-off valves and watch all the joints - the connections under the faucet as well as the faucet itself at the base. Let the water run for at least 2-3 minutes at full flow and while mixing hot and cold water, because some leaks only show up under higher pressure or with a change in temperature (thermal expansion of the material). Only after this check should you consider the installation complete.
Deck-Mounted vs. Wall-Mounted Faucet - Differences in Installation
The faucet type fundamentally affects both the difficulty and the time of installation. A deck-mounted faucet is installed into a single opening in the sink or tub and is held by one central nut - this is a faster and simpler installation, normally manageable in 30-45 minutes including connecting the hoses. A wall-mounted faucet is screwed directly onto two connections protruding from the wall, which requires precisely matching the spacing (most often 150 mm) and more work with alignment - allow 60-90 minutes, especially if it's your first time installing this type.
With a wall-mounted faucet, you also need to know the exact distance between the connections in advance, since faucets are made with a fixed outlet spacing (most often 150 mm, less often 100 or 180 mm). When buying a new faucet, therefore always measure the existing spacing - replacing with a different spacing means intervening in bricked-up or plastered piping, which is no longer an ordinary DIY job.
Why Address Water Pressure Before Installation
Most bathroom faucets are designed for an operating pressure of approximately 1 to 6 bar - this is the standard range for which the seals, ceramic cartridges and anti-drip safeguards are designed. The problem arises in apartment buildings and family houses with their own well or pressure station, where network pressure can briefly spike above 8-10 bar - typically at night, when water usage in the house is low. High pressure is one of the most common causes of premature cartridge wear, hose bursting or a faucet dripping shortly after installation, even when it was installed completely correctly.
The solution is a pressure reducing valve fitted on the main water supply to the apartment or house, which keeps pressure within a safe range regardless of fluctuations in the network:
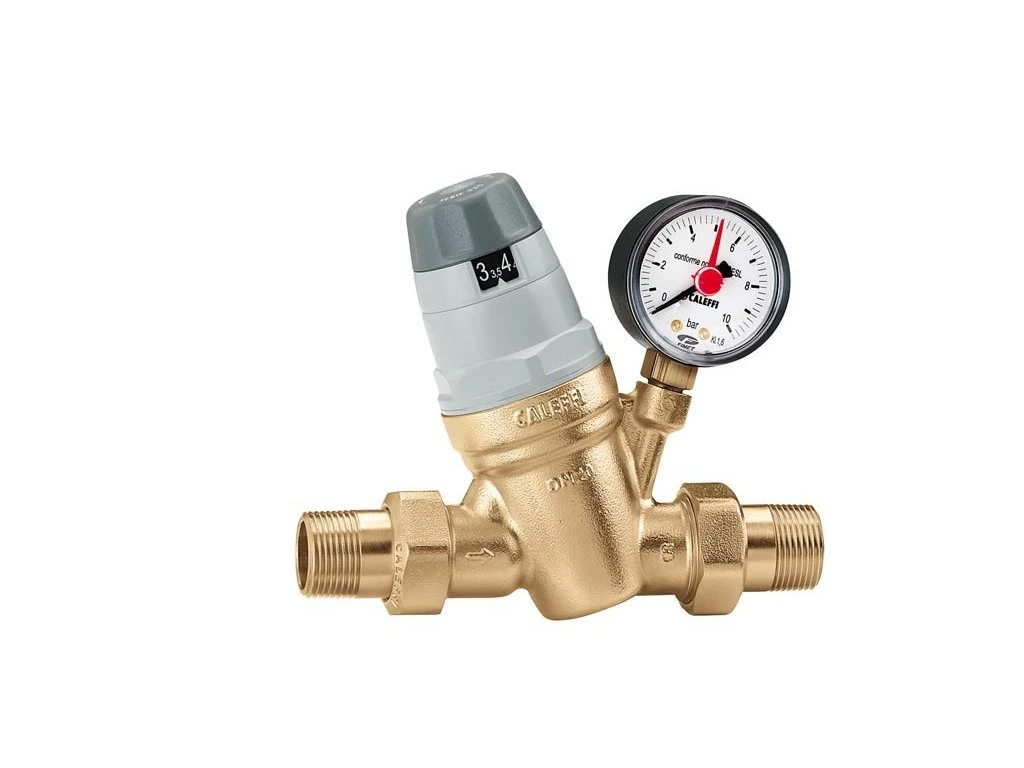 |
Pressure reducing valve 1/2", PN 25bar, working range 1-6 bar, T max.+40 °C, pressure gauge 0-10 bar - keeps the pressure in the system exactly within the band for which most bathroom faucets are designed, and the built-in 0-10 bar pressure gauge shows you the current outlet pressure at any time without needing a separate meter. Suitable before a new installation as well as an additional solution if a faucet started dripping after replacement for no apparent reason. Price from 90.73 EUR. |
The pressure gauge on the valve is a practical aid during the faucet installation itself too - before connecting the new faucet, it's worth checking what value the pressure is at that moment, to rule out a pressure spike as the cause of a possible problem.
Installation with a Bathtub - Trap and Drainage System
When completely replacing a bathtub faucet, it's worth checking the condition of the bathtub trap and the overflow filling system at the same time. Automatic bathtub traps handle both drainage and overflow with one control mechanism, and replacing them together with the faucet has the advantage that you take apart and inspect the whole underside of the tub at once, instead of two separate interventions at different times:
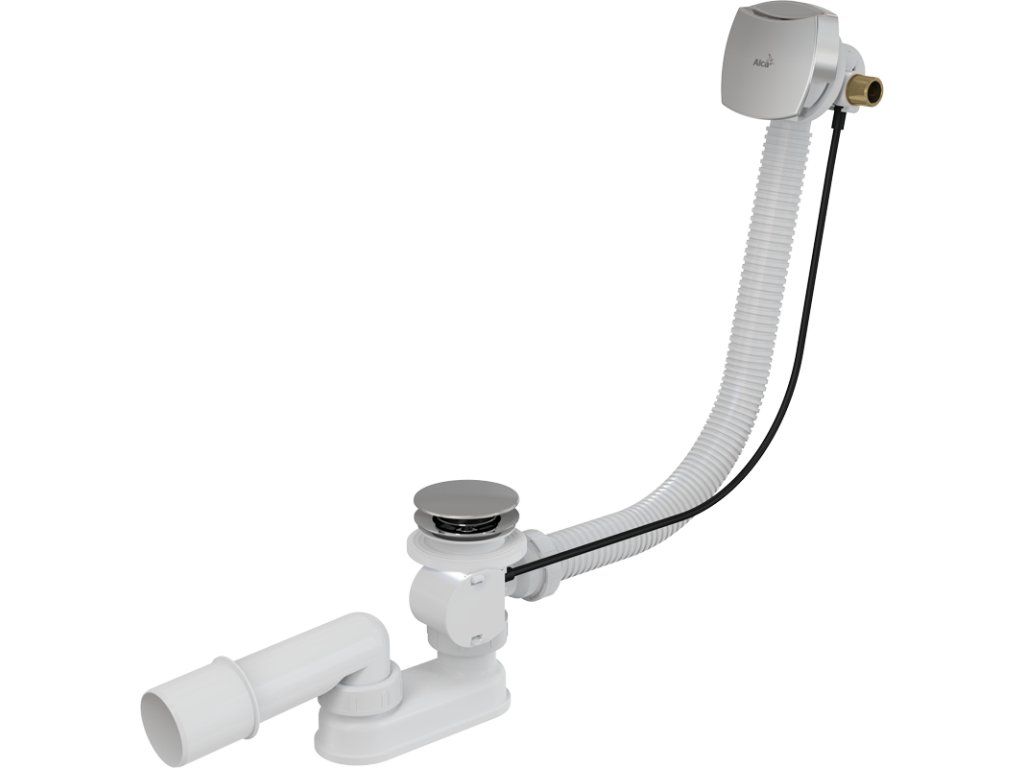 |
Automatic bathtub trap with overflow filling, chrome - if while removing the old faucet you find that the trap is also corroded, leaking or has a stiff plug control mechanism, it logically follows on from the same job and saves you a second intervention under the tub a few months later. Price from 102.08 EUR. |
Common Installation Mistakes - Where Most Warranty Claims Come From
From experience we know that the vast majority of problems after replacing a faucet don't originate in the quality of the faucet itself, but in small installation mistakes. The most common are:
Overtightening
Union nuts and mounting screws are tightened "all the way" with force exceeding what's recommended. The result is a stripped thread, a cracked plastic body inside the nut, or a microscopic crack in the seal that shows up as dripping only after a few weeks, by which point no one connects the cause back to the installation.
Missing or Damaged Seal
The old seal gets reused instead of replaced, or gets twisted or pinched between the threads during handling. Seals are a cheap part - it's always worth having a spare on hand and not skimping on them.
Misaligned Faucet
Especially with deck-mounted lever faucets, the faucet can rotate slightly while tightening the central nut, so it ends up sitting crooked. Visually this seems negligible during installation, but it's bothersome in everyday use and with some models can even cause uneven seating of the seal on one side.
Ignoring Network Pressure
As mentioned above, high or fluctuating pressure can damage even a correctly installed faucet. If your household has repeatedly had a cartridge or faucet replaced "for no apparent reason" in the past, it's highly likely that pressure, not the faucet's quality, is the cause.
Swapping Hot and Cold Water
With wall-mounted faucets with separate connections, the hot and cold sides sometimes get swapped - the faucet works, but the lever faces the opposite way from the usual convention (hot on the left instead of the right). It can be fixed afterward, but it's unnecessary extra work you can avoid with a simple check before final tightening.
Overview of Related Material Prices
When planning a budget for replacing a faucet, it's worth counting on additional material too - hoses, or a reducing valve or trap, if you're replacing them at the same time. An approximate overview of three items mentioned in this article:
Prices are approximate and valid as of the article's publication date - always check the current price directly on the product page, as it may change according to supplier terms.
Maintenance After Installation
Once installation is finished, it's worth giving the faucet a few more minutes of attention over the following days too. Check the joints at least once a day during the first week - a minor leak sometimes only shows up after the seal material "settles" into its final position. Clean limescale from the aerator (the mesh on the outlet) every 2-3 months, more often in areas with harder water - a clogged aerator is the most common cause of weak water flow, which is mistakenly blamed on a faulty faucet. If the faucet has a ceramic cartridge, avoid abruptly flipping the lever all the way to its stop with every use - gentler handling extends the cartridge's lifespan by years.
Frequently Asked Questions
Do I always have to replace the hoses when replacing a faucet?
It's not mandatory, but it's recommended. Rubber hoses have a limited lifespan (usually 5-8 years), and even if they look fine on the outside, the material inside gradually loses flexibility. If the original hoses are less than 2-3 years old and are stainless steel braided, you can leave them - with older rubber hoses, we recommend replacing them along with the faucet.
How do I find out the connection spacing on a wall-mounted faucet?
Measure the distance between the centers of both connections protruding from the wall. The most common spacing is 150 mm, and 100 or 180 mm occasionally occurs in older buildings. Always check this value before ordering a new faucet, since changing the spacing already requires intervening in the wall.
Why does my new faucet drip right after installation?
The most common causes are insufficiently tightened connections, a missing or damaged seal, or high pressure in the system. Check all the joints one by one with the water on - if it drips directly from the outlet or from under the lever, it could also be a faulty or incorrectly seated cartridge, which is grounds for a warranty claim with the seller.
Can a wall-mounted faucet be replaced with a deck-mounted one without demolition?
In most cases, no, not without intervening in the piping - a deck-mounted faucet needs the water supply routed upward from under the sink or tub, while a wall-mounted one has the supply routed from the wall. This change requires modifying the piping and we recommend entrusting it to a professional company.
Is a reducing valve needed for every installation?
Not always, but it's a worthwhile investment especially in apartment buildings with height differences (pressure changes by floor) and in houses with their own well or pressure station. If you don't know the pressure in your network, you can roughly find out with a simple pressure gauge screwed on in place of the faucet for a short time.
How long does a quality bathroom faucet last?
With correct installation, reasonable network pressure and normal maintenance (cleaning the aerator, gentle handling of the lever), a quality faucet with a ceramic cartridge normally lasts 10-15 years. Most premature failures originate precisely in installation mistakes or extreme water pressure, not in the product's quality itself.
Related Topics
- How to Choose a Bathroom Faucet
- Comparison of Bathroom Faucet Brands
- Stainless Steel Hoses - How to Choose and When to Replace
- Common Faucet Problems and How to Fix Them
- Bathroom Fixture and Faucet Maintenance
You'll find the complete range of bathroom fixtures and faucets in the main category Bathroom, Fixtures, Faucets.
Have a question on this topic?
Not sure what to decide or dealing with a specific situation at home? Write to us - we're happy to help.