
Bleeding and Setting Up a Manifold
Bleeding and setting up a manifold - why it's not just a formality
A stainless steel manifold is the heart of every underfloor heating system, as well as combined radiator-plus-underfloor systems. It distributes heating water from the boiler to individual circuits and back, and how well it's bled and set up directly determines whether rooms heat evenly, whether the boiler avoids working needlessly at full output, and whether the system stays free of bubbling or knocking noises in the pipework. In practice, we find that a large share of complaints about "cold corners of a room", "noisy heating" or "high gas consumption" don't originate from a faulty boiler or poorly designed underfloor heating, but from plain air left in the system, or incorrectly set flow rates on individual manifold circuits.
This article walks you step by step through the whole process - from why air appears in the system in the first place, through the exact bleeding procedure, to balancing (setting) the flow of individual circuits so that each room gets exactly the amount of heat it needs. The text is written practically, based on common situations installers and homeowners encounter, and is illustrated with real products from our range that are actually used for this kind of maintenance.
Why air appears in a manifold and its circuits in the first place
Air in a closed heating circuit has several typical sources, and it's worth knowing them, since this also determines how often the system will need bleeding:
- Initial filling of the system. During installation, or after major work (replacing the boiler, adding a circuit, repairing a leak), air gets into the pipework and has to be gradually pushed out. This is the most common and largest batch of air you'll deal with.
- Dissolved air in the water. Cold water from the mains contains dissolved oxygen and nitrogen. When the water in the system heats up, these gases are released as micro-bubbles that travel through the system and collect at the highest points - which is typically the manifold, if it's positioned higher than part of the pipework, or the upper corners of underfloor loops.
- Micro-bubble corrosion and chemical reactions. Small chemical processes take place over the long term in heating water between the water and the metal parts of the system, which can produce hydrogen. This production is slow but continuous, which is why air can appear in the system even months after the last major intervention.
- Negative pressure during topping-up or a leak. If the system is losing pressure (for example a slow leak at a joint), once pressure drops below a certain threshold, air can be drawn into the system through the leaky point or through the expansion vessel.
The practical conclusion is: the very first bleeding after installation is always the most demanding and needs time set aside for it, but a smaller regular check once per heating season (typically in autumn, before the season starts) is usually enough to keep the system in good condition.
How a manifold works - a quick overview before the actual procedure
A manifold always consists of two parallel pipes - the flow (hot water from the boiler) and the return (cooled water back to the boiler). Individual underfloor heating circuits or radiator branches branch off from the flow pipe, each with its own shut-off and regulating element, and connect back into the return pipe. Precisely because this is a parallel arrangement, air can get "stuck" in any single circuit independently of the others - which is why bleeding is done circuit by circuit, not for the whole manifold at once.
The diagram shows three things that matter for bleeding: first, each circuit is a separate loop, and air in circuit 2 has no necessary connection to circuits 1 or 3. Second, the highest point of the whole system is usually right in the manifold body itself (both the flow and return pipe), which is why good-quality manifolds have their own bleed valves at both ends. Third, for air to be pushed out of a circuit, water actually has to flow through that circuit at a sufficient speed - which is why the other circuits are temporarily closed during bleeding, concentrating the whole flow onto just one circuit at a time.
Bleeding a manifold step by step
The following procedure applies to a typical home system with underfloor heating connected to a stainless steel manifold with manual or thermoelectric actuators. If you have an automatic air vent directly on the manifold, some steps become simpler, but the principle stays the same.
A few practical notes on the individual steps that guides often leave out, but which determine the outcome in practice:
- Step 1 - why switch off the pump. A running pump stirs up the water and disperses air bubbles throughout the system instead of letting them concentrate at the highest points, where you can easily let them out. Letting the system settle for 5-10 minutes before bleeding significantly simplifies the whole process.
- Step 2 - why only one circuit at a time. If you leave several circuits open at once, the water always finds the path of least resistance (the shortest or least clogged circuit), and the other circuits get only minimal flushing. The result is that air stays exactly in the circuits you'd most need to be working - typically the longest loops in far-away rooms.
- Step 3 - valve position. On good-quality stainless steel manifolds you'll find a bleed valve at the end of both the flow and return pipes. When bleeding one circuit, it's practical to open the one on the side where water flows out of the system (usually the return) first, so you can see when the water runs bubble-free.
- Step 4 - topping-up speed. Filling too quickly creates turbulence, which tends to spread air around rather than push it out. Slow, controlled topping-up is more effective, even if it takes longer.
- Step 5 - repetition. When a system is first filled, it's common for one circuit to need bleeding 2-3 times before no more air comes out at all. This isn't a flaw in the procedure, just a consequence of how much air a long loop (typically 50-120 metres of pipe in standard underfloor heating) can trap.
- Step 6 - checking pressure. The pressure test after installation is usually done at around 3 bar, but the actual operating pressure during heating runs roughly between 1.5 and 2.5 bar, depending on the height of the building and the expansion vessel setting. If pressure drops noticeably after bleeding, that's normal - the air you released was taking up space that now has to be filled by water.
Balancing and setting the flow of individual circuits
Bleeding is only half the job. The other half is balancing - setting how much water flows through each circuit, so that longer or more heavily loaded rooms get proportionally more heat than short circuits in small spaces. Without balancing, it's common for a short-run bathroom circuit to be "overheated" and warm up quickly, while a living room circuit with a 100-metre loop lags behind and the room doesn't reach temperature even after long hours of heating.
The basic rule when manually setting flow screws (if the manifold has them) or adjusting flow meters is simple: longer, more heavily loaded circuits (large rooms, corner rooms, rooms with higher heat loss) need a higher flow, shorter circuits a lower one. In practice, a rough ratio of circuit length to set flow is recommended, but it always needs fine-tuning based on how the rooms actually behave after a few days of operation - the theoretical calculation is only a starting point.
As the comparison shows, manifold price rises with the number of circuits - a 2-way stainless steel manifold for underfloor heating costs €53.68, a 3-way one €69.39, and a 4-way one €85.32. When choosing the number of circuits it's worth allowing a small margin (one extra circuit if you're planning to finish part of the house later, or possibly split a large room into two zones), since buying a whole separate additional manifold just for one missing circuit is less practical than having a margin from the start.
Flow and heating water temperature in underfloor heating
Underfloor heating works with a lower heating water temperature than radiators - the typical range is roughly 35 to 45 °C on the flow, depending on the room's heat loss and the type of floor covering. That's exactly why it makes sense to have a mixing station, or at least a thermostatic valve, at the manifold that maintains this temperature regardless of what temperature the boiler itself is heating to.
If, when checking, you find that the manifold's flow pipe is distinctly hot to the touch (above 50 °C), that's a signal that the mixing station or thermostatic head on the circuit isn't working correctly, or that the boiler is heating to an unnecessarily high temperature for the needs of underfloor heating - this increases fuel consumption without a corresponding improvement in comfort.
The role of thermostatic and electrothermic actuators in setup
Besides manually balancing flow, many systems use electrothermic actuators, which, on command from a room thermostat, either fully open or fully close a specific circuit. This principle differs from gradually throttling the flow - it's on/off control, which works reliably and is typical for zoned systems where each room or group of rooms has its own thermostat.
When choosing an actuator, it's essential to know the control's supply voltage - actuators for 230 V (direct connection to mains voltage via a relay or switch box) or 24 V (low voltage, typical for systems with a central control unit and several zones) are commonly used. Mixing up these two types is one of the most common installation mistakes - an actuator with the wrong voltage either doesn't work at all or, worse, gets damaged.
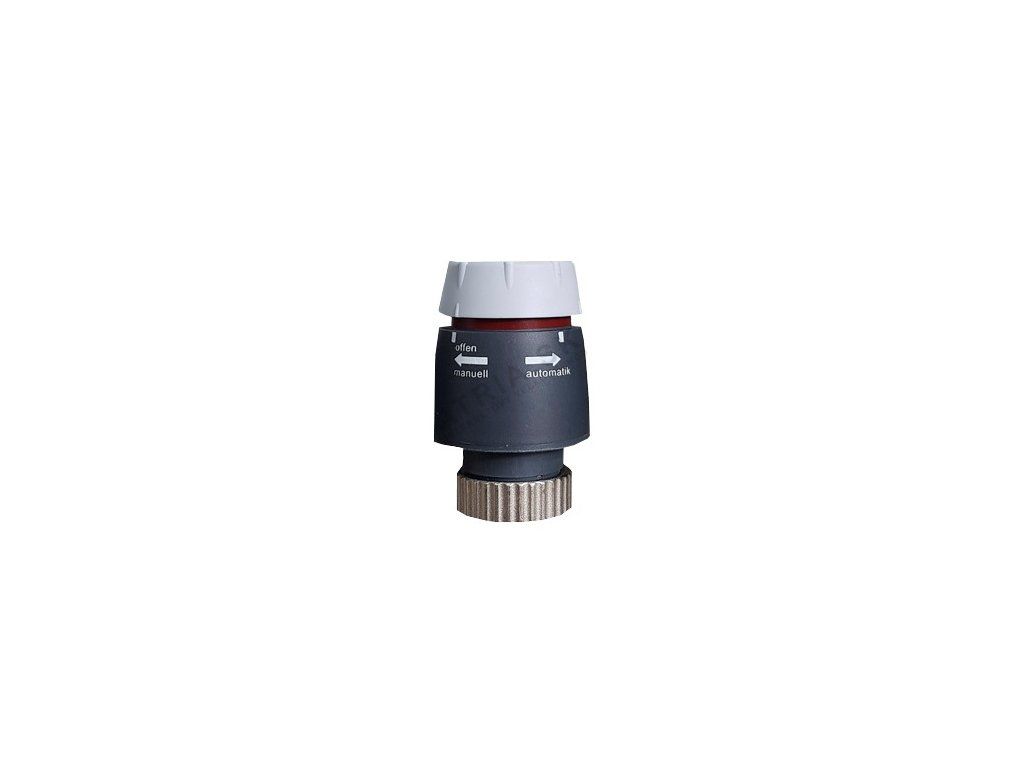 |
Electrothermic actuator 230 V - suitable for systems where the control is powered directly from mains voltage via a switch box, typically for simpler zoned wiring without a central low-voltage unit. Price from €16.36. |
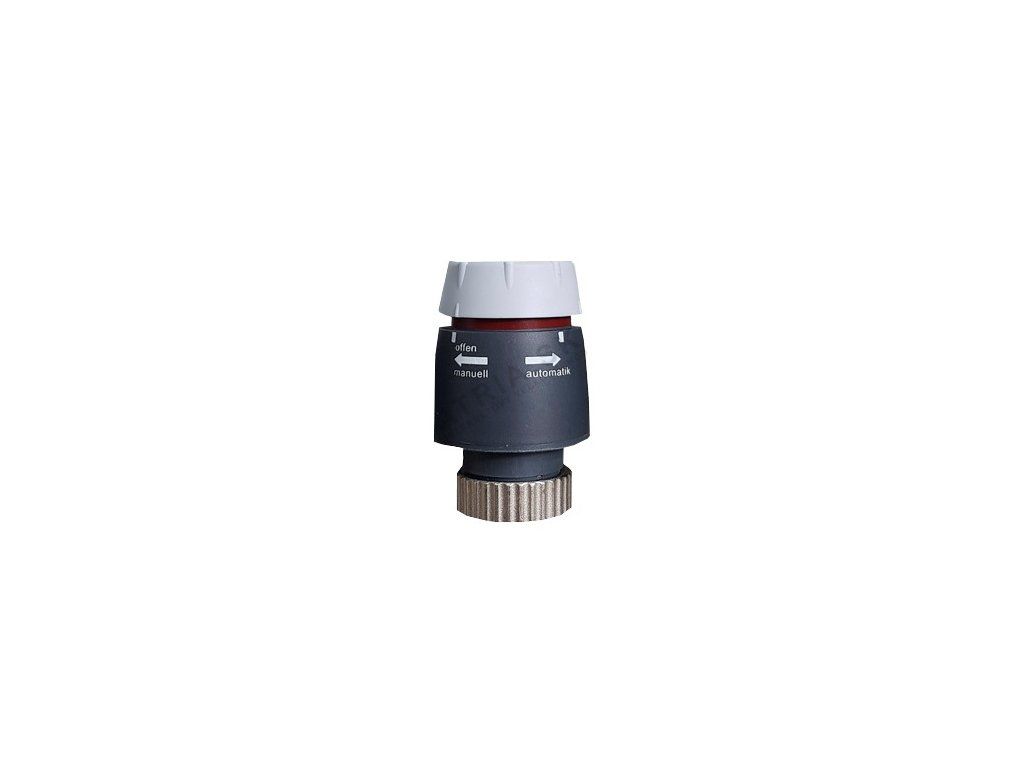 |
Electrothermic actuator 24 V - used with systems that have a central control unit and several zones, where low voltage is safer and more practical with a larger number of circuits. Price from €16.36. |
If you're planning to extend or renew the manifold as a whole, it's worth looking at the stainless steel manifolds themselves with the matching number of circuits - for example, a combined system with two rooms on independent control needs only a 2-way type, while a larger flat or house with several zones is worth considering with a 3- or 4-way version with some margin.
 |
3-way stainless steel manifold for underfloor heating - a good choice for a flat or smaller house with three independently controlled circuits, a good compromise between price and flexibility for future changes to the layout. Price from €69.39. |
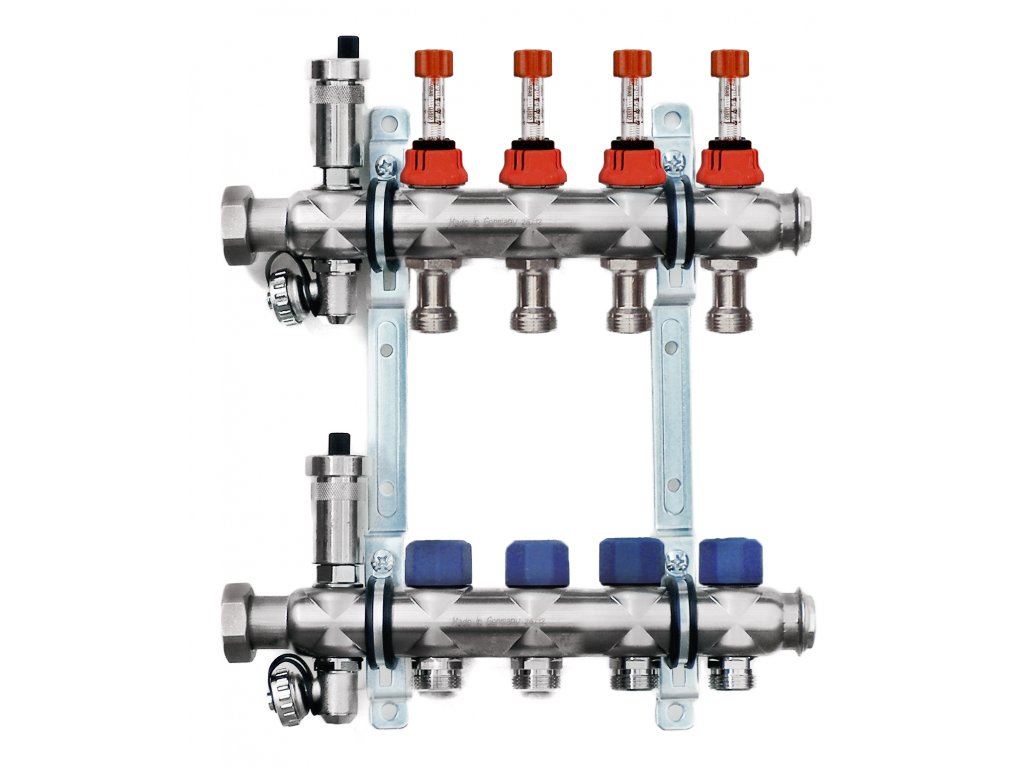 |
4-way stainless steel manifold for underfloor heating - a recommended choice for a larger house with four zones, or if you want a margin for future expansion of the system without needing to buy a second, separate manifold. Price from €85.32. |
When it comes to manifold maintenance and its accessories, it's worth having a small extra part on hand, one that many installers recommend keeping right in their toolkit for service work on a heating system.
 |
Avansa 2003 - a practical accessory part worth having ready for regular seasonal checks and maintenance of the manifold and heating system. Price from €20.05. |
Typical mistakes when bleeding and setting up a manifold
Over years of working with underfloor heating, the same handful of mistakes keep coming up - all easily avoidable once you know about them in advance:
- Bleeding all circuits at once. As mentioned above, this is the most common mistake - air stays exactly in the circuits where it would matter most, i.e. the longer or hydraulically "harder" ones.
- Topping up water too quickly. A fast stream of mains water creates turbulence, which tends to mix the air around the system rather than push it out in one direction.
- Forgetting to check pressure after bleeding. After releasing a larger amount of air, system pressure naturally drops and needs topping up - otherwise the circulation pump may end up working outside its optimal range.
- Setting flow "by eye" without a follow-up check. The initial setting of flow screws is always just an estimate. Without checking floor or room air temperature after a few days of operation, an error in the estimate goes unnoticed and the system runs inefficiently for months or years.
- Mixing up the supply voltage of electrothermic actuators. As described above, 230 V and 24 V actuators are not interchangeable, and mixing them up can leave a zone non-functional or damage the controls.
- Ignoring a repeated pressure drop. If the system keeps losing pressure even after thorough bleeding, that usually means a hidden leak, not "just air" - in that case it's worth calling in a professional to check the joints and the expansion vessel.
- Forgetting the seasonal check. Even a trouble-free system is worth checking once a year (ideally in autumn before the heating season starts) - a quick pressure check and a fast bleed of the manifold takes 15-20 minutes but prevents bigger problems during winter.
When it's worth calling a professional
A careful, patient homeowner can handle basic bleeding and rough flow setup on their own. There are, however, situations where it's worth calling a heating technician:
- System pressure keeps dropping even after repeated bleeding and topping up - suggesting a leak.
- One or more rooms remain noticeably colder than the others even after several days of flow adjustment following bleeding.
- The system makes noises (bubbling, knocking) even after thoroughly bleeding all circuits - this could indicate a problem with the circulation pump, the expansion vessel, or hydraulic balancing at the level of the whole boiler circuit.
- Uncertainty about which circuit on the manifold corresponds to which room (common with an older system without a diagram or labels).
- Suspicion of a fault in the manifold itself (a leaking valve, a damaged flow meter) rather than ordinary air in the system.
Seasonal check - a quick list before winter
To close out the practical section, here's a short checklist worth going through once a year, ideally in September or October, before the heating season fully starts:
- Check the system pressure (should be roughly in the 1.5-2.5 bar range, the exact value depending on the design and the height of the building).
- Briefly bleed each circuit on the manifold individually, even if there doesn't seem to be a problem.
- Check that the flow pipe isn't unusually hot (above roughly 50 °C for underfloor heating), which would suggest a problem with mixing.
- Verify the electrothermic actuators are working - when the thermostat calls for heat, the actuator should be warm to the touch, cold when off.
- Visually check the manifold and its joints for any signs of moisture or corrosion traces.
Frequently asked questions
How often does a manifold need bleeding?
After the system is first filled, it's normal to bleed it repeatedly over the first days to weeks, while the system "settles in". After that, one thorough check per year, ideally before the heating season starts, is enough. If the system makes noise or some rooms don't reach the required temperature, bleed it any time, regardless of the seasonal schedule.
Why did system pressure drop after bleeding?
This is a normal effect - the air you released was taking up space in the system. Once it's removed, you need to top the pressure back up to the normal operating value, usually around 1.5-2.5 bar depending on your system. If pressure keeps dropping repeatedly over the following days without an obvious reason, it's more likely a leak than residual air.
Can a manifold be bled without draining the whole system?
Yes, the standard procedure described in this article (closing the other circuits, opening the bleed valve on one circuit, slowly topping up water) doesn't require draining the whole system. Draining the entire water volume is only done for major work, for example replacing the manifold or a long shutdown.
How do I know which circuit on the manifold belongs to which room?
With a more recent installation, each circuit should have a label directly on the manifold or in the design documentation. If labels are missing, you can find out step by step - close all circuits except one, wait until that floor noticeably warms up, and match the circuit to whichever room heated up. We recommend writing the result down or labelling it directly on the manifold right away.
Can I replace an electrothermic actuator myself?
The mechanical replacement (unscrewing the old one, screwing on a new one onto the circuit's valve) is simple, and most homeowners can manage it themselves. The important thing is just to check that the new actuator matches your control's supply voltage (230 V or 24 V) - mixing it up can leave it non-functional or damage it. If you're unsure about the electrical wiring, we recommend consulting an electrician or heating technician.
Why is one room still colder even after bleeding?
If the system is demonstrably free of air (clear, bubble-free water flows from the valve) and the room is still colder, the problem is most likely a flow setting - that circuit needs more flow, which is addressed by opening up the flow screw on the manifold (if that manifold type has one) or by checking the circuit's length and diameter against the others. In that case, gradual fine-tuning over several days, with ongoing room temperature measurement, is the way to go.
Related topics
- How to choose a stainless steel manifold
- How many manifold circuits do I need
- Installation and connection of a manifold
- Most common manifold faults
- Maintenance of a stainless steel manifold
You'll find the complete range in the main category Stainless steel manifolds.
Do you have a question on this topic?
Can't decide, or dealing with a specific situation in your home? Write to us - we're happy to help.