
Maintenance of a Stainless Steel Manifold
Why even stainless steel needs regular care
A stainless steel manifold for underfloor heating is one of those components commonly described as "maintenance-free". That's partly true - unlike brass, stainless steel (most often grade 1.4404 or a similar austenitic alloy) doesn't corrode, doesn't suffer from dezincification, and doesn't develop the greenish deposits familiar to owners of older brass manifolds. That doesn't mean, however, that you don't need to look after the manifold at all. The manifold body is only one part - around it sits a set of moving and wearable components: regulating inserts with flow meters, bleed valves, drain cocks, electrothermic actuators, seals and O-rings. It's precisely these parts that determine whether the underfloor heating works as it should, or whether one room mysteriously underheats while another overheats.
In practice, our customer support most often sees three scenarios: after years of operation someone discovers air in the system and doesn't know how to bleed it, the flow meters on individual circuits show nonsensical values, or an electrothermic actuator stops responding to the thermostat and the circuit stays either permanently open or permanently closed. In most cases these are things a more experienced user can fix themselves in a few minutes, if they know what to check and how. This article is a practical guide - what, when and how to check on a stainless steel manifold so it lasts for decades without major problems.
It's also worth saying that a manifold isn't an isolated component - it's the connection point between the boiler, the circulation pump (either standalone or built into the manifold assembly) and the individual underfloor heating circuits in each room. Manifold maintenance is therefore closely linked to maintaining the whole heating system - if you neglect water treatment in the system, it will damage not just the boiler but, over time, also the seals and internal parts of the manifold's fittings.
Annual maintenance schedule - what to check and when
The most common question is: how often should a manifold be checked? The answer depends on whether it's a routine visual check or a more thorough service intervention. The schedule that has proven itself in practice is as follows:
- Before the heating season (August - September): a complete check before running the system at full output - visual check of tightness, checking flow meter settings, a functional test of the electrothermic actuators, checking system pressure.
- During the heating season (ongoing, roughly once a month): a quick visual check - listening for bubbling (a sign of air in the system), checking that all rooms are heating evenly, checking the pressure gauge on the boiler or expansion vessel.
- At the end of the heating season (March - April): bleeding the system before shutting it down for summer, checking whether any circuit became clogged during the season (uneven flow), noting any observations for next season.
- Once every 3 - 5 years: a more thorough check of the internal regulating inserts, possibly cleaning or replacing them, checking the condition of seals and O-rings, checking that the drain cock still works.
This cycle isn't complicated and, for an ordinary family home, takes less than an hour of actual work per year in total. The problem arises when precisely that autumn pre-season check gets skipped - that's when things that have "built up" over summer are usually discovered (a slight leak at a seal, an actuator stuck in one position over the summer, a slight drop in system pressure).
Bleeding a manifold step by step
Air in an underfloor heating system is by far the most common reason some rooms don't heat up properly. Air tends to rise and collect at the highest points of the system - and the manifold, usually located in a utility room or a hallway cabinet, is exactly such a point for the whole floor's circuit. It shows up as bubbling in the pipework, cold spots on the floor of an otherwise working circuit, or a noisy circulation pump.
The procedure for bleeding a stainless steel manifold is simple, but needs to be done in the right order, otherwise the air just moves from one place to another:
- Switch off the circulation pump (or at least turn it down to minimum) - bleeding while the water is fully circulating just stirs it up and makes the air harder to separate out.
- Check the system pressure on the gauge at the boiler or expansion vessel - if the pressure is below the lower limit recommended by the boiler manufacturer (typically around 1 - 1.5 bar when cold), top up the system slightly before bleeding.
- Open the bleed valve on the manifold (usually a small valve on the top or side of the main body; some models have an automatic air vent pot directly on the manifold). Use a container or a cloth to catch the escaping water.
- Wait until a steady stream of water flows out without air bubbles - with a larger amount of air this can take several minutes.
- Close the valve and check the system pressure again - it usually drops slightly after bleeding, so the system needs to be topped back up to the operating value.
- Repeat the procedure for each circuit separately if the manifold has separate bleed points for individual loops - with multi-circuit manifolds (3, 4 or more circuits), air often builds up unevenly.
In the first heating season after installing new underfloor heating, we recommend bleeding more often - roughly once a month, since the system is still "settling in" and micro-bubbles of air from filling are gradually released. In subsequent seasons, bleeding once in autumn before startup and once in spring at shutdown is usually enough.
Checking flow meters and setting up circuits
Most stainless steel manifolds for underfloor heating have flow meters (rotameters) built into the flow branch - small transparent tubes with a float that show the current water flow in a given circuit, usually in litres per minute. This is one of the most useful, yet also most overlooked features of a manifold. If the float on a given circuit drops to zero, or conversely permanently shows the maximum regardless of the thermostat setting, that's the first sign of a problem - a clogged circuit, an air pocket, or a faulty electrothermic actuator.
When checking flow meters, we recommend:
- Checking that the values on individual circuits roughly match the values set when the system was balanced (these should be recorded in the design documentation, or at least noted at commissioning). A deviation of up to 10 - 15% is normal; a larger deviation signals a problem.
- If one circuit consistently shows significantly lower flow than the others, check whether the regulating valve on the return branch is partially or fully closed, or whether the electrothermic actuator on that circuit is actually opening the valve when heating is called for.
- Fine-tune flow meters with a gentle turning motion of the adjustment wheel directly at the manifold - large single adjustments can throw off the balance of the whole system, so it's best to change the setting gradually, in small steps, with at least a day between adjustments so you can observe the real effect on room temperature.
If you find that a room still doesn't heat up properly despite correctly set flow meters, the cause is often not the manifold but elsewhere in the system (circuit length, hydraulic balancing, circulation pump output). We write in detail about how to correctly determine the number and layout of circuits at the design stage in the article How many manifold circuits do I need.
Electrothermic actuators - the most frequently worn part
If there's one thing on a manifold that's a genuine "consumable", it's the electrothermic actuators. These small drives, which open or close the flow in a given circuit based on a signal from the room thermostat, contain an internal heating element and a mechanical piston. The typical lifespan of a good-quality electrothermic actuator is around 6 to 8 years under normal operation - after that, the risk increases that the piston will jam, or that the actuator will stop responding to the signal (most often it stays permanently open, showing up as a "constant" flow of heat into that room even without a call from the thermostat).
When checking actuators, we recommend:
- Visually checking for visible moisture on the actuator, corrosion around the connection, or a cracked housing.
- Verifying the function - after lowering the target temperature on the thermostat, the actuator should visibly close the valve within a few minutes (typically 3 - 4 minutes, depending on the type), which you can tell from a drop on the flow meter or by touch (the actuator warms up slightly when open).
- If the actuator isn't warm to the touch at all during active heating and the flow meter shows zero, it's probably faulty or disconnected from power/signal.
- When replacing, always use an actuator with the correct supply voltage - commonly 230 V (direct mains connection via a room thermostat) or 24 V (low voltage, controlled via a central unit/relay box). Mixing up the voltage will destroy the actuator instantly.
Replacing an actuator doesn't require replacing the whole manifold or draining the entire system - the actuator simply unscrews from the regulating valve's spindle and a new one is fitted in its place, while the system stays full of water. This is one of the few maintenance jobs on a manifold that even a homeowner without technical training can handle without trouble.
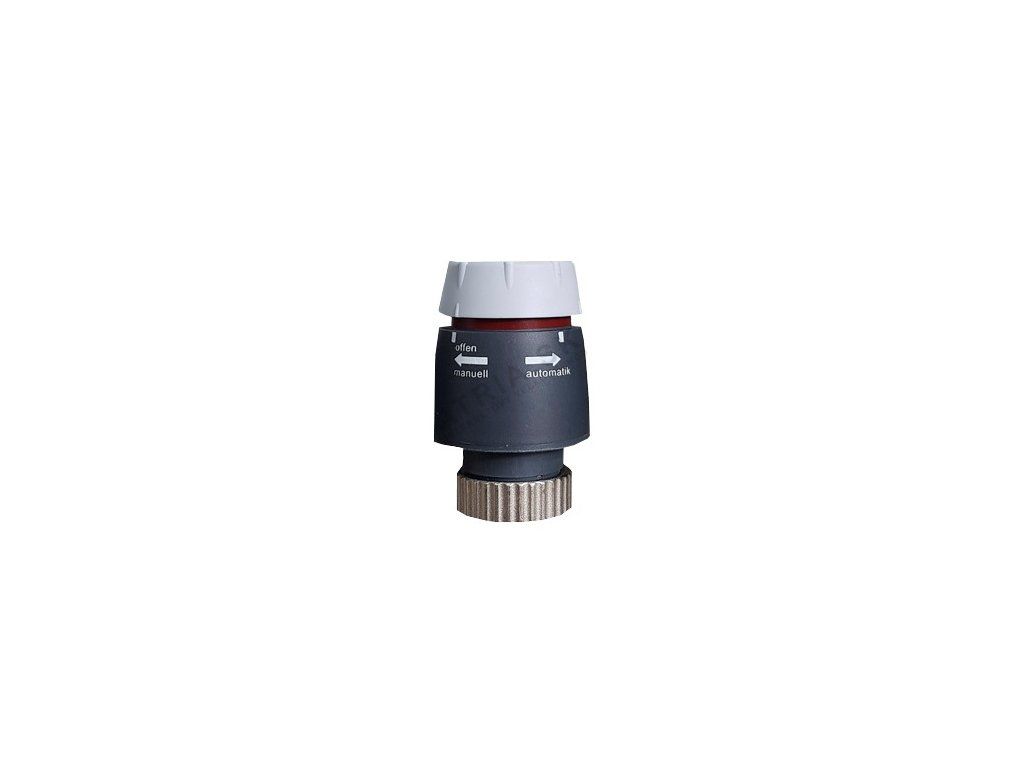 |
Electrothermic actuator 230 V - the most common type for direct connection to a room thermostat via the 230 V mains, a suitable replacement for a worn-out or non-functioning actuator on most standard manifolds. Price from EUR 16.36. |
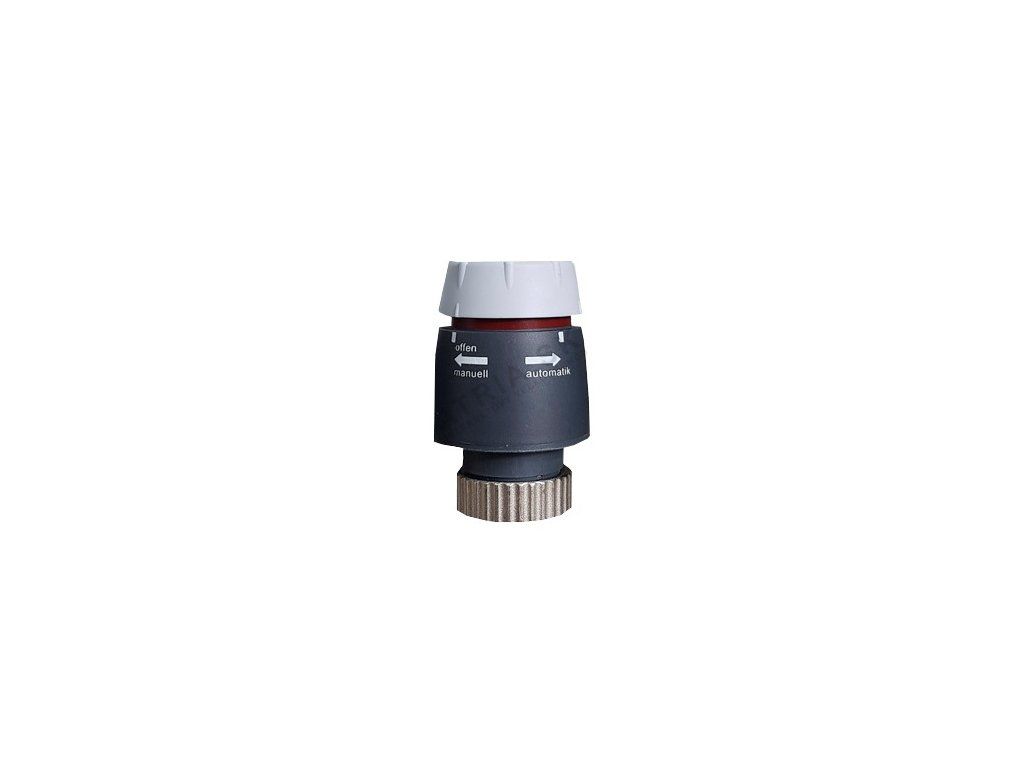 |
Electrothermic actuator 24 V - a low-voltage version for systems controlled via a central unit/relay box; it's important not to mix it up with the 230 V variant when replacing. Price from EUR 16.36. |
Checking tightness and pressure testing
Even though the stainless steel manifold body itself is very resistant to leaks, the joints, seals and O-rings at the regulating valves and pipe connections are places where a slight leak can appear over time - most often after years of operation, once a rubber seal loses its elasticity, or after work on the system (e.g. replacing an actuator, adjusting flow) when a joint wasn't retightened to the original torque.
A routine visual tightness check involves inspecting the whole manifold and its joints - look for damp patches, limescale traces (typical of a slow, long-term leak), or actual drips of water. This check should be part of every autumn pre-season inspection.
If a larger leak is suspected in the system, or if the system is being renovated or extended, a pressure test is carried out. This is done by pressurising the system to a value higher than the normal operating pressure - usually 1.5 to 2 times the operating pressure. Typical operating pressure in a family house heating system is around 2 to 3 bar (when cold), which gives a recommended test pressure of roughly 4 to 6 bar, held for at least 30 minutes up to several hours (depending on the standard and scope of the test), during which pressure stability is monitored. We recommend leaving a pressure test after major work on the system to a heating professional, since an incorrectly performed test (for example too high a pressure for the components used) can cause damage instead of revealing a problem.
Lifespan of individual components
When planning maintenance and a service budget, it's useful to know which manifold parts will last "for the life of the house" and which need to be replaced periodically during operation. The stainless steel manifold body itself is designed for 25 to 30 years of normal operation, practically without needing replacement - it's a passive component with no moving parts that simply distributes water. Regulating inserts with flow meters have a somewhat shorter, but still very long, lifespan - typically 10 to 15 years, after which some wear may appear in the adjustment wheel mechanism. Seals and O-rings typically last 8 to 10 years before losing their original elasticity. As already mentioned, electrothermic actuators have the shortest lifespan - 6 to 8 years.
These figures obviously depend on water quality in the system, the number of on/off cycles per season, and whether the system was properly flushed of debris when filled. In harder water, or systems without water treatment, lifespans can be shorter, especially for moving parts.
Cleaning the filter and drain cock
Many stainless steel manifold assemblies also include an inlet filter (strainer) upstream of the circulation pump, which catches small debris from the pipe system - leftover sealant, metal shavings from installation, deposits. This filter needs regular checking, especially in the first year after installing a new system, when residue from the installation may still be present in the pipework. A clogged filter increases hydraulic resistance in the system, showing up as reduced overall flow and a noisier pump.
Cleaning the filter is simple: shut off the flow and return before and after the filter (if ball valves are provided), unscrew the strainer insert, rinse it under running water and put it back. Before opening it for the first time after any work, have a cloth ready - pressurised water may remain in the pipework.
The drain cock is used to fully drain a given branch or the whole manifold, for example during a major service job or component replacement. We recommend turning it briefly every so often (for example during the autumn check) even without an actual need to drain - cocks that go unused for a long time tend to seize up, and can cause complications when they're really needed in an emergency (for example when repairing a leak).
When to call a professional and when self-servicing is enough
A large part of routine maintenance - visual checks, bleeding, fine-tuning flow meters, replacing an electrothermic actuator, cleaning the filter - can be handled without trouble by a reasonably capable homeowner with minimal tools. On the other hand, we recommend leaving a pressure test after major work, repairing an actual leak at a joint (which requires disassembly and a new seal or sealant applied at the correct torque), or any intervention that requires draining and refilling the whole system with bleeding "from scratch", to a heating professional. The reason is simple - a mistake during refilling or when retightening a joint can cause damage that costs more than the service job itself.
A practical rule that has proven itself: if the job only requires hands-on work directly at the manifold without disconnecting pipe joints (bleeding, replacing an actuator, fine-tuning a flow meter), it's a DIY task. If the job requires disconnecting pipework, soldering, press-fitting or work with larger tools, it belongs in a professional's hands.
Overview - typical products related to manifold maintenance
Routine maintenance and minor repairs most often involve replacement actuators, or, when extending or replacing the whole assembly, a new manifold of the right size. Below is an overview of the products that come up most often around manifold maintenance and servicing:
 |
2-way stainless steel manifold for underfloor heating - if you find your original smaller manifold can no longer handle the growing number of circuits during a renovation, or you're replacing a damaged assembly for a smaller section (e.g. bathroom, extension), this 2-way version is a basic building block with the same stainless steel durability as the larger models. Price from EUR 53.68. |
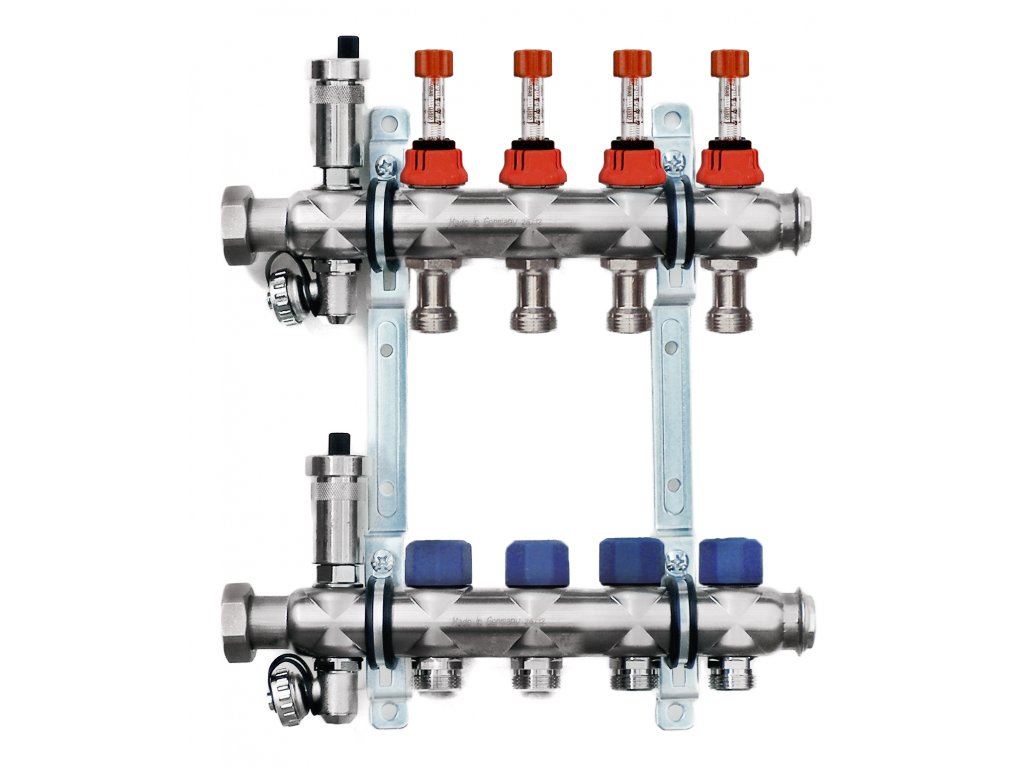 |
4-way stainless steel manifold for underfloor heating - if a service inspection reveals that the manifold body is damaged (for example mechanically, during building work) and repair no longer pays off, replacing it with a new 4-circuit unit is more reliable than a makeshift repair of the old body. Price from EUR 85.32. |
 |
Avansa 2003 - small Avansa 2003 fittings and connecting parts often come in handy during manifold servicing when replacing or re-sealing joints; it's worth having them ready in advance so the job doesn't have to be interrupted. Price from EUR 20.05. |
A practical example from an everyday household
Take a typical case: a house with underfloor heating, a stainless steel 6-circuit manifold in the utility room, the system in its sixth year of operation. In autumn, the owner notices during a check that the upstairs bedroom isn't heating up as well as the rest of the house, even though the thermostat shows the target temperature and the heating indicator light is on. Inspecting the manifold, they find that the flow meter on the bedroom circuit shows a significantly lower value than the other circuits, and the electrothermic actuator on that circuit is cold to the touch, even though it should be slightly warm during active heating.
After disconnecting the actuator, it turns out the internal spindle piston is stuck in a partially open position - a classic sign of an actuator reaching the end of its life after about six years of operation, right within the expected lifespan. Replacing it with a new 230 V actuator (same voltage as the original) takes less than ten minutes without needing to drain the system, and the flow meter immediately shows a normal value matching the other circuits after the swap. This kind of diagnosis - from the symptom (a cold room), through checking the flow meter, to verifying the actuator by touch - is exactly the process we recommend repeating for any similar problem before starting to consider more complex causes such as a boiler fault or hydraulic imbalance across the whole system.
Summary - what to remember
Thanks to its material, a stainless steel manifold is one of the most durable parts of a heating system, but its long-term reliability depends on regular, simple care of the moving and wearable parts around it. Key points to remember: check and bleed once in autumn before the season and once in spring at shutdown, keep an eye on flow meters throughout the season, plan on replacing electrothermic actuators roughly every 6 - 8 years, and visually check the tightness of joints at every major inspection. Following this simple rhythm, the manifold body itself will last the entire lifetime of the house without trouble.
Frequently asked questions
How often does a stainless steel manifold need bleeding?
Under normal operation, bleeding once in autumn before the season starts and once in spring when shutting the system down is enough. During the first heating season after installing a new system, we recommend bleeding more often, roughly once a month, since the system is still "settling in" and releasing micro-bubbles of air from filling.
How long does an electrothermic actuator on a manifold last?
The typical lifespan of a good-quality electrothermic actuator is around 6 to 8 years under standard operation. After that, the risk of the internal piston jamming increases, most often showing up as a circuit that's permanently open or permanently closed regardless of the thermostat setting.
Can I replace an electrothermic actuator myself without draining the system?
Yes, replacing an actuator is done directly at the regulating valve's spindle without needing to drain the system. The one thing to watch is that the supply voltage matches - usually 230 V or 24 V - between the old and new actuator, since mixing up the voltage will destroy the actuator instantly.
Why doesn't one room heat up while the others work normally?
The most common cause is either air in that circuit, or a faulty electrothermic actuator that isn't opening the valve on the thermostat's command. The first diagnostic step is always to check the flow meter value for that circuit at the manifold and check by touch whether the actuator is warm during active heating.
What pressure should an underfloor heating system have, and how is a pressure test done?
Typical operating pressure of a system in a family house is around 2 to 3 bar when cold. During a pressure test after major work on the system, pressure is raised to roughly 1.5 to 2 times the operating value, i.e. approximately 4 to 6 bar, and its stability is monitored over a longer period. We recommend leaving this test to a heating professional.
Is a stainless steel manifold really maintenance-free?
The stainless steel manifold body itself is very resistant to corrosion and, under normal operation, lasts 25 to 30 years practically without any work needed. However, the other components of the assembly - regulating inserts, seals, electrothermic actuators - are mechanical, wearable parts that need regular, if simple, care.
Related topics
How to choose a stainless steel manifold | How many manifold circuits do I need | Stainless steel vs. brass manifold | Installation and connection of a manifold | Most common manifold faults | Bleeding and setting up a manifold | Frequently Asked Questions About Manifolds
Back to the main category: Stainless steel manifolds
Do you have a question about manifold maintenance?
Can't decide, or dealing with a specific situation in your home? Write to us - we're happy to help.