
Pipe installation – procedure and pressure test
Installing pipe looks at first glance like one of the simpler trade jobs on a building site – cut, join, fix in place. In practice, however, this is exactly the part of a water and heating installation that, once covered by a wall, screed or tiling, becomes practically inaccessible for decades. While you can fix a fault on a visible radiator or tap in a few minutes, a leaking pipe joint embedded in a floor or bricked into a partition wall means breaking things open, drying out, and redoing the finishing work. That's exactly why it pays to give the installation procedure and the final pressure test the same attention as choosing the boiler or radiators themselves.
This article will guide you through the whole process – from choosing the material and diameter of pipe, through the decision between concealed and surface-mounted routing, joining methods, the installation procedure itself step by step, all the way to the pressure test, which is the last safeguard before the run is covered. At the end you'll find two real-world examples and answers to the most frequently asked questions we encounter about pipe installation.
If you're planning a flat renovation, building a family house, or just replacing part of an old run, this overview will help you prepare what to ask the installation company, or what to watch out for if you're doing the installation yourself.
What pipe for water and heating is, and why installation matters
Pipe for water and heating carries hot or cold water between the source (boiler, water meter) and the individual points of use – radiators, taps, underfloor heating. The choice of material and diameter affects the lifespan of the run, pressure losses, ease of installation and the overall installation cost.
Precisely because this is hidden infrastructure within the house, all the decisions – material, diameter, routing method, joint type – have to be made correctly right from the start. While badly chosen bathroom tiling can be replaced at the next renovation, pipe embedded in the floor or routed in a wall has a lifespan comparable to the building itself. Installation is therefore not just about mechanically joining tubes together – it's a set of decisions made, in practice, in a precisely defined order: first material and diameter, then the routing path, then the joining and fixing method, and finally a tightness check before the final covering.
Choosing pipe material before installation: PEX-AL-PEX, copper and steel
The three common materials differ mainly in durability and installation difficulty.
Before starting the actual installation, you need to decide on the material. PEX-AL-PEX (multilayer plastic-aluminium pipe) combines an inner and outer plastic layer with a middle aluminium layer. Aluminium prevents oxygen diffusion into the water, which matters especially in closed heating circuits, and at the same time gives the pipe shape memory – so after bending, the pipe holds its shape, which greatly simplifies installation in tight spaces or when working around obstacles.
Copper pipe is a traditional solution, very durable against temperature and pressure, but it's more expensive, and soldered installation requires more skill and work with an open flame. Steel pipe is used today only exceptionally – in older installations or industrial applications – because without proper water treatment it is prone to corrosion from the inside.
For a typical family house or flat installation, PEX-AL-PEX is therefore in the vast majority of cases the most practical choice – it combines easy installation (shape memory, no open flame) with the properties needed for a closed heating circuit.

PEX-AL-PEX pipe 16 x 2 for heating, underfloor heating and water
Price: €0.66/m
Multilayer plastic-aluminium pipe with an oxygen barrier, 16 mm diameter, universal use for water and heating – the most common choice for individual underfloor heating circuits and runs to radiators.
You'll find a detailed comparison of all three materials, including advantages and disadvantages, in the separate article PEX-AL-PEX vs. copper vs. steel pipe.
What pipe diameter to choose before starting installation
The second decision to make before installation is the pipe diameter. Diameter is chosen according to the required water flow and the length of the run – for underfloor heating and individual circuits, 16 mm is commonly used; for main riser lines or longer sections with higher flow, 20–26 mm and above.
Pipe that's too narrow causes high pressure losses and noise as the water flows – in practice this shows up as audible gurgling or hissing in walls at higher draw-off. Unnecessarily wide pipe, on the other hand, increases installation costs and slows the arrival of hot water, because it retains cooled-down water from the previous draw-off. During installation, it's therefore important not to standardise the diameter across the whole house, but to combine a smaller diameter on individual circuits with a larger diameter on the main runs.

PEX-AL-PEX pipe 26 x 3 for heating, underfloor heating and water
Price: €1.62/m
Larger 26 mm diameter, suitable for main riser lines with higher water flow – typically between the boiler room and the manifold, or on shared risers to multiple points of use.
Pipe price rises with diameter and material specialisation.
When installing individual underfloor heating circuits, specialised pipe with an oxygen barrier designed directly for this purpose has proven its worth:

HEPWORTH pipe for underfloor heating, 16 mm
Price: €1.48/m
PE-RT pipe with an oxygen barrier specifically designed for underfloor heating.
You'll find a detailed guide on how to calculate the required diameter according to the length and number of circuits in the article What pipe diameter do I need.
Concealed vs. surface-mounted routing – a decision that affects the whole installation
Before the actual installation, you need to decide how the pipe will be routed. Concealed routing is pipe embedded in a wall or floor under plaster or screed – it looks aesthetically clean, but in case of a fault (a leak) requires breaking open the wall or floor to repair it. That's exactly why, with concealed routing, the pressure test is absolutely critical – it's the last opportunity to catch a leak before the run is permanently covered.
Surface-mounted routing is visible, run along the surface of the wall, often in trunking or completely openly. Installation and any later repair are simpler, but it's less attractive aesthetically, so it's used mainly in technical spaces – the boiler room, cellar or garage.
When installing in living spaces (living room, bedroom, bathroom), concealed routing is chosen almost always because of appearance, while in a boiler room or technical room it's commonly combined with surface-mounted routing, where access to the run is needed for routine maintenance or boiler servicing. You'll find more on the advantages and disadvantages of both solutions in the article Concealed vs. surface-mounted routing.
Oxygen barrier – why heating pipe must have one
The oxygen barrier – most often an aluminium layer in PEX-AL-PEX, or a special EVOH layer in PE-RT pipes – prevents atmospheric oxygen from penetrating through the pipe wall into a closed heating circuit. Without this barrier, oxygen would gradually diffuse into the heating water and cause corrosion of the system's metal parts – the boiler, pump, radiators and steel piping.
When installing a run intended exclusively for heating (not for drinking water distribution), an oxygen barrier is therefore practically essential. If you're deciding between a variant with and without a barrier when choosing pipe, for a heating circuit this question shouldn't be a matter of compromise even for a lower price – the consequences of a missing barrier (corrosion of the circulation pump, fouling of the boiler's heat exchanger) only show up after years of operation, and the repair is considerably more expensive than the price difference in the pipe. Details in the article Oxygen barrier – why it matters in heating pipe.
Ways of joining pipe: screwed, press, welded
Choosing a joining method directly determines how the installation itself will proceed, what tools you'll need, and whether the joint will be detachable in the future.
Screwed (compression) joints are secured mechanically with a union nut and a sealing ring. The advantage is that the joint can be taken apart and reassembled at any time without special tools, which you will especially appreciate during servicing – for example when replacing a manifold or valve. They are therefore suited especially to places where future access is anticipated (surface-mounted routing, boiler room, manifold).
Press joints are created with special pressing pliers that permanently deform a metal sleeve around the pipe and fitting. The joint is faster to install on a larger scale and is permanent – non-detachable – but requires investing in pressing tools. When installing concealed routing, where the joint won't be taken apart again anyway, this is typically the preferred choice – faster work and lower risk of error when repeatedly making a large number of joints.
Welding – mainly with plastic PP-R pipes – joins the pipe and fitting by melting the material. It creates a homogeneous, permanent joint and is common for both cold and hot water distribution. You'll find a complete overview of the procedure for each joint type, including recommendations on when to choose which, in the article Ways of joining pipe – screwed, press, welded.
Pipe installation step by step – the procedure
The installation procedure repeats regardless of run type, only the joining method changes.
Installing pipe itself follows, in most cases, a similar procedure regardless of whether it's a run to radiators, to taps, or an underfloor heating circuit. The following steps describe the common procedure for installing plastic-aluminium PEX-AL-PEX pipe, which, thanks to its shape memory and ease of installation, is the most common choice for both renovations and new builds.
1. Preparing the route and measuring up. Before actually cutting the pipe, the routing path is first marked out – for concealed routing, a channel is chiselled or milled into the wall; for underfloor heating, fixing rails or system boards are laid out on the base before being covered with screed. It's important, even at this stage, to take into account the pipe's bending radius – thanks to shape memory, PEX-AL-PEX holds its shape even after moderate bending, but too sharp a bend can irreversibly damage (kink) the pipe, which is why wider bends or special bending springs are used at corners and when passing around obstacles.
2. Cutting the pipe to the required length. The pipe is cut with special shears for plastic and multilayer pipe so that the cut is perpendicular to the pipe axis – a slanted or uneven cut makes fitting harder and increases the risk of a leak. After cutting, the edge is smoothed and freed of any burrs.
3. Installing fittings and joints. According to the chosen joining method (screwed, press, or welded – see above), a fitting is installed on the end of the pipe. For a press joint, a pressing sleeve is first slid onto the pipe, then the fitting is inserted, and the sleeve is permanently pressed with pliers. For a screwed joint, the union nut and sealing ring are slid on, and the joint is tightened with a wrench to the specified torque – a joint that's either too loose or too tight is not tight.
4. Fixing the pipe. The pipe is fixed to the base along the way with clips or system rails at regular intervals so that it can't move freely with thermal expansion (change in length due to temperature) and cause noise or stress on the joints. When passing through building expansion joints or structures where movement is expected, room is left for the pipe to expand, or a protective sleeve is used.
5. Passages through structures and going around obstacles. When routing pipe through partitions, ceilings, or under other installations, care is taken not to needlessly cross other installations (electrical wiring, ventilation ducts) and to keep a minimum distance from heat sources or an open flame if it's plastic pipe.
6. Connecting to the manifold or main run. Individual circuits (for example for underfloor heating) are connected to a manifold, where each circuit can be individually shut off and regulated. It's precisely at this stage that a smaller pipe diameter on individual circuits is most often combined with a larger diameter on the supply to the manifold.
7. Visual check before covering. Before the pipe is covered with plaster or embedded in screed, a thorough visual check of all joints is carried out – correct tightening, correct pressing, absence of visible pipe deformation. This check precedes the pressure test itself, described in the next chapter.
This procedure applies in its basic form to all common materials; what mainly changes is the joint-making step (soldering instead of pressing or screwing for copper, welding for PP-R) and the fixing method for different diameters.
Pressure testing pipe – why it's done and how it proceeds
The pressure test is the last and also the most important step before the pipe is finally covered by a wall, screed or tiling. Its purpose is to verify that all joints are actually tight and that the pipe as a whole will withstand operating pressure without a leak – that is, to catch any installation error at a time when repair is still simple and cheap.
How the test proceeds in practice: the system is first filled with water and thoroughly bled – air in the pipe would distort the test result (the compressibility of air causes a slower and less sensitive pressure drop, so a smaller leak might not show up at all). After bleeding, the system is pressurised to a test pressure that exceeds normal operating pressure, in order to also verify a margin above normal load. The pressurised system is then left closed for a set test duration, during which it's monitored to see whether the pressure drops – a pressure drop signals a leak, even if it's not visible to the naked eye.
The test always also includes a thorough visual inspection of all joints, fittings, manifolds and connections to existing runs – a drop of water at a joint can be discovered sooner than a pressure drop on the gauge alone would reveal it. For larger or more complex runs, an air test (pressurising with air instead of water) is sometimes also performed, which allows tightness to be tested even before the run is fully connected to the water source, though a water test under operating conditions is always recommended for final verification.
Only after successfully passing the pressure test – that is, once the pressure hasn't dropped during the whole test period and no drop of water has appeared at any joint – can the pipe be finally covered: bricked into the channel, embedded in screed for underfloor heating, or tiled over. If a leak appears, the relevant joint needs to be taken apart (for a screwed joint) or cut out and replaced with a new fitting (for a press joint), and the test repeated after the repair.
For underfloor heating, the pressure test matters even more than for a regular run to radiators – once covered by screed, any intervention is practically impossible without completely breaking up the floor. That's why, for underfloor heating, the test is generally carried out twice: once right after installing the circuits on the manifold, and once again just before the screed is actually poured, once the pipe is finally fixed in place. It's also recommended to keep a written record of the test's course and result (date, test pressure value, duration, result) – in the event of a warranty claim or handover of the work, such a record proves that the run was properly tested before being covered.
Common problems revealed during a pressure test – an untightened screwed joint, an incorrectly pressed sleeve, damaged sealing – and how to prevent them already during installation itself, we describe in more detail in the article Servicing and common problems with pipe.
Insulating pipe after installation
The last phase before final covering or putting the run into operation is insulation. Sleeve-type thermal insulation, usually made of foamed polyethylene, is slipped over the pipe and reduces the heat loss of the run. It matters especially for longer runs of hot water or heating circuit routed through unheated spaces – a cellar or attic – where without insulation, water would noticeably cool down on its way to the fixture.
For cold water runs, insulation serves a different, but equally important purpose – it prevents condensation of moisture on the pipe surface, i.e. so-called sweating, which can damage surrounding structures over the long term.
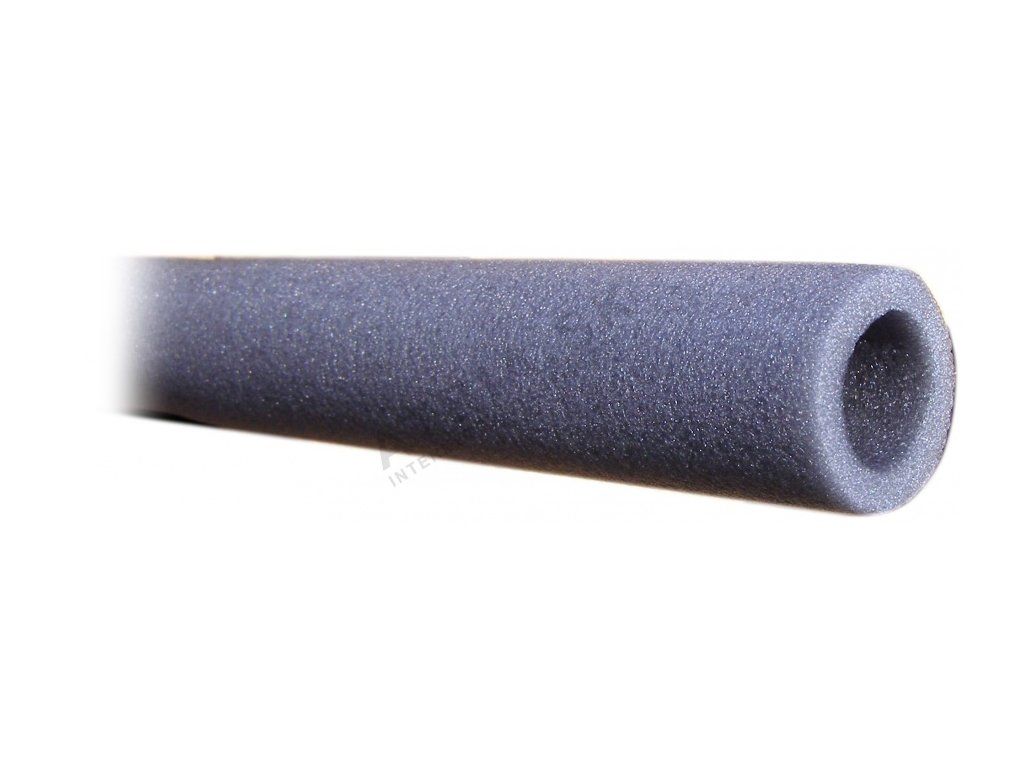
Insulation 22 mm (1/2") / 9 mm
Price: €0.86
Sleeve-type thermal insulation for pipe, wall thickness 9 mm, for pipe with a diameter of 22 mm – slipped directly onto the pipe before it's installed in a channel or covered.
Insulation needs to be slipped onto the pipe before it is finally fixed or embedded – adding insulation afterwards onto pipe already installed and covered is simply not possible. You'll find more on choosing the right insulation thickness according to pipe diameter and space type in the article Pipe insulation – why and how to insulate piping.
Real-world examples
Example 1 – family house, new build with underfloor heating. In a new-build family house, underfloor heating was installed in all living rooms as separate circuits connected to a shared manifold in the utility room. The individual circuits used 16 mm pipe routed in system boards directly on the floor's thermal insulation, while the supply from the boiler to the manifold was handled with a larger diameter due to the combined flow from all circuits at once. After laying out and fixing all the circuits, a pressure test was carried out before the screed was actually poured – the system was pressurised, kept under pressure, and continuously checked to see whether the pressure dropped. Only after a successful result and a written test record did work proceed to pouring the screed. Had the test been skipped and even a minor leak on one of the circuits shown up after the screed was poured, the only solution would have been to break up part of the floor down to the pipe itself – which, with the flooring already finished, means significantly higher costs than the installation itself.
Example 2 – panel-building flat, bathroom and kitchen renovation. During the renovation of an older flat, the original steel pipe, which after years of operation showed signs of internal corrosion, was replaced. In the bathroom, where new tiling was planned, the new run was routed in a channel in the wall, with joints made using the pressing technique for speed of installation and a permanent, non-detachable connection – in an occupied flat, it's important to keep the duration of the work to a minimum. In the service duct, where the run stays accessible, surface-mounted routing with screwed joints was chosen instead, so that a simple servicing intervention would be possible in the future without having to cut into the wall. Before tiling the bathroom – as in the first example – a pressure test of the entire new run was carried out, including the connection to the existing risers. The test revealed a slightly leaking joint at one of the corner fittings, which was fixed before tiling, without any additional intervention into the already finished surfaces.
Frequently asked questions about pipe installation and the pressure test
Does a pressure test always have to be done, even for a small repair?
Yes – even when replacing a short section or a single joint, the same rule applies: tightness needs to be verified before covering or putting the run into normal operation. The scope of the test can be simpler for a small repair, but the principle (pressurising, monitoring, visual check) stays the same.
Can underfloor heating be covered with screed without a pressure test?
Technically yes, but it's not recommended. Once covered with screed, the pipe is practically inaccessible, and any leak will only be revealed by damp patches on the floor or a drop in system pressure – by which time the repair involves breaking up the screed.
An air test is only preliminary; the final verification is always a water test.
What's the difference between a pressure test with water and with air?A water test corresponds to real operating conditions and is the standard method of verifying tightness before putting the run into operation. An air test (pressurising with air) is sometimes used as a preliminary check even before the run is fully connected to the water source, since it doesn't require the system to be fully filled – for final handover of the work, however, a water test is generally also required.
Why is bleeding before the pressure test important during installation?
Air in the pipe is compressible, whereas water practically isn't. If air is left in the system, even with a minor leak the pressure may change slowly and insignificantly, so the problem might not show up in the test at all. Thorough bleeding is therefore a precondition for a reliable test result.
Is there a difference in the installation procedure between PEX-AL-PEX, copper and steel?
The basic sequence of steps (preparing the route, cutting to length, making the joint, fixing, checking, pressure test) stays the same; what mainly changes is the joining technology – pressing or screwing for PEX-AL-PEX, soldering for copper, welding for plastic PP-R pipes. Copper and soldering additionally require work with an open flame, which places higher demands on installer skill and safety during installation.
Why does PEX-AL-PEX pipe have an oxygen barrier, and is it necessary for drinking water distribution too?
The oxygen barrier (aluminium layer) protects mainly a closed heating circuit against corrosion of metal parts caused by diffusion of atmospheric oxygen into the water. For drinking water distribution, which is continuously replaced and isn't part of a closed circuit, this barrier isn't equally critical from a corrosion standpoint, but pipe with a barrier can be used there without any problem too – it's a universal material suitable for both purposes.
How is pipe diameter chosen when combining multiple underfloor heating circuits?
Individual circuits leading into rooms are generally installed at a 16 mm diameter, while the shared supply from the boiler to the manifold, which has to handle the combined flow from all circuits at once, is chosen at a 20–26 mm diameter and above, depending on the number and length of connected circuits.
Does pipe routed in the floor for underfloor heating need insulating too?
The heating circuits themselves in the floor are usually not insulated with sleeve insulation (heat is meant to leave precisely through the floor into the room), but the underside of the floor build-up facing the structure is insulated, as is the supply pipe from the boiler to the manifold, especially if it runs through unheated spaces like a cellar or utility room.
What should I do if the pressure test shows a pressure drop but no visible water leak?
A pressure drop without a visible drop can signal a slow leak in a less accessible spot (for example under insulation or where it passes through a structure), or incomplete bleeding before the test. In such a case, it's recommended to repeat the test after thorough bleeding and to progressively shut off individual sections (if the system allows it), to narrow down the leak location to a specific circuit or joint.
Related topics
- How to choose pipe for water and heating
- PEX-AL-PEX vs. copper vs. steel pipe
- What pipe diameter do I need
- Concealed vs. surface-mounted routing
- Oxygen barrier – why it matters in heating pipe
- Ways of joining pipe – screwed, press, welded
- Pipe insulation – why and how to insulate piping
- Servicing and common problems with pipe
- Frequently asked questions about pipe for water and heating
Have a question about pipe for water or heating?
Not sure what to choose, or dealing with a specific situation in your home? Write to us – we're happy to help.