
Frequently asked questions about pipe for water and heating
Frequently asked questions about pipe for water and heating
Pipe is part of an installation that most households only notice once something stops working – when a weak stream of water flows from the tap, when the radiator at the end of an apartment block barely warms up, or when a damp stain appears under the floor. Yet it's precisely the choice of pipe – material, diameter, routing method and joining method – that decides whether a water and heating run will work reliably for decades, or become a source of repeated problems just a few seasons after installation.
In this article we've gathered the most frequent questions we get from customers about pipe for water and heating – from complete beginners doing their first bathroom renovation, to experienced installers dealing with a specific detail on a job. We'll explain the differences between the main pipe types, how to choose the right diameter, when concealed and when surface-mounted routing makes sense, why the oxygen barrier matters for heating circuits, what joining methods are commonly used today, and why it's worth investing in insulating the pipe itself too.
The article also includes two real-world examples and a clear FAQ section at the end, where you'll find quick answers without having to search through the whole text. If you're not sure which solution is best for your case, you'll also find a contact form at the end of the article – we're happy to give you tailored advice.
What pipe for water and heating is, and what it's for
Pipe for water and heating carries hot or cold water between the source (boiler, water meter) and the individual points of use – radiators, taps, underfloor heating circuits. It's essentially the "circulatory system" of a house: just as blood vessels carry blood from the heart around the whole body, pipe carries water from the source (boiler, water meter, main run) to every room where it's needed – the bathroom, kitchen, living room with radiators, bedroom with underfloor heating.
At first glance it looks like a simple component – a tube that water flows through. In reality, however, the choice of material and diameter affects several important parameters of the whole installation at once:
- Lifespan of the run – quality pipe will comfortably last 30-50 years without major intervention, while poorly chosen or badly installed pipe can start causing problems after just a few years.
- Pressure losses – pipe that's too narrow puts a lot of resistance on the flowing water, showing up as a weak flow at taps and a noisy system.
- Ease of installation – some materials require specialised tools and training (soldering copper, pressing), others can be installed faster and with fewer tool requirements.
- Overall installation cost – the price of the pipe itself is only part of the budget; you also need to add fittings, labour and any special tools.
That's exactly why it pays to give choosing pipe the same attention as choosing a boiler or radiators – ultimately, it's the pipe that holds the whole system together and carries heat or water exactly where you need it. If you're not sure where to start, also read our more detailed guide How to choose pipe for water and heating, which goes through the selection step by step.
PEX-AL-PEX vs. copper vs. steel pipe – what's the difference
Comparison of the three main pipe types for water and heating.
On the market today you'll essentially encounter three main pipe types for water and heating runs. Each has its advantages and limitations, which is exactly why they're commonly combined in practice – for example PEX-AL-PEX for runs in the floor and walls, copper in technical spaces where higher durability is needed.
PEX-AL-PEX (multilayer plastic-aluminium pipe) combines an inner and outer plastic layer with a middle aluminium layer. The aluminium layer serves two important functions – it prevents oxygen diffusion into the water (which is key especially in closed heating circuits, more in the section on the oxygen barrier below), and it also gives the pipe shape memory. This means that when you bend the pipe into the shape needed to go around an obstacle or run along a wall, it holds that shape on its own, without needing extra fixing every centimetre.
Copper pipe is a traditional, proven material. It's very durable against both temperature and pressure, making it a reliable choice even in more demanding conditions. Its disadvantage is a higher price compared to plastic-aluminium alternatives and more demanding installation – soldering copper requires more skill and work with an open flame, which places demands on the installer's experience and on safety measures during installation.
Steel pipe is used today only exceptionally – you'll find it in older installations or industrial applications. Its main risk is a susceptibility to corrosion from the inside, unless proper water treatment is ensured. In a typical family house or flat renovation today, you'll practically never encounter new steel pipe – it's been replaced by more modern, lower-maintenance materials.
For a typical household, PEX-AL-PEX is in the vast majority of cases the most practical choice – it combines a reasonable price, easier installation thanks to shape memory, and built-in protection against oxygen ingress. That's exactly why this pipe is also the best-seller in our range:

PEX-AL-PEX pipe 16 x 2 for heating, underfloor heating and water
Multilayer plastic-aluminium pipe with an oxygen barrier, 16 mm diameter – universal use for water and heating, the most common choice for individual underfloor heating circuits and runs to radiators.
Price: €0.66/m
You'll find a detailed comparison of all three materials, along with recommendations on when to reach for which, in the separate article PEX-AL-PEX vs. copper vs. steel pipe.
What pipe diameter do you need
Pipe diameter is chosen according to the required water flow and the length of the run. It's therefore not one universal number for the whole house – good practice is to combine several diameters according to what function a given section of the run performs.
For underfloor heating and individual circuits, 16 mm is commonly used – this diameter is enough to cover the needs of one room or one smaller circuit and is also easy to work with when laying in the floor (bending into the required shape, loop spacing).
For main riser lines or longer sections with higher flow, 20-26 mm and above is used instead – these thicker diameters can easily serve several circuits at once, or carry a larger volume of water over a longer distance without significant pressure losses.
Why does this actually matter? The choice of diameter has a direct impact on both the comfort and the efficiency of the whole system:
- Pipe that's too narrow causes high pressure losses and noise as the water flows – in practice you'll notice this as a weak stream of water at the tap or audible "whooshing" in walls at higher draw-off.
- Unnecessarily wide pipe increases installation cost (larger diameter = higher price per metre and more expensive fittings) and slows the arrival of hot water, because wider pipe holds a larger volume of water that first needs to be heated/pushed through before genuinely hot water starts flowing at the tap.
The practical rule, then, is: for individual circuits and points of use, choose a smaller diameter (16 mm); for main runs and risers, a larger diameter (20-26 mm and above), depending on how many circuits/points of use a given section supplies. Our range includes PEX-AL-PEX pipe in exactly both of these categories:

PEX-AL-PEX pipe 26 x 3 for heating, underfloor heating and water
Larger 26 mm diameter, suitable for main riser lines with higher flow, where one section of pipe supplies several circuits or points of use at once.
Price: €1.62/m
If you're not sure which diameter you need in your particular case, we recommend reading the more detailed guide What pipe diameter do I need, where the topic is covered in more detail, including with regard to the length of individual sections.
Concealed vs. surface-mounted routing
Another important question when planning a run is whether the pipe will be routed in the wall/floor (concealed), or on the surface (surface-mounted). Both approaches have their place, and the choice depends mainly on the type of space and on what matters more to you – aesthetics, or ease of any future repair.
Concealed routing is pipe embedded in a wall or floor under plaster or screed. The main advantage is aesthetic cleanliness – the pipe isn't visible, and the wall and floor remain smooth and ready for the final surface finish. The disadvantage is that in case of a fault (for example a leaking joint), repair requires breaking open the wall or floor just to reach the pipe at all. That's exactly why, with concealed routing, it's especially worth emphasising joint and material quality – an "on-the-fly" repair here is considerably more complicated and expensive than with a visible run.
Surface-mounted routing, by contrast, is visible, run along the surface of the wall – often in trunking or completely openly. The advantage is easier installation and any repair, since the installer always has free access to the pipe without needing to break anything open. The disadvantage is lower aesthetic value, so this routing method is used mainly in technical spaces – boiler room, cellar, garage – where appearance isn't a priority and quick access for maintenance or servicing is instead valued.
In practice, both approaches are commonly combined within one house: living spaces (living room, bedrooms, bathroom) generally have concealed routing for aesthetic reasons, while in the boiler room or utility room, where the main runs, valves and manifolds are located, the pipe is left visible precisely for easier servicing. You'll find a more detailed comparison of both solutions in the article Concealed vs. surface-mounted routing.
Oxygen barrier – why it matters in heating pipe
The oxygen barrier is a topic that isn't addressed for a typical drinking water run, but is almost essential for heating circuits. It's a layer within the pipe wall – most often an aluminium layer in PEX-AL-PEX pipe, or a special EVOH layer in PE-RT pipes – that prevents atmospheric oxygen from penetrating through the pipe wall into a closed heating circuit.
Why does this matter? Without this barrier, oxygen would gradually diffuse (penetrate) through the pipe wall into the heating water. Oxygen dissolved in the water then causes corrosion of the system's metal parts – of which there are generally quite a few in a heating circuit: the boiler itself, the circulation pump, radiators, and possibly older steel piping too. What's more, corrosion doesn't show up right away – it's a gradual process that only fully shows up after years of operation, once leaks, fouled heat exchangers, or pump failures caused by rust deposits in the system appear.
That's exactly why an oxygen barrier is practically essential for pipe intended for heating (that is, not just for drinking water distribution, but for a closed circuit where water circulates long-term through the same metal components). When choosing pipe for a heating circuit or underfloor heating, you should therefore always check whether the given product has a built-in oxygen barrier – in our range, all products intended for heating have one, for example this pipe specifically designed for underfloor heating:

HEPWORTH pipe for underfloor heating, 16 mm
PE-RT pipe with an oxygen barrier (EVOH layer) specifically designed for underfloor heating – prevents oxygen diffusion into a closed heating circuit.
Price: €1.48/m
If you're dealing with a specific case of corrosion, or aren't sure whether your current pipe has an oxygen barrier, we also recommend our separate article Oxygen barrier – why it matters in heating pipe.
Ways of joining pipe – screwed, press, welded
The three main ways of joining pipe and their properties.
Just as important as choosing the pipe itself is choosing the method by which individual sections and fittings are joined. On the market today you'll commonly encounter three main techniques, each with a different combination of advantages and tool requirements.
Screwed (compression) joints are secured mechanically – with a union nut and a sealing ring. The main advantage of this method is that the joint can be taken apart and reassembled at any time without special tools. You'll especially appreciate this during servicing – if, for example, a valve, manifold or other component needs replacing, you simply take the screwed joint apart, replace the part and screw it back together, without needing to cut the pipe or invest in further tools.
Press joints are created with special pressing pliers that permanently deform a metal sleeve around the pipe and fitting. The advantage is speed of installation on a larger scale – when installing an entire run in a new build or a larger renovation, an experienced installer can complete the installation considerably faster with press joints than by screwing each joint individually. The joint is also permanent (non-detachable), which is an advantage in terms of tightness and reliability, but the disadvantage is the need to invest in pressing tools – this pays off especially for companies that install regularly, less so for a one-off DIY job.
Welding is used mainly with plastic PP-R pipes and joins the pipe and fitting by melting the material. The result is a homogeneous, permanent joint – the pipe and fitting literally become one piece of material with no mechanical element between them. This method is common for both cold and hot water distribution and is valued especially for its reliability and the absence of any mechanical parts that could loosen over time.
The choice between these three approaches depends on the type of pipe you're using, the scope of the installation, and whether you anticipate future servicing on the given section (where a screwed joint pays off) or it's a permanent run where speed of installation and reliability are the priority (where pressing or welding pays off). You'll find more information and recommendations in the article Ways of joining pipe – screwed, press, welded.
Pipe insulation – why and how to insulate piping
The pipe itself is only half the job – the other important part of a quality run is its thermal insulation. Sleeve-type thermal insulation, usually made of foamed polyethylene, is simply slipped over the pipe along its whole length (or on critical sections) and reduces the heat loss of the run.
Why does it matter? Insulation matters especially for longer runs of hot water or heating circuit that are routed through unheated spaces – typically a cellar, attic, or an unheated garage. Without insulation, water would noticeably cool down on its way to the fixture – that means that by the time hot water arrives from the boiler at the tap on the other end of the house, part of the heat is irretrievably lost into the surroundings of the pipe instead of heating the water in the bath or the radiator in the room.
Insulation also matters for cold water runs, though – here it doesn't serve to maintain temperature, but instead prevents condensation of moisture on the pipe surface, that is, so-called "sweating". When cold pipe runs through a warmer and more humid space, airborne moisture condenses on its surface just as a glass with a cold drink sweats in summer. This sweating can over time cause damp stains, mould, or damage to surrounding materials – insulation reliably prevents this phenomenon.
Our range includes insulation in various diameters matched exactly to the diameter of the pipe you want to insulate:
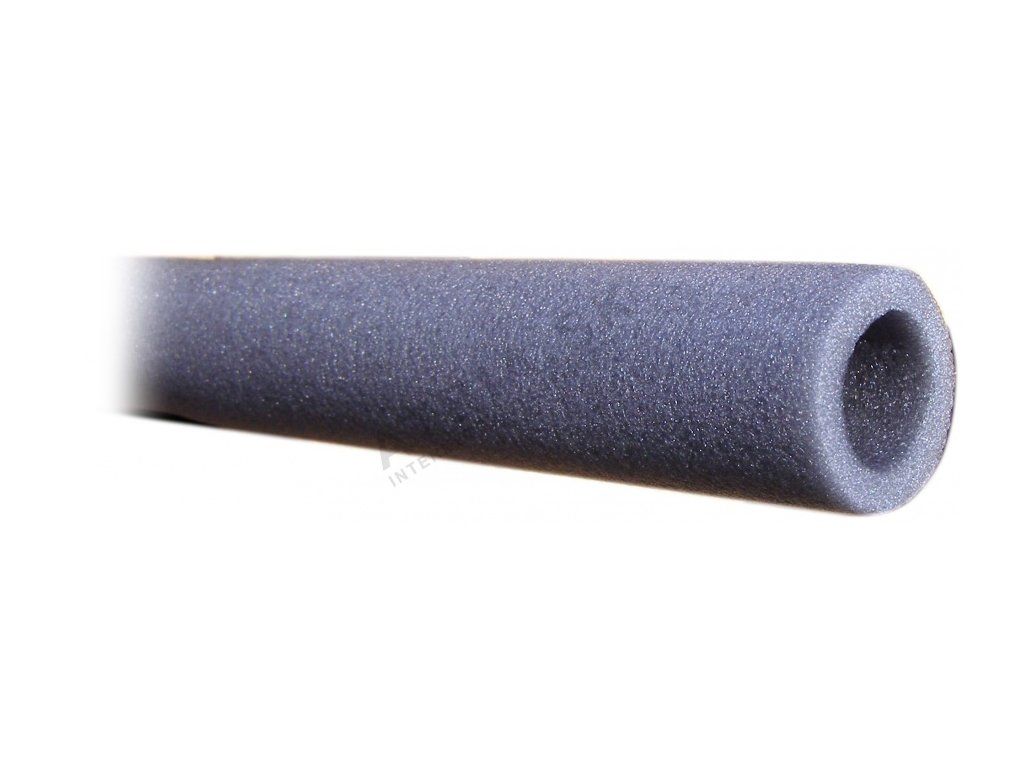
Insulation 22 mm (1/2") / 9 mm
Sleeve-type thermal insulation for pipe, wall thickness 9 mm, for pipe with a diameter of 22 mm – reduces heat loss in the run and prevents condensation of moisture.
Price: €0.86
The investment in pipe insulation generally pays for itself within the first heating season thanks to lower heat losses, while also protecting surrounding structures from moisture. You'll find more on where insulation is most needed and how to apply it correctly in the article Pipe insulation – why and how to insulate piping.
Installation and pressure testing – what not to forget
Regardless of the material, diameter and joining method you choose, quality installation is ultimately what determines whether the run will work without problems for its entire lifespan. Part of the correct procedure is always also a final pressure test – verifying that the whole system is tight and will withstand operating pressure before the pipe is plastered over or embedded in screed.
It's precisely the pressure test that's sometimes underestimated, especially for concealed routing – yet this is exactly where its importance is greatest. When a leak is only discovered after the wall has been plastered or the floor covered with screed, the repair means breaking things open and significantly higher costs than if the problem had been caught during the pressure test before the run was covered. You'll find the detailed step-by-step installation procedure, including recommendations for the pressure test, in the article Pipe installation – procedure and pressure test.
Real-world examples
Sequence of steps for the bathroom renovation with underfloor heating from the example in the article.
Example 1: Family house with underfloor heating and bathroom renovationImagine a family house where the bathroom is being renovated and, at the same time, underfloor heating is being added to two rooms that so far only had radiators. For the underfloor heating circuits themselves in both rooms, 16 mm pipe is used – this diameter is the standard choice for individual circuits, bends nicely into loops at the required spacing, and its shape memory (with the PEX-AL-PEX variant) makes the installer's job easier right on site. Since this is a heating circuit, attention is also paid to the pipe's oxygen barrier – without it, corrosion of the boiler and circulation pump would be a risk over time.
The main run from the boiler room to the manifold, which supplies both new circuits as well as the original radiators, is handled here with a larger diameter (26 mm), since it has to carry a larger volume of water over a longer distance without needless pressure losses. In the bathroom, where the run to the new bath fixture is also being changed, concealed routing is chosen – since it's a living space where aesthetics matter and the pipe shouldn't be visible at all once plastered and tiled. A pressure test of the whole new section is, of course, carried out before tiling the wall, to avoid an unpleasant surprise once the tiling is finished.
Example 2: Panel-building flat with riser replacement and extending the run into the kitchen
Another typical case is a panel-building flat where, during a kitchen renovation, the hot and cold water run needs extending by a few metres to the new position of the kitchen counter, since the kitchen layout is changing compared to the original state. The run in the flat is routed partly in a partition wall (concealed) and partly under the kitchen counter, where it stays accessible (effectively surface-mounted, though hidden behind furniture) – this makes any future servicing easier without having to break open tiling.
Since this is a shorter section to one point of use (the kitchen tap), the standard smaller diameter of pipe is used. The connection to the existing riser in the flat is handled with a screwed connection precisely because, in a panel building, a future need for access to this spot can be expected when the building's riser is eventually replaced – a detachable joint in that case makes the work easier without needing to cut the pipe. The section routed through an unheated space (in this case a short section along the perimeter wall) is additionally fitted with sleeve insulation, to avoid unnecessary cooling of the hot water on its way to the tap, and any sweating on the cold water run.
Frequently asked questions (FAQ)
What type of pipe is best for a typical household?
For most typical applications in a family house or flat, PEX-AL-PEX pipe is the most practical choice – it combines a reasonable price, easier installation thanks to shape memory, and a built-in oxygen barrier that protects the heating system from corrosion. Copper pipe is suitable where higher resistance to temperature and pressure is needed; steel pipe is no longer commonly specified today.
Does pipe for underfloor heating need an oxygen barrier?
Yes. Underfloor heating is a closed heating circuit, where without an oxygen barrier there's a risk of atmospheric oxygen penetrating into the water and subsequent corrosion of the system's metal parts – the boiler, circulation pump and any steel piping. Pipe intended for heating (not just drinking water distribution) should therefore always have an oxygen barrier.
A smaller diameter is enough for one circuit, a larger one for the main run supplying several circuits.
What pipe diameter should I use for an underfloor heating circuit?
For individual underfloor heating circuits, a 16 mm diameter is commonly used. For main runs that supply several circuits at once, a larger diameter (20-26 mm and above) is chosen according to the length of the run and the required flow.
Is concealed or surface-mounted routing better?
It depends on the space and priorities. Concealed routing is aesthetically cleaner, but in case of a fault requires breaking open the wall or floor. Surface-mounted routing is visible, but installation and any repair are simpler – that's why it's used mainly in technical spaces like a boiler room, cellar or garage.
What's the difference between a screwed and a press joint?
A screwed joint can be taken apart and reassembled at any time without special tools, which is advantageous for servicing. A press joint is faster to install on a larger scale and is permanent (non-detachable), but requires investing in pressing pliers.
Do cold water runs need insulating too?
Yes, although for a different reason than hot water. For cold water, insulation prevents condensation of moisture (sweating) on the pipe surface, which could otherwise, over time, cause damp stains or damage to surrounding materials.
Why is a pipe pressure test important?
A pressure test verifies the tightness of the whole run before the pipe is plastered over or embedded in screed. If a leak is only discovered after the run has been covered, the repair means breaking things open and significantly higher costs – so a pressure test should never be skipped.
Can several types of pipe and joining methods be combined in one house?
Yes, and in practice it's common. For example PEX-AL-PEX for runs in the floor and walls, copper in technical spaces, screwed joints in places with anticipated future servicing, and press or welded joints on permanent sections of the run. The choice is adapted to the specific section and its function.
Related topics
- How to choose pipe for water and heating
- PEX-AL-PEX vs. copper vs. steel pipe
- What pipe diameter do I need
- Concealed vs. surface-mounted routing
- Oxygen barrier – why it matters in heating pipe
- Ways of joining pipe – screwed, press, welded
- Pipe insulation – why and how to insulate piping
- Pipe installation – procedure and pressure test
- Servicing and common problems with pipe
Have a question about pipe for water or heating?
Not sure what to choose, or dealing with a specific situation in your home? Write to us – we're happy to help.