
Pipe insulation – why and how to insulate piping
Pipe is the circulatory system of a house – it carries hot and cold water wherever you need it right now: to a radiator in the living room, to a sink in the bathroom, to an underfloor heating circuit under the tiles. As long as the pipe is properly designed, insulated and installed, the whole system works as it should – water arrives at the fixture hot, pressure losses are reasonable, and the run lasts for decades without intervention. The problem arises when one of these steps gets forgotten. One of the most commonly underestimated is precisely the thermal insulation of the piping.
Pipe insulation looks at first glance like a cosmetic detail – a foam sleeve slipped over a pipe that no one sees anyway, since it's hidden in the floor, in a ceiling void, or behind the boiler in the utility room. In reality, it's one of the cheapest and fastest-paying-off steps in the whole water and heating installation. Without it, heat is lost from the run before it reaches the fixture, cold pipe condenses in summer and transitional seasons, and moisture gradually damages the surrounding structures. With insulation, these problems can be avoided for a few euros per metre of run.
In this article we'll explain why pipe insulation pays off, where in the house it matters most, how to choose the right type and thickness, and how such insulation is installed in practice. Since the choice of insulation is closely linked to the material, diameter and routing method of the pipe itself, we'll also touch on these related topics – if you're still just planning your run, we also recommend our article How to choose pipe for water and heating, where you'll find a broader overview before you get to the insulation itself.
What pipe is, and why to think of it as a whole
Pipe for water and heating carries hot or cold water between the source – boiler, water heater, water meter – and the individual points of use, such as radiators, taps or underfloor heating circuits. It sounds simple, but in reality it's a system in which several things are decided at once: what pipe material to choose, what diameter will be sufficient for a given section, how the individual parts will be joined, and finally – how the whole run will be protected against heat loss or condensation.
These decisions influence each other. For example, the pipe diameter determines what insulation thickness will be possible or suitable to use. The routing method (under plaster or on the surface) determines whether the insulation will remain accessible for inspection the whole time, or will be permanently embedded in the structure. That's why it pays to think about insulation already at the run-planning stage, not only afterwards, once the pipe is finished and bricked in.
Choosing insulation follows on from a series of earlier decisions when designing the run.
The choice of run material and diameter also directly affects the pipe's lifespan, pressure losses during water flow, ease of installation and the overall cost of the whole installation. That's exactly why, in the following sections of this article, we'll go through, step by step, the decisions related to insulation – from material, through diameter and routing method, to the insulation itself and its installation.
What material is your pipe made of – PEX-AL-PEX, copper or steel
The pipe material affects the diameter and installation method that the insulation is slipped onto.
Before choosing insulation, it's good to know what type of pipe you'll be insulating – the material affects both the diameter and the surface finish of the pipe that the insulation sleeve is slipped onto. In current water and heating installations, you'll most commonly encounter these three variants.
PEX-AL-PEX, i.e. multilayer plastic-aluminium pipe, combines an inner and outer plastic layer with a middle aluminium layer. The aluminium layer has two important functions – it prevents oxygen diffusion into the water, which is key especially in closed heating circuits, and it gives the pipe shape memory, so after bending it holds the chosen shape without springing back to its original position. Thanks to this, PEX-AL-PEX is conveniently routed even along more complex paths with several bends.
Copper pipe is a traditional solution, very durable against both temperature and pressure. Its disadvantage is the higher price and more demanding installation – joining is done by soldering, which requires skill and work with an open flame, and therefore also extra caution when installing near flammable materials.
Steel pipe is used today only exceptionally, typically in older installations or industrial applications. Without proper water treatment it is prone to corrosion from the inside, so it is practically not used in new water and heating runs in typical households.
You'll find a detailed comparison of all three materials, including advantages and disadvantages for specific uses, in the separate article PEX-AL-PEX vs. copper vs. steel pipe. For a typical home water and heating installation, the most common choice today is precisely PEX-AL-PEX – for example universal pipe with a 16 mm diameter, which can be used both for heating and for water distribution.

PEX-AL-PEX pipe 16 x 2 for heating, underfloor heating and water
Multilayer plastic-aluminium pipe with an oxygen barrier, 16 mm diameter, universal use for water and heating.
Price: €0.66/m
View productWhat pipe diameter do you need
Pipe diameter is chosen according to the required water flow and the length of the run. For underfloor heating and individual circuits, a diameter of 16 mm is commonly used; for main riser lines or longer sections with higher flow, a diameter of 20–26 mm and above is used. The choice isn't arbitrary – pipe that's too narrow causes high pressure losses and noise as the water flows, while unnecessarily wide pipe increases the installation cost and slows the arrival of hot water at the fixture.
Why does diameter matter from an insulation perspective too? Insulation sleeves are manufactured with specific internal diameters matched precisely to a given pipe size – a sleeve made for a 16 mm pipe won't fit a 26 mm pipe and vice versa. That's why it's good to know the exact diameter of your run before buying insulation, so you don't have to place your order twice. You'll find a complete guide to correctly determining the diameter according to the type of section in the article What pipe diameter do I need.
Prices of three common pipe types mentioned in the article, per metre.
For larger diameters, for example on main riser lines with higher flow, pipe with a 26 mm diameter is often used in practice.

PEX-AL-PEX pipe 26 x 3 for heating, underfloor heating and water
Larger 26 mm diameter, suitable for main riser lines with higher water flow.
Price: €1.62/m
View productConcealed or surface-mounted routing – it also affects insulation
Another decision that has a direct effect on insulation is the pipe routing method. Concealed routing is pipe embedded in a wall or floor under plaster or screed. It looks aesthetically clean, since nothing of the run is visible, but in case of a fault – that is, a leak – it requires breaking open the wall or floor just to get to the pipe at all and repair it.
Surface-mounted routing, by contrast, is visible, run along the surface of the wall, often in trunking or completely openly. Installation and any repair are simpler, since the pipe is accessible at any time, but aesthetically it's less suitable for living spaces, so surface-mounted routing is used mainly in technical spaces – the boiler room, cellar or garage.
For insulation, this results in an important difference. With concealed routing, the insulation gets embedded together with the pipe into the structure permanently – once the screed or plaster is closed up, you can no longer get to the insulation without breaking things open, so it's worth doing the installation thoroughly the first time and using a quality sleeve. With surface-mounted routing, typical for example precisely for a boiler room or cellar, the insulation is accessible at any time for inspection or possible replacement, which is an advantage especially for longer runs routed through unheated spaces. You'll find more on the advantages and disadvantages of both routing methods in the article Concealed vs. surface-mounted routing.
Oxygen barrier – protecting your heating circuit
When choosing pipe for heating, alongside material, diameter and routing method, the oxygen barrier matters too. It's a layer within the pipe wall – most often an aluminium layer in PEX-AL-PEX pipe, or a special EVOH layer in PE-RT pipes – that prevents atmospheric oxygen from penetrating through the pipe wall into a closed heating circuit.
Why does this matter? Without an oxygen barrier, oxygen would gradually diffuse through the pipe wall into the heating water and cause corrosion of the system's metal parts – the boiler, circulation pump, radiators and any steel sections of the run. This corrosion takes place slowly and unnoticeably, but over the years it can significantly shorten the lifespan of the more expensive components of the heating system. That's why an oxygen barrier is practically essential for pipe intended for heating – that is, not only for drinking water distribution.
Both PEX-AL-PEX products mentioned above have an oxygen barrier thanks to the middle aluminium layer. PE-RT type pipe, designed specifically for underfloor heating, has it too, with the EVOH layer providing the same protection against oxygen diffusion as the PEX-AL-PEX solution.

HEPWORTH pipe for underfloor heating, 16 mm
PE-RT pipe with an oxygen barrier (EVOH layer), specifically designed for underfloor heating.
Price: €1.48/m
View productYou'll find a more detailed explanation of exactly how the oxygen barrier works and why its absence only shows up in practice after years, in the article Oxygen barrier – why it matters in heating pipe.
Ways of joining pipe
How individual sections of pipe are joined also affects how the insulation around the joints is later installed. In practice, you'll encounter three main joining methods.
Screwed, or compression joints are secured mechanically with a union nut and a sealing ring. The advantage is that such a joint can be taken apart and reassembled at any time without special tools, which is especially appreciated during servicing, when the run needs to be accessed repeatedly.
Press joints are created with special pressing pliers that permanently deform a metal sleeve around the pipe and fitting. The joint is faster to install on a larger scale and is permanent, i.e. non-detachable, but requires investing in pressing tools.
Welding is used mainly with plastic PP-R pipes – it joins the pipe and fitting by melting the material, creating a homogeneous, permanent joint. This method is common for both cold and hot water distribution.
One practical note follows for insulation: at the joint, the pipe is somewhat thicker than the plain tube itself, so it's worth either slightly cutting the insulation sleeve at the joint and wrapping it around the fitting, or using insulation shapes designed specifically for elbows and T-pieces, if available. Incomplete insulation exactly at the joint is one of the most common places where heat escapes the most from the run, since it's the spot most easily forgotten during installation. You'll find a detailed overview of all three joining methods in the article Ways of joining pipe – screwed, press, welded.
Pipe insulation – why and how to insulate piping
Now that we have an overview of material, diameter, routing method and joining, we get to the main topic of the article – pipe insulation itself. Sleeve-type thermal insulation, usually made of foamed polyethylene, is slipped over the pipe like a sleeve and its job is to reduce the heat loss of the run.
Why insulate hot-water and heating runs
Insulation matters especially for longer runs of hot water or heating circuit that are routed through unheated spaces – typically a cellar, attic or unheated garage. Without insulation, water would noticeably cool down on its way to the fixture – hot water from the boiler would cool down over a longer run before it reaches the tap, and heating water heading towards a more distant radiator would give off part of its heat already on the way, instead of delivering it where you actually need it – in the living room.
Sleeve insulation keeps this heat in the run where it belongs. Thanks to it, water arrives at the fixture warmer, and the heating circuit delivers most of its heat where it should – at the radiator or in the floor circuit – not on the way in a cold cellar.
Why insulate cold water too – condensation and sweating
Insulation isn't only worthwhile for hot water and heating. For cold water runs, insulation serves a different, but equally important function – it prevents condensation of moisture on the pipe surface, i.e. so-called sweating. This phenomenon occurs when the cold water in the pipe cools the surface of the tube enough that airborne moisture from the warmer surrounding air condenses on it – similar to how a cold glass sweats in a warm room in summer.
Sweating pipe is not just an aesthetic problem. The drops of water running down it can, over time, damage surrounding structures, cause damp stains on ceilings beneath the pipe, or encourage mould growth in enclosed spaces such as service ducts or ceiling voids. Insulation solves this problem simply – it separates the cold pipe surface from the warmer surrounding air, so sweating doesn't occur.
Where insulation matters most
Insulation pays off most where pipe passes through spaces with a different temperature than the water being carried. This concerns above all:
- runs routed through an unheated cellar or basement,
- runs routed through an attic or unheated roof space,
- sections routed through a garage or other uninsulated technical space,
- main riser lines passing through service ducts between floors,
- cold water runs near hot-water runs or in damper spaces at risk of sweating.
Conversely, for short sections inside heated living rooms, where the air temperature around the pipe is similar to neighbouring spaces, the benefit of insulation is smaller – although it's still worth considering, especially for concealed routing, which you can no longer access once the structure is closed up.
How to choose the thickness and diameter of insulation
Insulation is chosen primarily according to the diameter of the pipe it's to be slipped onto – the internal diameter of the sleeve must match the external diameter of the tube, including any protective layer. That's why it's important to know the exact diameter of your run (see the chapter above) before buying insulation.
Besides the internal diameter, insulation also differs in the wall thickness of the insulating material itself – a thicker wall means better thermal insulation performance, but also a larger overall diameter once fitted, which can be limiting especially in tighter service ducts or wall channels. When choosing thickness, it's therefore worth considering how much space is actually available along the run.
Our range includes, for example, sleeve insulation with a wall thickness of 9 mm, designed for pipe with a diameter of 22 mm (i.e. 1/2") – a common choice for water and heating runs in this diameter range.
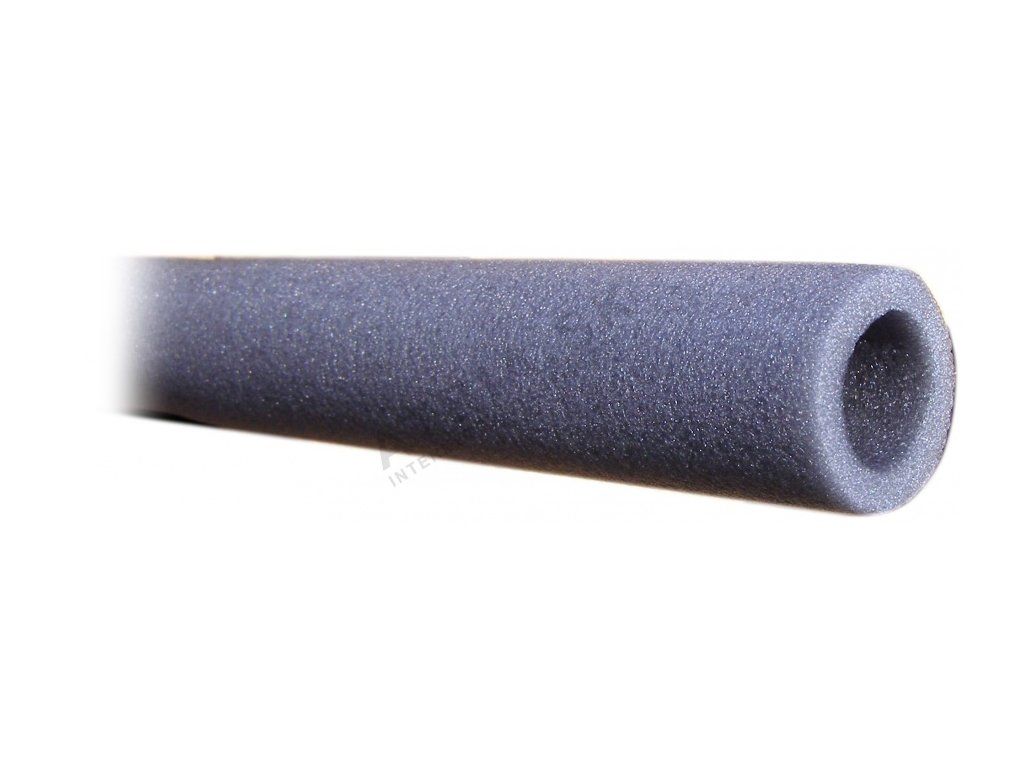
Insulation 22 mm (1/2") / 9 mm
Sleeve-type thermal insulation for pipe, wall thickness 9 mm, for pipe with a diameter of 22 mm.
Price: €0.86
View productInstalling sleeve insulation – a practical procedure
Sleeve insulation is installed simply in practice – in most cases it's a sleeve with a longitudinal slit or cavity, which is slipped directly onto the pipe before it is finally fixed to the wall or embedded in the structure. That's exactly why it's worth planning for insulation already when planning the pipe installation, not only afterwards – on a finished and fixed run, slipping on insulation is considerably more complicated, especially in places with limited access.
During installation, it's important to pay attention especially to joints, elbows and T-pieces, where insulation is most easily interrupted or where the installer simply forgets about it. Continuous insulation without gaps is far more effective than insulation with gaps at every joint – even a small uninsulated gap can significantly increase heat loss at that spot, since heat looks for the path of least resistance precisely through the uninsulated section.
If you're still planning to install pipe, we also recommend our article on the installation procedure including the pressure test – Pipe installation – procedure and pressure test – the pressure test should take place before the run is finally insulated and covered, so that you catch any leak before access to the pipe becomes more complicated.
Real-world examples
Family house with a hot-water run through an unheated cellar. In an older family house, the main hot tap water run led from the water heater in the boiler room through the entire length of an unheated cellar all the way to the riser heading to the upstairs bathrooms. The run was originally not insulated – the pipe was routed on the surface along the cellar ceiling, so it was well accessible. The owner noticed that it took noticeably longer for hot water to reach the upstairs sink than for shorter runs in the house, and at the same time the cellar was warmer in winter than one would expect for an unheated space. Since the pipe was surface-mounted and therefore accessible, adding sleeve insulation could be done afterwards, without breaking anything open – it was enough to cut the sleeves lengthwise, fit them onto the existing pipe, and tape the joints. After insulating, the time for hot water to reach more distant points of use noticeably shortened.
Panel-building flat with sweating cold-water pipe in a service duct. In a ground-floor flat of an apartment building, damp patches kept appearing on the wall around the service duct in the bathroom, shared by several floors. Once the inspection hatch was opened, it turned out that the cause wasn't a leak, but condensation – the cold-water run in the duct wasn't insulated anywhere, and in the warmer, more humid environment of the bathroom (the duct was close to the bathroom's ventilation), regular sweating occurred on the pipe surface. The drops gradually ran down the pipe to the wall of the flat. The solution was to slip sleeve insulation of the matching diameter onto the accessible sections of cold-water pipe in the duct – this separated the pipe surface from the humid air in the duct, and sweating stopped, which also removed the source of the damp stains on the wall.
Frequently asked questions about pipe insulation
Do I need to insulate even short sections of pipe in a heated room?
Not necessarily. Insulation has the greatest benefit where pipe passes through a space with a different temperature than the water it carries – that is, through an unheated cellar, attic, garage, or service duct. For short sections inside a heated room, the effect of insulation is smaller, though for concealed routing it's still worth considering, since you simply can't access the run any more once the structure is closed up.
The same type of insulation protects the run differently for hot and for cold water.
What's the difference between insulation for hot water and for cold water?The principle of the insulating material and the installation are basically the same – it's sleeve insulation made of foamed polyethylene. The difference is in the function: for hot water and heating, insulation reduces heat loss in the run; for cold water, it prevents condensation (sweating) on the pipe surface.
Can insulation be added afterwards to pipe that's already installed?
For surface-mounted (visible) routing, yes – sleeves can generally be cut lengthwise and fitted onto existing pipe without disconnecting it. For concealed routing embedded in a wall or floor, this is no longer possible, so with this type of routing it's worth thinking about insulation before the structure is closed up.
What insulation diameter should I buy?
The internal diameter of the insulation sleeve must match the external diameter of your pipe. If you're not sure what diameter of pipe you have, you'll find the procedure for determining it in the article What pipe diameter do I need.
Does the pipe material (PEX-AL-PEX, copper) affect the choice of insulation?
The insulation sleeve itself works the same regardless of whether it's over PEX-AL-PEX, copper or another pipe – what matters mainly is the outer diameter of the tube. The pipe material is important for a different reason, though – for example copper pipe is joined by soldering with an open flame, which needs to be kept in mind when installing insulation near the joint, fitting the insulation only once the joint is finished and has cooled down.
What happens if I don't insulate the pipe at all?
For hot-water and heating runs routed through unheated spaces, heat will be lost on the way to the fixture – water will arrive at the tap or radiator cooler than if the run were insulated. For cold-water runs in a warmer or more humid environment, there's a risk of condensation and sweating on the pipe surface, which can damage surrounding structures over time.
Do joints and elbows in the pipe need insulating too?
Yes, it's precisely at joints, elbows and T-pieces that insulation is most easily forgotten during installation, even though these are places where heat escapes from an uninsulated section just as it does from a straight length of tube. Continuous insulation without gaps is always more effective than insulation broken at every joint.
Is pipe insulation related to the oxygen barrier?
Not directly – these are two different layers with different functions. The oxygen barrier (for example the aluminium layer in PEX-AL-PEX) is part of the pipe wall itself and prevents oxygen from entering the heating water. Thermal insulation is a separate sleeve added on top of the finished pipe, and its job is to reduce heat loss, or prevent condensation. Both elements matter, but they solve different problems – more on the oxygen barrier in the article Oxygen barrier – why it matters in heating pipe.
If your question isn't among those above, also check the broader list in the article Frequently asked questions about pipe for water and heating, or just write to us directly using the form below.
Related topics
- How to choose pipe for water and heating
- PEX-AL-PEX vs. copper vs. steel pipe
- What pipe diameter do I need
- Concealed vs. surface-mounted routing
- Oxygen barrier – why it matters in heating pipe
- Ways of joining pipe – screwed, press, welded
- Pipe installation – procedure and pressure test
- Servicing and common problems with pipe
- Frequently asked questions about pipe for water and heating
Have a question about pipe for water or heating?
Not sure what to choose, or dealing with a specific situation in your home? Write to us – we're happy to help.