
Radiator installation and replacement
Radiator installation and replacement - a practical step-by-step guide
Replacing an old radiator is one of those maintenance jobs most flat and house owners tick off their list sooner or later. After twenty or thirty years in service, a radiator might not be leaking yet, but it's almost always oversized or undersized for the room's actual needs, doesn't fit the look of the room any more, or is simply nearing the end of its life and rusting from the inside. In this article we'll go through the whole process - from deciding it's time to replace it, through the actual removal and installation, to filling and bleeding the system. We'll also explain the differences between side and bottom connections, the most common mistakes made during installation, and when it's worth calling a professional instead of doing it yourself.
An important note right at the start: replacing a radiator means working on a heating system that is under pressure and contains hot water. If you don't have basic practical skills and experience working on plumbing, leave part of the process (especially work on the main pipework and the first fill of the whole system) to a heating engineer. This article is here so you know exactly what's happening and what you can do yourself, not as an invitation to experiment with an open heating circuit with no basic skills at all.
When it's time to replace a radiator
Not every old radiator automatically needs replacing. The decision should be based on a few specific signs, not just age:
- The radiator is rusting or leaking water - internal corrosion is common especially in cast-iron and old steel radiators from the 1980s and 90s. If rusty water keeps appearing when bleeding, even after several cycles, the material is breaking down from the inside.
- The radiator doesn't heat evenly - hot at the top, cold at the bottom, which can signal sludge build-up, but in older bodies also progressing corrosion of the internal channels.
- Insufficient output - if you've insulated the house, or conversely replaced windows with less airtight ones, the room's heat demand has changed and the original radiator no longer matches the room's new heat output needs.
- Renovating a bathroom or living room - often the reason for replacement is aesthetics, not technical condition. A low, flat panel radiator fits better under a window than a tall sectional one.
- Changing the connection type - when switching from a classic side connection to a bottom connection (popular with underfloor convectors and modern designer radiators), the body itself usually changes too.
For a detailed guide on how to choose the type and size of a new radiator, see the separate article How to choose a radiator - type and size. Here we'll focus mainly on the installation itself, but since choosing the output is closely tied to what you'll be installing, we'll look at that part too.
What output to choose when replacing
As a rough guide, older, poorly insulated flats and houses need around 50-60 W of heat output per square metre of floor area, while insulated new builds with good windows manage with 35-45 W/m². These figures are just a rough estimate for preliminary orientation - the exact heat output for a room is calculated from heat losses (wall and window area, orientation, thickness and type of insulation), ideally through a proper thermal calculation, or at least a calculator, which you'll find in the Calculations and Calculators section.
In practice, this looks like: a room with a floor area of 12 m² in an older, poorly insulated house needs roughly 600-700 W, a 16 m² room around 800-900 W, and a 20 m² room around 1000-1100 W. This is a upper-end estimate for less-insulated buildings - in an insulated house, these figures can easily be 20-30% lower.
When comparing specific radiators, it's therefore good to look directly at the stated output in the product data sheet, not just the dimensions. For example, between two type 21K radiators of the same 300 mm height, just an extra 100 mm of length (from 400 mm to 500 mm) increases the output from 298 W to 373 W - roughly 25% more, for a price difference of under 7 euros. That's a good example of why it's worth thinking in watts rather than centimetres when choosing.
 |
Radiator 21K 300 x 400, output 298W - a compact panel radiator suitable under lower windowsills or in smaller rooms, where an output around 300 W is enough. Price from €58.79. |
 |
Radiator 21K 300 x 500, output 373W - a slightly longer variant with a 373 W output, an ideal replacement for an oversized old cast-iron radiator in a medium-sized room. Price from €65.56. |
Tools and preparation before installation
Before you start unscrewing anything, get everything you need ready - having to run to the shop mid-way with a drained system isn't pleasant. You'll need:
- a container or bucket and rags to catch water while draining,
- an adjustable (or two open-ended) wrench of a suitable size for undoing the union nuts,
- PTFE tape or hemp thread sealant with paste for sealing threads,
- a spirit level for precisely fitting the new brackets,
- a drill with suitable bits (for masonry, plasterboard or a partition wall - depending on the wall type),
- an adjustable spanner or a special key for the bleed valve,
- a new thermostatic valve and head, if you're replacing them along with the radiator,
- and possibly reducers or adapters, if the connection spacing differs from the old radiator.
If you're only replacing the body itself and keeping the original spacing and connection type, part of the job is much simpler - you don't need to drill new holes in the wall, just move the brackets or fine-tune their height. If, on the other hand, you're switching from side to bottom connection, or changing the spacing, expect additional work on the pipework under the plaster or in the floor.
Step-by-step radiator replacement procedure
The replacement itself can be broken down into six main steps. It's important to follow the order, since skipping a step (for example filling without bleeding) can leave air bubbles in the system and a radiator that doesn't heat properly.
1. Drain water from the radiator's circuit
On most radiators you can drain just that one circuit using the shut-off valves on the inlet and return - if the radiator has them and they work, you don't need to drain the whole system. If shut-off valves are missing or seized, you need to drain the whole heating circuit via the drain cock at the boiler or at the lowest point of the system. Before draining, make sure the system isn't under pressure from a running circulation pump - the boiler or the main shut-off should be switched off.
2. Removing the old radiator
Once the water is drained, undo the union nuts on the valve and the return, holding the valve body with a second wrench so you don't twist it and damage the thread in the wall. Then carefully lift the radiator off the brackets - older cast-iron bodies can weigh several dozen kilograms, so for larger radiators plan on having a second person help.
3. Preparing and fitting the new brackets
If the new radiator has a different height, depth or bracket spacing than the old one, new brackets need to be fitted. Always measure with a spirit level - a radiator hung unevenly not only bleeds badly (air doesn't collect exactly at the bleed valve), it also looks poor, especially with designer and bathroom radiators.
4. Hanging the new radiator
Hang the radiator on the brackets and check that it sits evenly on all the mounting points. For heavier radiators (cast-iron or large multi-panel ones), it's worth sizing the brackets with a margin - manufacturers usually state a maximum load capacity per unit.
5. Fitting the valve, head and reducers
Now comes sealing the threads with PTFE tape or hemp with paste, fitting the thermostatic valve on the inlet and the shut-off (or also thermostatic, if it's a dual-regulation type) valve on the return. The thermostatic head is then fitted onto the valve.
6. Filling the system and bleeding
Finally, the circuit is slowly filled with water while the radiator's bleed valve is kept open, until a steady stream of water without air bubbles starts flowing out of it. The system pressure is then checked (on the boiler gauge), along with the tightness of all the new joints - especially during the first few hours after filling, when any leak is most likely to show up.
Side vs. bottom connection - what it means for installation
How the radiator connects to the pipework fundamentally affects which components you'll need for the replacement and how demanding the installation will be. With a classic side connection, both pipes (inlet and return) come from one side of the radiator, usually from below or the side, and most older flats and houses in Slovakia are connected this way. With a bottom connection, both pipes come straight up from the ground or floor under the centre of the radiator, which is typical of newer designer radiators and installations where the pipework runs in the floor.
When switching from one connection type to the other during a replacement, expect extra work on the pipework itself, not just the radiator - and that's work most home DIYers don't take on themselves, since it involves breaking into the floor or plaster and connecting to existing pipework. We cover the differences in more detail, including which type suits which rooms, in the article Side vs. bottom radiator connection.
Choosing a valve and thermostatic head
When replacing a radiator, it's also worth considering replacing the valve and head, especially if they're more than 15-20 years old - the valve's internal mechanism loses control precision over time, and the head may have an inaccurate or completely non-functional temperature sensor. A common solution for a side connection is an angled dual-regulation valve, which allows fine flow adjustment during the initial system balancing (so-called hydraulic balancing) and also serves as a shut-off element for future maintenance.
 |
Thermostatic dual-regulation valve - 1/2"xEK; angled - a typical choice when replacing the valve along with the radiator on a side connection, allowing precise hydraulic balancing of the whole system. Price from €14.27. |
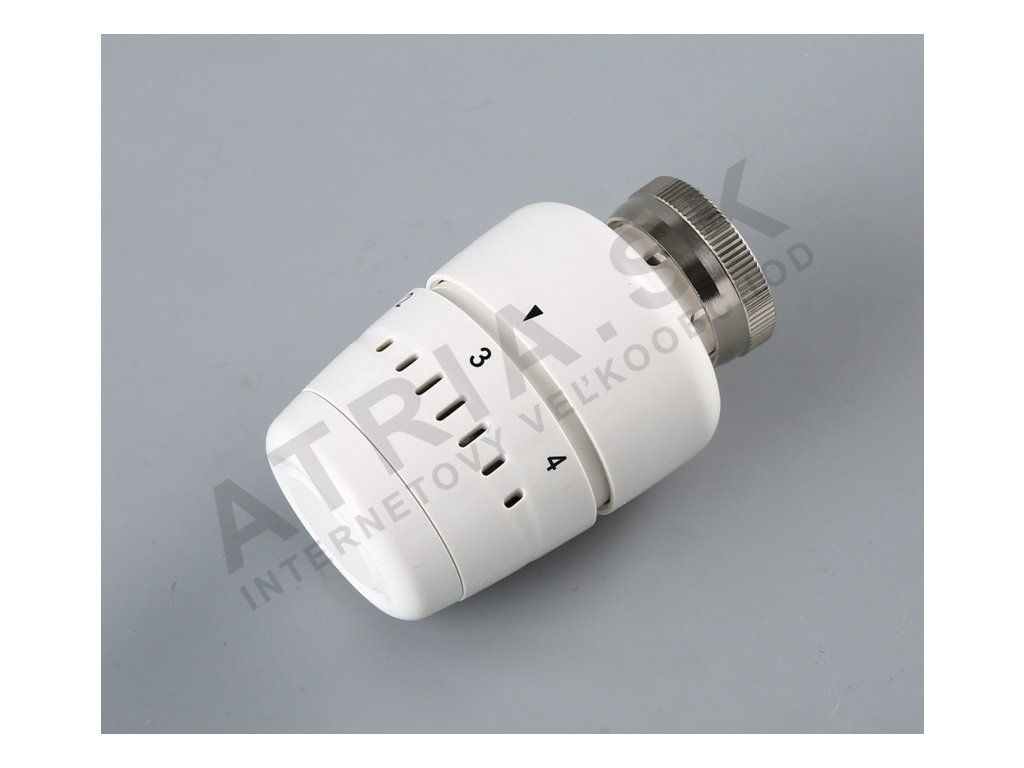 |
Large thermostatic head - lacquered - a replacement for an old, imprecisely regulating head; the lacquered finish also suits more representative rooms. Price from €8.49. |
For bigger renovations, where the pipework itself is also changing, or where a height difference between the original pipework and the new radiator needs compensating, a control set with a straight or angled connection is handy too - it allows fine adjustment of the connection position without having to break into the wall or floor again.
 |
HPW Set1 control set - helps compensate for a small height or position difference between the old and new radiator connection without working on the pipework. Price from €27.94. |
You can find more about the differences between classic, smart and other types of heads in the article Thermostatic heads and smart control.
How much a radiator replacement costs - DIY vs. professional installation
It's worth comparing two routes in terms of price: buying the materials and fitting the radiator yourself, or ordering a full installation from a heating company. For a model example of one 21K 300x500 (373 W) radiator with a new dual-regulation valve and a lacquered head, the comparison looks like this:
- Materials (radiator + valve + head): €65.56 + €14.27 + €8.49 = approximately €88.3, plus small fittings and sealant (PTFE, hemp - a few euros extra).
- DIY installation: add only your time to the material cost - roughly 2 to 4 hours for a first attempt with one radiator, including draining and filling the circuit.
- Professional installation: add the heating engineer's labour to the same material cost, which in Slovakia typically runs from €35 to €60 per radiator for a straightforward replacement in the same connection position (the price varies by region and how difficult access is).
The difference between the two options for a single radiator therefore works out to roughly €35-60, which isn't a huge sum for a one-off replacement of a single unit. When replacing several radiators at once (for example a whole flat, 5-8 units), the savings from DIY installation can add up to hundreds of euros - but you also need the matching skill and time for that, since the risk of a mistake (a leaking joint, a poorly regulated system) grows with the number of units.
The most common radiator installation mistakes
A handful of the same mistakes keep recurring in practice, and they're all easy to avoid:
- Insufficient thread sealing - too little PTFE tape or hemp with paste leads to a slow, hard-to-spot leak that only shows up after a few days as a damp patch under the radiator.
- Overtightening the union nut - tightening it too hard can damage the seal or even crack the valve's plastic insert, especially on cheaper or older valves.
- Forgetting to bleed - if the system is filled without bleeding gradually, an air bubble is left in the radiator and the body only heats partially (typically cold at the bottom, lukewarm at the top, or vice versa).
- Hanging it unevenly - a radiator hung out of level bleeds worse, because air doesn't collect exactly at the bleed valve but spreads out along the top edge of the body.
- Wrong valve orientation - on some types (especially dual-regulation ones), the direction of flow matters, usually marked with an arrow directly on the valve body. Fitting it the wrong way round worsens control.
- Underestimating bracket load capacity - especially when switching from a lighter panel radiator to a heavier one (for example cast-iron or a large bathroom towel rail), you need brackets with a higher load capacity, not just reusing the original ones.
If one of these mistakes occurs, it usually isn't visible right away - symptoms like a cold radiator after filling, dripping at the valve or uneven heat only show up after a few days of operation. For a detailed guide on dealing with a radiator that isn't heating or heats unevenly, see the article Radiator not heating or heating unevenly, and the full procedure for correct bleeding in the article Bleeding a radiator - when and how.
When it's better to leave installation to a professional
DIY installation makes sense when you're replacing a radiator with the same connection type, in the same location, and you have at least basic experience working on plumbing. We recommend calling a professional in these cases:
- You're changing the connection type or position (for example from side to bottom) and work on the pipework in the floor or wall is needed.
- It's a shared riser system in a multi-flat building, where draining and filling also affects neighbours and needs coordinating with the building manager.
- The system has more complex controls (for example weather-compensated control linked to several circuits) and after the replacement the whole system needs re-balancing and re-regulating.
- It's a condensing boiler with precisely set pressure, and you want to be sure the system stays in order after the work, including in terms of the boiler manufacturer's warranty conditions.
- You simply don't have the time, tools or inclination to deal with a possible leak or problem yourself - in that case, €35-60 for installing one radiator quickly pays for itself as insurance against bigger damage to the floor or plaster.
Summary
Replacing a single radiator while keeping the same connection type and location is manageable as a DIY job with ordinary household tools, knowledge of the draining, removal, installation procedure and, above all, thorough bleeding. When changing connection type, working on shared risers, or dealing with more complex controls, it's worth bringing in a professional - the difference in installation cost (typically €35-60 per unit) is negligible compared to the risk of a leak or a poorly balanced system. When choosing a new radiator, it's worth thinking in terms of output in watts rather than just dimensions, and also considering replacing the valve and head if they're older than 15 years.
Frequently Asked Questions
Do I have to drain the whole heating system to replace one radiator?
Not always. If the radiator has working shut-off valves on both the inlet and return, it's enough to close off just that circuit and drain the water from that radiator. If the valves are missing, rusted solid or not working, the whole circuit needs draining via the drain cock at the boiler or at the lowest point of the system.
Can a radiator be replaced without draining water, just with the valves closed?
Yes, if the shut-off valves are in good working order, closing them leaves only a limited amount of water in the radiator itself, which is enough to drain via the bleed valve and catch in a small container when disconnecting it. The rest of the system (other radiators, the boiler) stays under pressure and doesn't need to be touched.
How do I know a radiator is properly bled after replacement?
Opening the bleed valve should produce a steady stream of water from the radiator with no bubbles or hissing. If the radiator still doesn't heat evenly across its whole surface after what seemed like proper bleeding, the process needs repeating, or you should check whether the radiator is hung exactly level.
Is it worth replacing the valve and head along with the radiator?
If they're older than 15-20 years, yes - the valve mechanism loses precision over time and the head may sense temperature inaccurately, resulting in unnecessarily high consumption or uneven heating. Replacing them at this point is cheaper than a separate job later.
Is there a difference in difficulty between installing a side-connected and a bottom-connected radiator?
Yes, a significant one. Keeping a side connection mostly involves work with the valves and brackets, without touching the wall or floor. Switching to a bottom connection or changing the spacing requires work on the pipework, which usually already calls for a professional.
How long does replacing one radiator take as a DIY job?
For a first attempt with one radiator, including draining the circuit, removal, installation and filling with bleeding, plan on roughly 2 to 4 hours. An experienced heating engineer typically manages the same job in 45 to 90 minutes.
Related topics
- How to choose a radiator - type and size
- What radiator output do I need
- Side vs. bottom radiator connection
- Bleeding a radiator - when and how
- Radiator not heating or heating unevenly
- Thermostatic heads and smart control
Back to the main category: Radiators
Have a question about replacing a radiator?
Dealing with a specific radiator replacement and not sure about the procedure or the right output to choose? Write to us - we're happy to help.