
Installing and Wiring a Room Thermostat
Buying the right room thermostat is only half the job — the other, equally important half is installing and wiring it. Even the best-quality WiFi thermostat with lots of features won't work as it should if it's badly placed on the wall, incorrectly connected to the boiler's controller, or set up without regard to the type of heat source. In practice, we see customers invest in a more expensive controller, but because the installation was done without knowledge of the basic rules, the resulting comfort and savings fall far short of expectations.
In this article we'll look at how a thermostat is physically wired — the difference between a wired and a wireless solution, how wiring an original controller from the boiler manufacturer differs from a universal thermostat, and what you need to know when combining it with weather-compensated control, zone heating, or HDO with electric boilers. It also includes two real-life examples and an overview of the most common mistakes that can render the installation completely non-functional.
The article is aimed primarily at DIY enthusiasts and anyone who wants to know what to expect before ordering an installation from a service technician, as well as those who want to install the thermostat themselves (for wired connections directly into the boiler's controller, however, we always recommend calling in a professional, since incorrect wiring can cause a boiler fault or void the warranty).
What a room thermostat is and why installation matters
A room thermostat measures the temperature in a room and, according to the set value, switches the heat source — boiler, heat pump or electric heating unit — on or off (or modulates its output). Without a thermostat, the boiler would heat continuously at full output regardless of the actual room temperature, which leads to overheating and needlessly high energy consumption.
Incorrect placement distorts the measured temperature and reduces both comfort and savings.
This is exactly why it's worth paying attention to installation. A thermostat placed in the wrong spot — for example on a cold outside wall, in a draught near a door, above a radiator, or somewhere the sun shines in during the day — will measure a distorted temperature. The result is that the boiler switches off before the whole room is actually warm, or conversely heats longer than necessary because the sensor is cooler than the rest of the space. The recommended position is on an interior wall, at a height of roughly 1.2 to 1.5 metres above the floor, away from direct sunlight, away from doors and windows, and at a sufficient distance from heating elements and from electrical appliances that radiate heat (TV, fridge).
The second aspect of installation is electrical — correctly wiring it to the boiler's controller. Here the paths diverge depending on whether it's a wired or wireless thermostat, and on whether it's an original controller from the boiler manufacturer or a universal thermostat. We cover both topics in the following sections.
Wired vs. wireless wiring — differences during installation
A wired (cabled) thermostat connects to the boiler's controller with a two-core wire. It's reliable, without batteries, but requires running a cable from the thermostat to the boiler, which is problematic when renovating a flat without a pre-prepared route — it often means cutting a channel into the wall, running the cable under the floor, or using a visible cable trunking.
A wireless thermostat communicates with the receiver at the boiler via a radio signal, usually on a frequency of 868 MHz. Installation is faster and without breaking into walls — you just need to mount the transmitting unit on the wall (or simply set it on a stand) and connect the receiver at the boiler. The disadvantage is that the transmitter needs batteries, which need to be replaced occasionally, and in densely built-up spaces (flats with many WiFi networks, other radio devices) the signal can be more sensitive to interference than with a wired connection.
When deciding between the two variants, it's worth considering whether it's a new build (where the cable can be planned already during the shell construction) or a renovation of a flat or house, where a wireless solution is often the only practically feasible one without disturbing the plaster. You'll find a more detailed comparison of both types in the article Wired vs. wireless thermostat.
An example of a simple wired solution is the manual thermostat Avansa TH1 — it connects with exactly the two-core wire mentioned above, directly into the boiler controller's terminal block:
 |
Simple manual (mechanical) room thermostat with a rotary dial. Connects with a two-core wire directly into the boiler controller's terminal block, with no need for battery power. Price: €10.61 |
If, on the other hand, you prefer a wireless solution with programming by day and hour, a suitable example is the Avansa 2007 TX, where the transmitter and receiver are supplied together and cabling doesn't need to be dealt with at all:
 |
Wireless programmable thermostat — transmitter and receiver without the need for cabling between the room and the boiler. Suitable especially for renovations where no cable route is prepared. Price: €56.31 |
Step by step: installing a wired thermostat
Six steps for safely installing a wired thermostat to the boiler's controller.
When installing a wired thermostat, the basic rule is to first disconnect the boiler from the power supply — work on the controller's terminal block is never done while it's live. After disconnecting, the following steps follow:
- Choose a suitable spot on the wall according to the principles described above (interior wall, away from draughts, sunlight and heating elements, height roughly 1.2–1.5 m).
- Fit the thermostat's mounting plate on the wall, ideally into an installation box or directly on the surface if using cable trunking.
- Run the two-core wire from the thermostat location to the boiler — either in a wall channel, under the floor trim, or in visible cable trunking if that's how it's routed.
- Connect the wire into the boiler controller's terminal block exactly according to the wiring diagram of the given boiler manufacturer (the terminals intended for a room thermostat are usually marked and described in the boiler's manual).
- Fit the thermostat onto the mounting plate and switch the boiler's power back on.
- Test that it works — set the thermostat to a temperature higher than the current room temperature and verify that the boiler starts heating; then lower the setting below the current temperature and verify that the boiler stops heating.
If you're not sure exactly where on the boiler's controller the terminal block for the room thermostat is located, or which wiring diagram your boiler requires, we recommend calling in a service technician — incorrectly connecting the terminals can, in the worst case, damage the boiler's control electronics.
Step by step: installing a wireless thermostat
A wireless thermostat consists of two parts — the transmitter (the thermostat itself, which hangs on the wall or stands on a base in the room) and the receiver, which connects to the boiler. Since no cable runs between them and instead they communicate via a radio signal on a frequency of 868 MHz, installation is simpler:
- The receiver connects to the boiler the same way as a wired thermostat — with two wires into the controller's terminal block — with the difference that the receiver is usually placed right next to the boiler or close to it, so the length of cabling is minimal.
- The transmitter (thermostat) is placed in the living space at the chosen spot — either mounted on the wall using a mounting plate, or simply set on a table/shelf for models with a free-standing base.
- Batteries are inserted into the transmitter according to the type specified in the manual.
- The transmitter and receiver need to be paired — the pairing procedure (usually pressing a button on both units, or automatic recognition on first power-up) can be found in the manual for the specific model.
- After pairing, test the signal range from the location where the thermostat will be permanently placed — in densely built-up apartment buildings with many WiFi networks and other radio devices, the signal can be more sensitive to interference, so it's worth verifying reliable switching of the heating before finally placing the unit.
The advantage of a wireless solution is that you don't need to cut channels or run a cable through several rooms, which you'll appreciate especially when renovating a flat in a panel building, where routing a cable across a hallway or through a neighbouring room is often not even practically possible.
Thermostat types by control method and their impact on installation
A manual (mechanical) thermostat has only a rotary dial for setting a single target temperature — it's the cheapest, but cannot lower the temperature on its own at night or during the day when you're not at home. From an installation point of view it's the simplest — it's generally a wired connection with two wires and no need for any setup beyond the rotary dial itself.
A programmable (weekly) thermostat lets you set different temperatures for different times of day and days of the week. The typical saving compared to a manual setting is noticeable especially from the temperature drop during the night and while at work. Installation is electrically the same as for the manual type (wired or wireless), but additionally, on first commissioning, you need to set the current time and day and program the weekly temperature schedule according to the manual.
An example of a programmable thermostat with a display is the Euroster Q7:
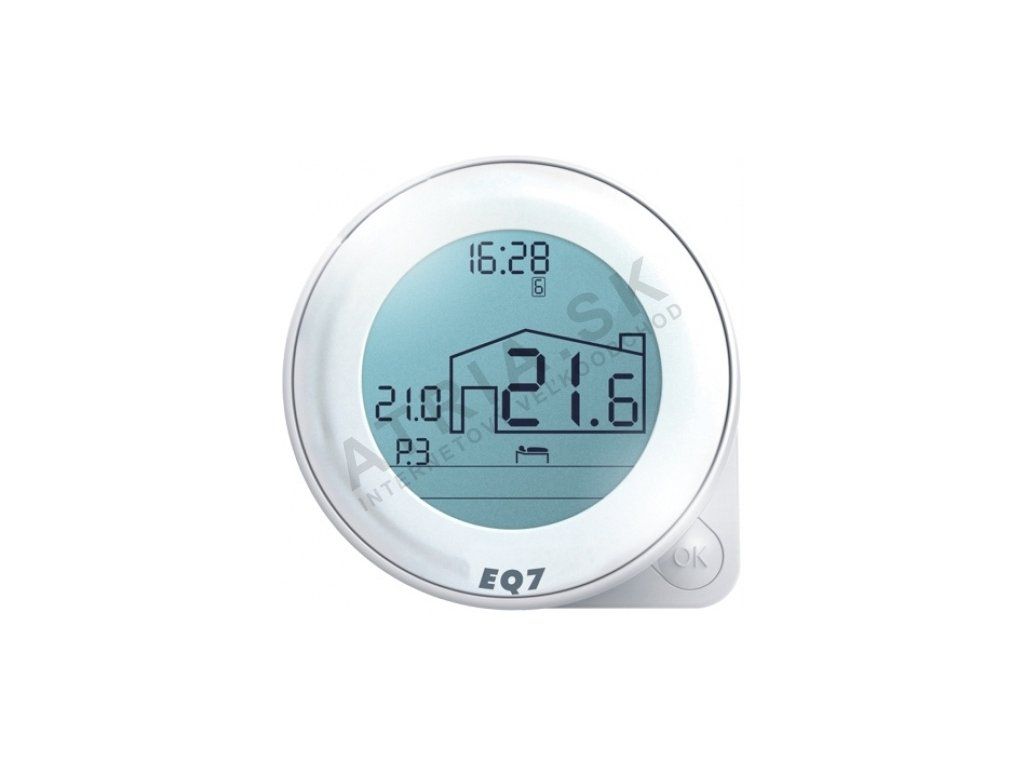 |
Programmable weekly thermostat with a display — lets you set different temperatures for different times of day and days of the week. Wired installation, into the boiler controller's terminal block. Price: €74.29 |
A WiFi/smart thermostat adds remote control and monitoring via a mobile app from anywhere on top of programming. Installing this type adds one more step compared to the previous ones — connecting the receiver (or the thermostat directly, if it's an original controller communicating digitally with the boiler) to the home WiFi network and pairing it with the mobile app via a QR code or activation code given in the manual. You'll find more about the differences between the individual types in the article Manual vs. programmable vs. WiFi thermostat.
Original controller from the boiler manufacturer vs. universal thermostat — wiring differences
This is one of the most important decisions, and it also affects the installation method. An original controller from the boiler manufacturer (for example Bosch Easycontrol, Protherm MiGo, Vaillant eRELAX) communicates with the boiler over a digital bus, for example eBUS or OpenTherm. Thanks to this it can smoothly modulate the boiler's output according to current need, display the boiler's error messages directly on the thermostat's display or in the app, and sometimes also control the compensation curve.
Wiring an original controller happens into specific terminals on the boiler's board intended for the communication bus (eBUS/OpenTherm) — these are different from the simple terminals for a contact thermostat, so it's essential to use exactly the terminals the boiler manufacturer designated for this type of communication. This type of controller is tied to a specific boiler brand (or model line).
Universal thermostats are significantly cheaper; original WiFi controllers offer more features at a higher price.
A universal thermostat (for example Avansa, Euroster, Salus) works more simply — it only closes or opens a circuit (contact), which the boiler evaluates as a "heat" or "don't heat" signal. Wiring is therefore just two-core, with no need to deal with a specific manufacturer's communication protocol. A universal thermostat is cheaper and works with almost any boiler, while an original controller offers smoother control and more features, but only for the given boiler brand.
Examples of original controllers with WiFi functionality:
 |
Original WiFi/smart room controller for Bosch/Junkers boilers. Connects via the communication bus directly to the boiler's board (not a simple two-core contact), controlled via mobile app. Price: €356.68 |
 |
Original WiFi controller for Protherm boilers, controlled via mobile app. As with the Bosch Easycontrol, this is a bus connection, not a simple contact. Price: €222.48 |
Before buying an original controller, it's therefore always important to check whether it's compatible with your boiler's specific model and whether that boiler supports the relevant communication bus. You'll find a detailed comparison of both approaches in the article Original boiler controller vs. universal thermostat.
Wiring with weather-compensated control
Weather-compensated control doesn't control heating only according to room temperature, but mainly according to the outdoor temperature measured by an outdoor sensor. According to a pre-set compensation curve, the boiler calculates on its own what temperature it should heat the heating water to, so the house has a stable temperature regardless of whether it's freezing outside or the weather is milder.
Installing this type of controller adds, on top of a regular room thermostat, an outdoor temperature sensor, which is mounted on the north or northwest side of the house's facade (away from direct sunlight) and connects via a separate wire into the relevant terminal block on the boiler's board, which is separate from the terminal block for the room thermostat. Combining weather-compensated control with a room thermostat, so-called cascade control, gives the most precise and most economical result — the room thermostat in this arrangement fine-tunes small fluctuations (for example solar gain through windows or heat from household appliances), while the compensation curve handles the main trend according to outdoor temperature.
If you're considering combining both systems, we recommend first reading the separate article How weather-compensated control works, where the principle of the compensation curve is explained in more detail.
HDO and thermostat wiring with electric heating
HDO (ripple control) is a signal from the electricity distributor that switches between a high and a low (night) tariff — it mainly concerns electric boilers and storage systems. A thermostat with an HDO input can recognise when the cheaper tariff is active and adjust its behaviour accordingly — for example a lower comfort threshold outside HDO to save energy, and a higher one during HDO, when electricity is cheaper.
When installing a thermostat with an HDO input, besides the usual two-core (or wireless) connection to the boiler's controller, you also need to bring the HDO signal to the thermostat or its receiver — this is usually taken from the HDO relay in the electrical distribution board, where the signal is brought in by the electricity meter or a separate distributor receiver. The connection between the HDO relay and the thermostat needs to be made according to the specific thermostat's wiring diagram — not every model has an HDO input available at all, so it's important to check this feature already when choosing, if you have an electric boiler with a dual-tariff rate.
We write in more detail about how this combination works in the article Ripple control (HDO) and a room thermostat — how they work together.
Zone control — installing multiple thermostats in a house
Zone control divides the house into several independent circuits (zones), each of which has its own thermostat and its own control valve (actuator) on the manifold or radiator. This makes it possible to have 22 °C in the living room and 18 °C in the bedroom at the same time, without having to manually adjust radiator valve heads.
From an installation point of view, this is essentially multiple repetitions of the procedure described above — each zone has its own thermostat (wired or wireless) located in a representative room of that zone, which, instead of a direct link to the boiler, controls the actuator or valve head on that specific zone's manifold. Zone control is commonly combined with underfloor heating, where typically each room has its own loop and its own thermostat controlling an actuator on the manifold — in this case the individual thermostats are connected to a central control unit at the manifold, which then communicates with the boiler.
When installing several thermostats at once, it's worth preparing a clear diagram in advance of which thermostat controls which zone/room, and labelling the cables or wireless units (for example with tags), so that any future servicing doesn't result in mix-ups.
Common mistakes when installing a room thermostat
An overview of the most frequently repeated mistakes when installing a thermostat.
When installing room thermostats, we repeatedly encounter a few typical mistakes:
- Incorrect wall placement — a thermostat mounted above a radiator, in a draught by a door, in direct sunlight, or on an outside (cold) wall measures a distorted temperature, so the boiler ends up heating either too little or too long.
- Swapped terminals on the boiler's controller — especially with a wired connection, it's important to connect the wires exactly to the terminals designated for a room thermostat according to the boiler manufacturer's diagram, not to other similarly labelled terminals.
- Using a universal thermostat where the boiler expects bus communication — with some boilers, when using a simple contact thermostat, you need to explicitly enable operation with a room thermostat in the boiler's settings, otherwise the boiler ignores the controller.
- Underestimating signal range with a wireless solution — thick walls, a large distance between transmitter and receiver, or many other radio devices nearby can cause unreliable heating switching.
- Omitting the outdoor sensor when combined with weather-compensated control — without a correctly placed outdoor sensor, the compensation curve doesn't work as it should.
- Missing programming of the time schedule — with programmable and WiFi thermostats, it happens that after installation only a simple constant mode remains set, so the main advantage this type was bought for goes unused.
If the thermostat behaves unpredictably after installation (the boiler doesn't heat at all, heats continuously, or the thermostat loses connection with the receiver), we recommend first checking exactly these points. We describe further common faults and their solutions in the article Thermostat service and common faults.
Real-life examples
A family house with a gas condensing boiler and a heating system renovation: when replacing an old boiler with a new condensing boiler, the owner of a family house also decided to replace the original mechanical thermostat with an original WiFi controller from the boiler manufacturer. Since the house already had a cable route prepared from an earlier time, from the original thermostat's location in the living room to the boiler in the utility room, the installation was done wired — the only difference from the original wiring was that the new controller connected to the communication bus on the boiler's board, not to simple contact terminals as before. After setting up the WiFi connection and pairing it with the mobile app, the owner could also monitor the boiler's error messages directly on their phone, which wasn't possible before with the simple thermostat.
A flat in a panel building with an old manual thermostat: in a flat with the original manual thermostat and no programming at all, the owner wanted heating to automatically decrease overnight and during working hours, when the flat is empty, without needing to cut a channel in the wall for a new cable (the flat was already completely repainted and redoing the plaster was out of the question). The solution was replacing it with a wireless programmable thermostat — the transmitter was placed in the same spot on the wall where the original manual thermostat had hung (no new cable needed), and the receiver was simply connected with two wires right at the boiler in the kitchen alcove, where the original thermostat terminals were already available. The signal between the transmitter and receiver worked reliably even though there were two masonry partition walls between them, since the distance within the flat was only a few metres.
Frequently asked questions (FAQ)
Do I need to switch off the boiler when installing a wired thermostat?
Yes. Work on the boiler controller's terminal block is never done while it's live — the boiler always needs to be disconnected from the power supply first.
Can a wireless thermostat be installed without any intervention in the wall at all?
In most cases, yes — the transmitter can either be hung on a simple mounting plate fixed with screws or double-sided tape, or simply set on a table or shelf for models with a free-standing base. There's no need to deal with a cable between the transmitter and the boiler at all, since communication happens via a radio signal.
What's the difference between wiring an original controller and a universal thermostat?
An original controller (for example Bosch Easycontrol, Protherm MiGo, Vaillant eRELAX) connects to the boiler's communication bus, for example eBUS or OpenTherm, and can communicate smoothly with the boiler, including output modulation and error messages. A universal thermostat connects via a simple two-core contact, which the boiler evaluates only as a "heat" or "don't heat" signal.
Can I use a universal thermostat on any boiler?
A universal thermostat is designed to work with almost any boiler that has simple contact terminals for a room thermostat available. An original controller from the boiler manufacturer, on the other hand, only works with boilers of the given brand (or a specific model line) that support the relevant communication bus.
Exactly where on the wall should I install the thermostat?
The recommended position is on an interior wall, at a height of roughly 1.2 to 1.5 metres above the floor, away from direct sunlight, away from doors and windows (draughts), and at a sufficient distance from heating elements and electrical appliances that radiate heat.
How do I find out if my boiler supports an HDO input on the thermostat?
Not every thermostat has an HDO input available — you'll find information on whether a given model supports HDO in the product's technical specification; if you have an electric boiler with a dual-tariff rate, it's worth checking this feature already when choosing the thermostat.
Do I need a separate thermostat for every room with zone control?
Yes, zone control works so that each zone (a room or group of rooms) has its own thermostat and its own control valve or actuator on the manifold or radiator, controlled independently of the other zones.
Is it possible to combine a room thermostat with weather-compensated control?
Yes, this combination is called cascade control and gives the most precise and most economical result — the compensation curve, based on the outdoor sensor, handles the main heating trend, while the room thermostat fine-tunes small fluctuations in the specific room.
What should I do if a wireless thermostat loses connection with the receiver after installation?
First check the distance and obstacles (thick masonry walls) between the transmitter and receiver, and check the battery status in the transmitter. If the problem persists even after these steps, we recommend also going through the other common causes of faults in the article on thermostat service.
Related topics
- How to choose a room thermostat
- Wired vs. wireless thermostat
- Manual vs. programmable vs. WiFi thermostat
- Original boiler controller vs. universal thermostat
- How weather-compensated control works
- Ripple control (HDO) and a room thermostat — how they work together
- Zone heating control
- Thermostat service and common faults
- Frequently asked questions about room thermostats and controllers
Have a question about choosing a room thermostat?
Can't decide, or dealing with a specific situation in your household? Write to us — we're happy to help.