
Solar System Installation - Step by Step
A solar water heating system is an investment where it really pays to know exactly what you are buying and how it will look both on the roof and in the utility room. While most households picture a boiler or a heat pump as a single unit, a solar assembly is always a sum of several components - the collectors on the roof, the tank, the pump station, the control unit and the pipework between them. Each of these components has its own role, and the installation follows a logical sequence that can be broken down into clear steps.
In this article we will go through the installation of a solar system for domestic hot water step by step, in exactly the order it is actually carried out on site: from selecting and mounting the collectors, through the pipework, connecting the tank, fitting the pump station and control unit, all the way to filling the circuit and commissioning it. The goal is for you to understand why each step is done in this particular order and what to watch out for at each stage - whether you hand the installation over to a professional company or simply want to check that it was done correctly.
It is important to say right at the start what a solar system cannot do. It is not a replacement for the main heat source - the boiler or heat pump - but a supplement to it. It can cover most of the hot water demand mainly in the summer months, when there is plenty of sunshine and outdoor temperatures are high. You cannot rely on it alone for space heating in winter or to cover water heating fully all year round. This topic is also covered in a separate article, Solar Heating as a Supplement to a Boiler, where you will find a more detailed comparison with the main heat source.
What a solar water heating system is and what it consists of
A solar water heating system, more precisely a hot-water solar assembly, consists of four basic units. The first are the solar collectors placed on the roof or another sun-exposed surface, which capture solar radiation and heat the heat-transfer fluid - a mix of water and antifreeze that withstands both frost and the high temperatures reached in the circuit. The second unit is the solar tank with a heat exchanger, where heat from the collectors is transferred to the domestic hot water. The third is the pump station, which ensures circulation of the heat-transfer fluid between the collector and the tank, and the fourth is the control unit, which decides, based on measured temperatures, when the pump should run.
These four units are connected by pipework that runs from the collectors on the roof all the way to the utility room, where the tank and the pump station are located. The whole circuit is closed and pressurised, similar to a classic heating circuit, and has its own expansion vessel, which compensates for the volumetric expansion of the fluid at the high temperatures reached at the collector.
It is important to have realistic expectations: a solar system supplements the main heat source, it does not replace it. In practice, this means that in the summer months it can cover a large part, often even most, of a household's domestic hot water demand, but outside the season, when there is less sunshine and lower temperatures, heating must be taken over by the boiler or another heat source connected to the second exchanger in the solar tank. If you are not sure what type of assembly and what tank size would suit your house, the article How to Choose a Solar Water Heating System will help you find your way around.
The main steps of a solar system installation, from choosing the collectors to commissioning.
Step 1: Choosing the collector type - flat or vacuum
The first decision that affects the entire rest of the installation is the choice of collector type. On the market you will commonly find two types - flat and vacuum (tube) collectors - and each has different requirements for mounting, space and budget.
Flat collectors have an absorption surface covered with tempered glass, housed in an insulated aluminium frame. This design makes them mechanically more robust - they withstand hail or mechanical stress during installation better, for example - and at the same time they are more affordable. For ordinary domestic hot water heating in Central European conditions they are usually fully sufficient, and in practice they are the most commonly chosen collector type for family houses.
Vacuum, or tube, collectors work on a different principle - the absorber is enclosed in a vacuum glass tube, which significantly limits heat loss to the surroundings. Thanks to this, they achieve higher efficiency especially at low outdoor temperatures and lower solar radiation intensity, i.e. typically in spring, autumn or on cloudy days. This advantage comes at a price, however - vacuum collectors are more expensive and more fragile, which is also reflected in the demands of installation and any subsequent servicing.
Flat collectors are cheaper and more durable, vacuum collectors achieve higher efficiency at lower temperatures.
The choice between the two types should be based mainly on what seasonal use you expect from the system - purely summer domestic hot water heating, or the longest possible period of the year - and on your available budget. A detailed comparison of both types can be found in the article Flat vs. Vacuum Solar Collectors, where you will also learn about further technical differences.
Step 2: Designing the mounting and installing the collectors on the roof
Once the collector type is chosen, one of the most important installation steps follows - mounting on the roof or another structure. Collectors are anchored using a specialised mounting structure, which is chosen according to the roof type and must exactly match the dimensions of the specific collector model. There is no universal structure that fits everything - that is precisely why mounting kits are always sold as part of a specific collector and roof type combination.
On a pitched roof, the mounting also differs by roofing material - a different anchoring system is used for tiles, another for metal roofing, and another for plain tiles ("bobrovka"). Hooks or brackets are anchored into the roof rafters, not just into the roofing material, so that they can carry the weight of the collector as well as the wind and snow load throughout the entire lifetime of the system.
On a flat roof the situation is different - the collector must be tilted to a suitable angle, because a panel laid flat would not achieve sufficient efficiency and, moreover, water and dirt could remain on it longer. An adjustable tilt of 15° or more is commonly used, with the minimum tilt of around 15° chosen partly for self-cleaning reasons as well - at this angle, rainwater manages to wash dust and dirt off the collector surface, which helps maintain the system's efficiency without the need for frequent manual cleaning. This specific mounting kit is designed exactly for this type of installation:

Mounting kit for collectors on a flat roof up to 15° tilt, for the KS 2100F 1.82m2 collector
A mounting structure for fixing a flat collector directly onto a flat roof, with an adjustable tilt so that the collector works at optimal efficiency and at the same time cleans itself well with rainwater.
Price: €117.34
For mounting on a facade or directly on the ground (for example on a free-standing structure in a garden), a similar principle applies - the structure must be sized for the specific collector type and size, and must also take local climatic loads, i.e. wind and snow, into account. More details about the differences between individual roof types can be found in the article Mounting Collectors - Pitched Roof, Flat Roof, Facade.
Only once the structure is firmly anchored and it has been verified that it can carry the weight and loads throughout the year are the collectors themselves fitted onto it. This step is always done before the pipework, because the exact position of the collector determines where and in which direction the pipe from the collector will run onward to the utility room.
Step 3: Pipework between the collector and the utility room
After the collectors are anchored, one of the most time-consuming steps follows - connecting the collectors to the utility room, where the tank and pump station are located. Two approaches are used in practice for this pipework.
The first is classic copper or stainless steel pipe, which is joined by soldering or press fittings and then additionally insulated with a thermal insulation sleeve resistant to both high temperatures and weather effects. This method is proven and flexible for non-standard routes, but installation takes longer, because the insulation has to be done by hand both on the roof and in the installation shaft.
The second, increasingly popular solution is pre-insulated 2-in-1 flexi pipe, which has both the flow and return pipe built into a single flexible, already thermally insulated jacket. Because the insulation is part of the pipe straight from the factory, installation time is significantly shortened - the installer does not need to insulate the pipe additionally on the roof or in the shaft, they simply pull the pipe through the prepared route and connect it at both ends.
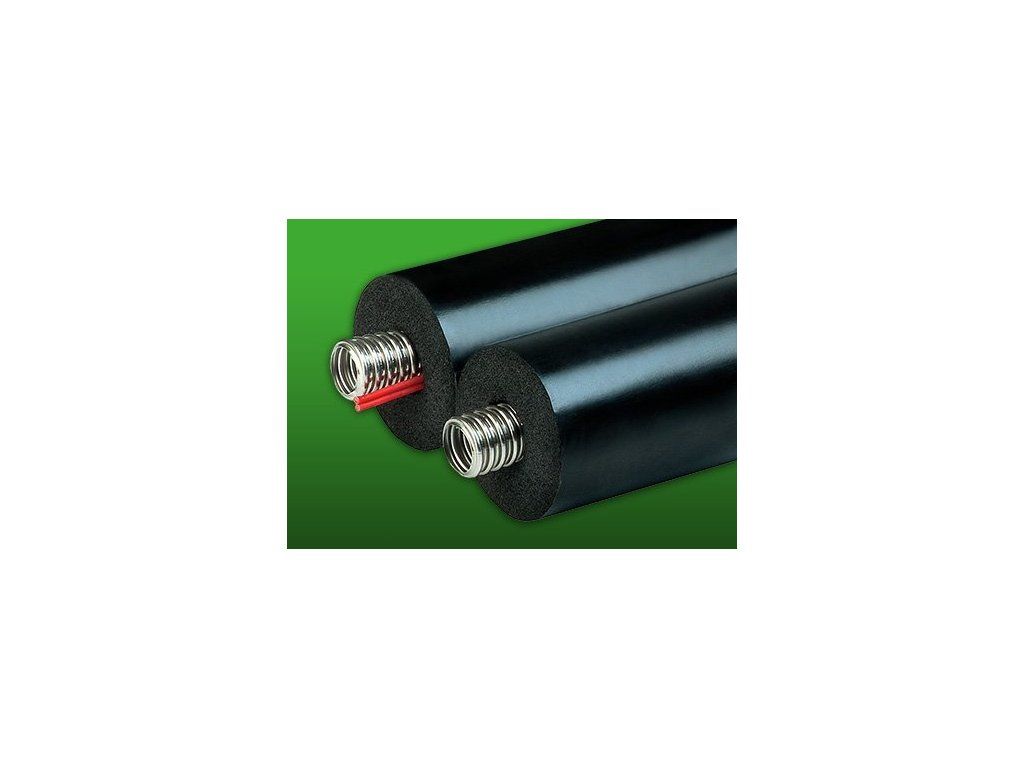
A pre-insulated, flexible double pipe with the flow and return in a single jacket - allows fast installation of the whole run between the roof collector and the utility room without the need for additional on-site insulation.
Price: €308.75
Right at the collector, at the point where the flexi pipe or classic pipe connects to the collector's inlet and outlet, a short section of flexible stainless steel pipe, a so-called corrugated hose, is often used. Thanks to its corrugated structure, this type of pipe is flexible enough to compensate for small amounts of expansion and inaccuracies during installation, while at the same time being resistant to the high temperatures the heat-transfer fluid commonly reaches in the solar collector circuit, especially in the summer months under full sunshine.

Stainless steel pipe, corrugated hose
Flexible stainless steel pipe for the connection between the collector and the tank, resistant to the high temperatures of solar fluid - suitable for short connecting sections right at the collector or at the pump station.
Price: €3.81
Regardless of the pipe type chosen, the route should be as short as possible and with as few bends as possible, because every metre of pipe and every joint represents a potential heat loss and a potential leak point. More detailed technical background on the pipework and how stainless steel corrugated hoses work is covered in the article Solar Pipework and Stainless Steel Corrugated Hoses - How They Work.
Step 4: Connecting the solar tank
While the pipe runs from the roof to the utility room, the tank into which heat from the collectors will be transferred is prepared at the same time. At first glance a solar tank looks like a classic water heater, but it has one key difference - it additionally contains at least one heat exchanger, which is connected precisely to the solar circuit. In most cases the tank also has a second exchanger, intended for supplementary heating from the boiler or another heat source, for times when solar radiation is not enough to reach the required water temperature.
The heating principle is indirect: the heat-transfer fluid from the solar circuit circulates separately, in a closed loop, and never comes into direct contact with the domestic hot water in the tank. Heat is transferred exclusively through the wall of the exchanger. This separation is important both for hygienic reasons (the domestic hot water you subsequently use for bathing or washing does not mix with the antifreeze mixture in the solar circuit) and because it allows the solar circuit to have a different pressure and different operating parameters than the domestic water distribution.
When installing the tank, it is important to correctly connect the lower exchanger to the solar circuit (it is usually positioned lower by design, since the heated fluid from the collector flows from top to bottom through the exchanger) and the upper or second exchanger to the boiler's supplementary heating circuit, if the tank is equipped this way. Swapping the connections would reduce the efficiency of heat transfer and could cause the system not to work as designed. This is exactly why, when choosing and connecting the tank, it is worth following the manufacturer's recommendations for the specific model. The article What Solar Tank Do I Need offers guidance on what type and size of tank to choose based on the number of people in the household and the collector area.
Step 5: Fitting the pump station and the control unit
Once the pipework is laid and the tank is connected, it is time for the heart of the whole control system - the pump station together with the control (solar) unit. The pump station is a compact block that combines the circulation pump, shut-off valves, thermometers or pressure gauges and a safety valve. Because all these components are grouped together in a single block, this significantly simplifies not only the installation itself but also any later servicing - everything needed is in one place, laid out clearly and accessible to a service technician.

A complete pump group - circulation pump, shut-off valves, pressure gauges and a safety valve in a single compact block - for circulating solar fluid between the collector and the tank.
Price: €750.55
The pump station on its own, however, does not know when it should run. This task is handled by the control, or solar, unit, which uses temperature sensors to constantly compare the temperature at the collector with the temperature in the tank. When the collector is warmer than the tank by a pre-set difference (typically a few degrees Celsius), the control unit switches on the circulation pump in the pump station and the heat-transfer fluid starts flowing from the collector into the exchanger in the tank. When the temperature difference drops below the set threshold, for example when the sun sets or the tank has already heated up enough, the pump switches off again.

Solar controller (control unit) for controlling the circulation pump based on the temperature difference between the collector and the tank - evaluates the sensors and decides when the solar fluid circulation should run.
Price: €108.94
When installing this pair of components, it is crucial to place the temperature sensors correctly - one directly at the collector outlet (where the fluid is hottest) and the other in the tank, at the location of the solar exchanger. The wiring between the sensors and the control unit is run alongside the pipework, so it is worth installing it in the same step as the pipework itself, to avoid needlessly reopening routes that have already been closed. More detailed information on exactly how control units and pump groups work together can be found in the article Control Units and Pump Groups of Solar Systems.
Step 6: Filling the circuit, venting and the expansion vessel
The last installation step, before you actually start up the system, is filling and venting the solar circuit. As already mentioned, this is a closed, pressurised system, which structurally has a lot in common with a classic heating circuit - here too its own expansion vessel is essential.
The role of the expansion vessel is to compensate for the volumetric expansion of the heat-transfer fluid. In a solar circuit this expansion is more pronounced than in ordinary heating, because the fluid in the collector can reach very high temperatures during sunny summer days. Without a properly sized expansion vessel, pressure in the circuit would rise uncontrollably when heated, which could lead to the safety valve activating and fluid leaking, or in a worse case to damage to components.
Filling and venting the circuit itself is done through filling valves that are part of the pump station, using a manual or electric filling pump - the principle is similar to filling a heating circuit. The heat-transfer fluid (a mix of water and antifreeze) is pumped into the circuit under pressure, simultaneously pushing out the air that remained in the system after installation. Air in the circuit is undesirable, because it hinders fluid circulation and can cause so-called "air pockets" at the highest points of the pipework, i.e. usually right at the collectors on the roof.
After filling, the system is left running with the pump switched on for a few minutes, and it is continuously checked whether only fluid, and no longer air, is escaping from the venting valves. Only once the circuit is completely vented and the pressure in the system matches the value specified by the manufacturer (this value usually varies depending on the height difference between the collector and the utility room) is the system ready for permanent operation. The complete filling procedure, as well as the most common faults that can occur at this stage or later during operation, are described in the article Servicing, Filling and Common Faults of Solar Systems.
Step 7: Commissioning and what to monitor in the first few days
After filling and venting, a final check of the whole system follows. The tightness of all pipe joints is checked, along with the correct setting of the temperature difference on the control unit (i.e. at what temperature difference between the collector and the tank the pump should switch on and off) and the functionality of the safety valve.
In the first few days of operation it is worth monitoring the system continuously - in particular whether the pump switches on and off at the expected intervals according to sunshine, whether the tank actually reaches the expected water temperature, and whether the pressure in the solar circuit remains stable. A pressure drop in the first weeks after installation can signal a small leak at one of the joints, which may not have shown up when first filled, but it is easier and cheaper to detect and fix it right at the start than to deal with it a few months later.
It is also recommended to record the initial settings of the control unit and the pressure in the circuit, so you have a reference value for any future check or servicing intervention. Solar systems generally do not require demanding regular maintenance, but an approximate annual check of tightness, pressure and the condition of the heat-transfer fluid extends their lifetime and reliability.
Real-world examples
Comparison of two real installations described in the article - an existing house and a new build.
Family house with a pitched roof, existing gas boilerA family house with a south-facing tiled roof and an existing gas boiler, which had until now provided both domestic hot water heating and space heating throughout the year. The owner decided to add two flat collectors on the roof, aiming to reduce gas consumption for water heating especially in the summer months. The installation proceeded in the order matching the steps above: first, a mounting structure matching the roof type and the dimensions of the chosen collectors was fitted onto the rafters under the tiles, then the collectors were installed and connected to the main run with a short section of stainless steel corrugated hose. The run between the roof and the utility room in the basement was handled with pre-insulated 2-in-1 flexi pipe, since the route led through an already finished roof structure and additional on-site insulation of classic pipe would have needlessly extended the installation time. In the utility room, a new solar tank with two exchangers was fitted - one connected to the solar circuit, the other to the existing gas boiler - together with the pump station and control unit. After filling and venting the circuit, the system covered the vast majority of the hot water demand in summer, with the boiler practically never switching on for domestic hot water during that period and serving only as a backup during prolonged cloudy weather.
Family house with a flat roof, new build
A new-build family house with a flat roof, where the solar system was planned already at the design stage together with a heat pump as the main heat source. Since a flat roof requires the collectors to be tilted to a suitable angle, an adjustable mounting structure for flat roofs with a tilt of around 15° was used, which also ensures that the collector surface is naturally cleaned of dust and dirt by rain. Given the shorter route between the roof (the house had only one storey) and the utility room, a combined solution was chosen - the shorter section right at the collectors was handled with stainless steel corrugated hose for easier handling at the final connection to the roof penetration, while the rest of the route used pre-insulated flexi pipe. The tank was designed with an exchanger for the solar circuit as well as an exchanger, or preparation, for a heat pump as a supplementary heat source outside the summer season. Since it was a new build, the wiring for the control unit's sensors was already prepared during the shell construction, which significantly simplified the installation of the pump station and control unit - all that remained was to connect the prepared cables and set the required temperature difference on the control unit.
Approximate prices of selected solar assembly components mentioned in the article.
Frequently asked questions about solar system installation
Can a solar system be added to an existing boiler, or does it only make sense with a new build?
Yes, a solar system is commonly added to an existing boiler without needing to replace the boiler itself. The condition is a suitable solar tank with two exchangers - one for the solar circuit, the other for supplementary heating from the existing boiler - or replacing the original water heater with such a tank, if the house did not have a solar tank before.
Does the pitched roof have to face exactly south for the system to make sense?
Exact south orientation is not a strict requirement, but the closer to a southern orientation and the less the surface is shaded by surrounding buildings or trees during the day, the higher the system's output. On a flat roof, the collector orientation can also be adjusted independently of the roof's own orientation using the mounting structure.
What is the difference between classic pipe and 2-in-1 flexi pipe in terms of installation?
Classic copper or stainless steel pipe has to be additionally insulated on site with a thermal insulation sleeve after joining, which extends installation time, especially on the roof and in shafts. Pre-insulated 2-in-1 flexi pipe already has the flow and return built into a single insulated jacket, so no additional insulation is needed - it just needs to be pulled through the prepared route.
Why is a tilt of at least around 15° used on a flat roof?
This tilt ensures that rainwater can naturally wash dust and dirt off the collector surface (a self-cleaning effect), which helps maintain the collector's efficiency long-term without the need for frequent manual cleaning. At a smaller tilt, or with the collector laid flat, dirt and water could remain on the surface longer.
How does the control unit know when to switch on the pump?
The control unit compares the temperature measured by the sensor at the collector with the temperature measured by the sensor in the solar tank. If the collector is warmer than the tank by a pre-set difference, the unit switches on the circulation pump in the pump station. When the difference drops below the set threshold, the pump switches off.
Why doesn't the solar fluid come into direct contact with the hot water I use?
The solar tank heats the domestic hot water indirectly, through a heat exchanger. The heat-transfer fluid circulates in a closed solar circuit, separately from the domestic hot water, and transfers its heat only through the wall of the exchanger, never mixing with it.
What happens if you forget to vent the solar circuit after installation?
An insufficiently vented circuit can contain air pockets, most often at the highest points of the route near the collectors. These hinder smooth circulation of the heat-transfer fluid, reduce heat transfer efficiency and can also cause pump noise. That is why, after filling the circuit, it is always thoroughly checked whether only fluid, and no longer air, is escaping from the venting valves.
Is an electrical connection needed directly at the collectors on the roof?
No, only the circulation pump in the pump station and the control unit itself, which are located in the utility room, are electrically powered. Only the temperature sensor wiring runs to the collector, not a power electrical supply.
Related topics
- How to Choose a Solar Water Heating System
- Flat vs. Vacuum Solar Collectors
- What Solar Tank Do I Need
- Solar Pipework and Stainless Steel Corrugated Hoses - How They Work
- Control Units and Pump Groups of Solar Systems
- Mounting Collectors - Pitched Roof, Flat Roof, Facade
- Solar Heating as a Supplement to a Boiler
- Servicing, Filling and Common Faults of Solar Systems
- Frequently Asked Questions about Solar Assemblies and Collectors
Do you have a question about solar systems or collectors?
Not sure what to decide, or dealing with a specific situation in your household? Write to us - we're happy to help.