
Collector Mounting – Pitched Roof, Flat Roof, Facade
Collector Mounting – Pitched Roof, Flat Roof, Facade
A solar collector is only as good as its mounting. You can buy the best flat-plate or vacuum tube collector on the market, but if the structure holding it to the roof, facade, or ground doesn't match the roof type, pitch, orientation, and the wind and snow load at the given location, sooner or later it will end in trouble – from reduced output through roof leaks to the collector coming loose in strong wind. That is exactly why, in practice, mounting the collectors gets just as much attention as choosing the collector itself, even though it is "only" a mounting component that gets the least mention in marketing materials.
Overview of the three basic ways to mount solar collectors.
In this article we look at the three basic situations most commonly encountered when installing a solar water heating system: a pitched roof with various types of roofing, a flat roof with adjustable tilt, and finally a facade or open plot of land, where collectors are placed when the roof is unsuitable for some reason. We will explain why the structure must match the exact dimensions of the specific collector type, what tilt angle is optimal and why flat roofs almost always use at least 15°, and how the mounting relates to the rest of the solar assembly – from the pipework and pump station to the controller and system filling.
Let's also recall the broader context at the outset: a solar water heating system (a hot-water solar assembly) consists of solar collectors on the roof that heat the heat-transfer fluid (a mix of water and antifreeze), a solar storage tank with a heat exchanger, a pump station, and a control unit. The system supplements, but does not fully replace, the main heat source – a boiler or heat pump – and covers most of the domestic hot water heating precisely in summer. Mounting the collectors is the first physical step everything else depends on, which is why we dedicate a separate, detailed article to it.
Why collector mounting is key for both performance and safety
Mounting the collectors actually performs two tasks at once, and both are equally important. The first is purely mechanical safety – a collector with its frame and glass cover, together with its fill, weighs tens of kilograms and is exposed to wind, snow, rain, and temperature swings all year round, often for decades. The structure must hold it securely in whatever weather can occur at the given location, including gusty wind during a storm or the load of wet snow. The second task is to ensure the optimal tilt and orientation of the collector toward the sun, because the angle of incidence of sunlight determines how much energy the collector actually produces over the year.
Collectors are therefore anchored using a specialized mounting structure depending on the roof type – a pitched roof with various roofing materials (tiles, metal sheet, beaver-tail tiles), a flat roof with adjustable tilt (usually 15° or more for self-cleaning), or a facade or the ground. The key point is that the structure must match the exact dimensions of the specific collector type – a "universal" structure that fits everything does not exist in practice, because the bracket spacing, profile length, and anchoring method differ by collector manufacturer and model. That is why, when ordering a structure, the exact collector type and size it needs to fit is always specified.
An incorrectly chosen or incorrectly installed structure shows up in practice in several ways: the collector may end up with the wrong tilt and thus lower annual output, the collector frame may suffer mechanical stress (shortening its service life), leaks can occur at roof penetrations, and in the worst case the structure, collector and all, can come loose in extreme wind. That is exactly why we recommend entrusting the installation to a company experienced specifically with solar systems, not just general construction or sheet-metal work – the details of anchoring into rafters, sealing penetrations, and calculating wind load require specific expertise.
Mounting on a pitched roof: tiles, metal sheet, beaver-tail tiles
A pitched roof is the most common place to install solar collectors in Slovakia, simply because most family houses have a pitched roof with good south or south-west orientation. The principle of mounting on a pitched roof is generally similar to that for photovoltaic panels: a roof hook or anchoring element is fixed into the rafter (the roof's load-bearing member) and passes out through the roofing, and mounting profiles (rails) are then attached to these hooks, onto which the collector frame itself is finally fastened. The number of hooks and their spacing depends on the size and weight of the collector, as well as the expected snow and wind load at the given location.
The type of roofing material fundamentally affects how the hook passes through the roof and how the penetration around it is sealed:
- Tile roofing – the most common case. Roof hooks shaped precisely to match the profile of the given tile (various variants exist for different tile types) are used, hung on a batten or screwed directly into the rafter, while the tile at the hook is slightly adjusted or a special penetration tile is used. The advantage of tile roofing is that sealing the hook penetration is relatively simple, since tiles are already designed to overlap the gaps.
- Metal roofing (standing-seam sheet, trapezoidal sheet, tile-profile sheet) – here special anchoring elements designed specifically for the given type of metal roofing are generally used, often with a rubber or silicone seal and a penetration through the corrugation or seam of the sheet at the point where it can be sealed best. With metal roofing it is important to ensure the anchoring element does not disrupt rainwater drainage along the corrugations and to avoid galvanic corrosion from contact between dissimilar metals.
- Beaver-tail tiles – small, densely laid tiles require their own type of hook adapted to the smaller format and denser batten spacing, similar to standard tiles, just with finer dimensional adjustment.
Once the hooks are fitted, mounting profiles (usually aluminum, corrosion-resistant) are attached to them, forming a plane onto which the collector is placed and mechanically anchored with clamps that fit exactly the frame of the given collector. On a pitched roof, the roof's own pitch is generally used – the collector follows the pitch of the roofing, which reduces the aerodynamic load on the structure (wind doesn't "catch" a collector standing perpendicular to the roof, but slides across its surface much like the rest of the roof). If the roof pitch isn't optimal for solar gain (for example, a very shallow pitched roof or unfavorable orientation), raised structures also exist that tilt the collector slightly to a better angle, though this increases the wind load and requires a more thorough structural design.
Mounting on a flat roof: adjustable tilt and self-cleaning
On a flat roof, the collector naturally doesn't follow any existing pitch – the roof is horizontal or has only a minimal slope for water drainage – so a separate support structure that tilts the collector to the required angle is always used here. This is where, for example, the mounting kit for collectors on a flat roof up to a 15° tilt comes into play, designed exactly for the KS 2100F collector type with an area of 1.82 m² – again, the structure's dimensions must match the specific collector type and size, it is not a universal part.
Comparison of typical collector tilt for different mounting methods.
A 15° tilt is chosen for flat roofs as a practical minimum, for two reasons. The first is the self-cleaning effect – rain needs a sufficient slope to wash dust, pollen, and dirt off the cover glass surface without manual cleaning; with too flat a placement (close to 0°) dirt sticks to the glass and visibly reduces the collector's output over time. The second reason is drainage of rainwater from the roof itself beneath the structure – a collector placed almost horizontally could trap water at the point of contact with the structure and accelerate degradation of the roofing or waterproofing. A higher tilt (for example 30° to 45°) is chosen when the roof's structural capacity allows it and the designer wants to bring the annual solar yield closer to values typical of a pitched roof with optimal orientation.
Equally important is the question of how the structure is anchored on a flat roof, since there is no rafter available to screw directly into. In practice, two approaches are essentially used:
- Anchoring directly into the roof's load-bearing structure – a penetration is drilled through the roof skin and waterproofing, the anchoring element is fixed into the reinforced concrete slab or another load-bearing layer, and the penetration is thoroughly sealed, usually doubly, with a suitable collar or sealant compatible with the given waterproofing. This method is mechanically the most reliable, but working into a continuous waterproofing layer requires professional work, ideally involving the roof contractor, so the warranty on the roof skin remains valid.
- Ballasted structure without penetration – the structure isn't anchored through the roof, but is heavy enough or loaded with additional weights (for example concrete pavers or gravel-filled containers) that its own weight resists uplift and displacement caused by wind. The advantage is that the roof's waterproofing is not disturbed; the disadvantage is a higher total weight on the roof, which the building's load-bearing structure must support, and the need for a precise calculation of the required ballast according to the wind zone and building height.
The choice between the two approaches depends on the roof type, its load capacity, the wind zone, and whether the existing waterproofing can be penetrated without risk. In both cases, the orientation of collector rows on a flat roof is chosen so they don't shade each other – the spacing between rows of collectors must account for the sun's height above the horizon even in winter, when the sun is lowest, otherwise the rear row of collectors would lie in the shadow of the front row for most of a winter day.
Mounting on a facade or on the ground
Not every building has a roof suitable for installing collectors – sometimes there isn't enough area with a suitable orientation, sometimes the roof is already fully occupied by photovoltaic panels, or the owner doesn't want additional load on the roof for aesthetic or structural reasons. In such cases, mounting on the building's facade or on a separate structure on the ground (or on a terrace, pergola, or standalone shelter) comes into consideration.
Mounting on a facade has its own specifics. In this case the collector is oriented almost vertically (close to 90° from horizontal), which is less favorable for annual yield than the optimal tilt of around 30-45° typical for a roof, but it also has its advantages: in winter, when the sun is low above the horizon, rays hit a vertical facade at a more favorable angle than a flat roof, so the vertical placement partly compensates for the lower total annual yield with better output precisely in the winter months, when the household needs energy the most. Structurally, it involves anchoring into masonry or a load-bearing wall using anchoring elements with sufficient capacity, with any pipework passing through the wall right below or beside the collector, which shortens the route to the utility room.
Mounting on the ground or on a separate structure (for example for a family house with a pitched roof unfavorably oriented to the north, but with a large enough plot to the south of the house) is handled similarly to a flat roof – a separate stand with adjustable tilt, anchored either into concrete footings cast in the ground, or held down by ballast. The advantage is easy access for installation and servicing, and the ability to choose the ideal tilt and orientation regardless of the roof's shape. The disadvantage is a longer pipe run between the collector and the utility room (more heat loss along the way and higher distribution costs) and the need to protect the lower part of the structure and the pipework from mechanical damage, for example when mowing the lawn or moving equipment around the plot.
In all three cases (pitched roof, flat roof, facade/ground), the common denominator is that the anchoring system is designed for the specific collector type and number, the specific location (wind and snow zone according to applicable standards), and the specific way of attaching to the building's load-bearing structure. You can also get advice when choosing the right structure directly through the detailed guide solar system installation – step by step, where collector mounting is listed as one of the first steps of the installation.
How mounting differs between flat-plate and vacuum tube collectors
A different collector shape also requires a differently designed mounting.
The choice between a flat-plate and a vacuum tube collector directly affects the mounting structure too, since both types have a different shape, weight, and load distribution. Flat-plate collectors have an absorber surface covered by tempered glass in an insulated frame – it's a compact, sealed "box" similar to a large window, mounted around the entire perimeter of the frame, similar to the photovoltaic panel mentioned earlier. They are cheaper, mechanically more durable (for example against hail), and are generally sufficient for domestic hot water heating in our climate conditions, which makes them the most common choice for family houses from a mounting perspective too – there are the most proven, standardized mounting kits available for them, including the flat-roof kit for up to a 15° tilt mentioned above.
Vacuum tube collectors have higher efficiency especially at low outdoor temperatures and lower solar radiation intensity, but they are more expensive and more fragile – they consist of a row of individual glass tubes fitted into a common header pipe (the collector header). In terms of mounting, this means the support structure mainly holds this header and the rack the tubes are inserted into, while individual tubes can in many cases be pulled out and reinserted during installation or later replacement without dismantling the whole structure. This is a practical advantage for servicing (a damaged tube can be replaced without disturbing the mounting), but on the other hand, the overall structure for vacuum tube collectors is generally somewhat more demanding to balance and anchor precisely because of the different weight distribution compared with a flat-plate collector. You can find more detailed differences between the two types, including recommendations on when it's worth choosing the more expensive vacuum tube solution, in the article flat-plate vs. vacuum tube solar collectors.

Mounting kit for collectors on a flat roof up to a 15° tilt, for the KS 2100F 1.82 m² collector
A mounting structure for attaching a flat-plate collector to a flat roof, with adjustable tilt – dimensioned exactly to fit the KS 2100F collector.
Price: €117.34
Connecting the structure to the pipework
Mounting the collector is not an isolated, standalone step – it's directly related to how the heat-transfer fluid is fed to it and drained from it. The run between the collector and the utility room uses either classic copper or stainless steel piping, or a pre-insulated 2-in-1 flexible pipe (supply and return in a single, already insulated flexible sheath) – this shortens installation time, since it doesn't need additional insulation on the roof or in a shaft. This time saving is especially noticeable for roof installations, since working at height is always slower and more complicated than working on the ground or in the utility room.
The pipe route from the collector must be planned already at the mounting design stage – the structure should allow the pipe to be routed without unnecessary sharp bends right next to the collector, and should protect the pipe from mechanical damage (for example chafing against the edge of the roofing or structure in the wind). On a pitched roof, the pipe is usually routed along a batten or rafter to a shared roof penetration; on a flat roof it's routed along the roof surface to a penetration or shaft; and for a facade mount the route is shortest, since the utility room is often directly behind the wall the collector is mounted on.
You can see a specific piping solution, for example, in the 10 m solar 2-in-1 flexi pipe – a pre-insulated dual pipe supplied on a coil that's simply laid alongside the collector structure to the roof penetration. Where a classic solution with individual pipes is chosen instead, stainless steel corrugated pipe is often used – a flexible stainless steel pipe resistant to the high temperatures the heat-transfer fluid in a solar collector commonly reaches, especially in summer months with high solar radiation and low hot water draw. You can find more about choosing and installing pipework in the article solar pipework and stainless steel corrugated pipe – how they work.
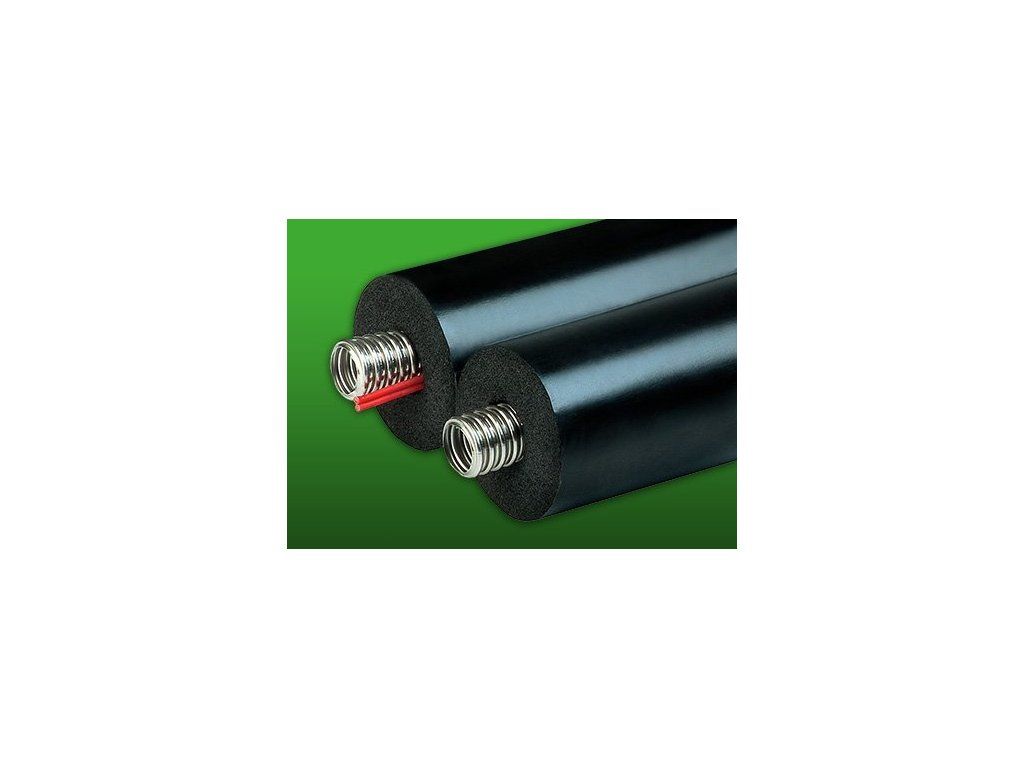
A pre-insulated, flexible dual pipe (supply and return in a single sheath) for fast installation of the run between the roof collector and the utility room.
Price: €308.75
What comes after mounting the structure: the storage tank, pump station, and controls
Mounting the collector itself is only the first step of the physical installation – for the system to actually work, it must be connected to three further components of the assembly. The first is the solar storage tank, which has, in addition to a regular boiler, at least one heat exchanger connected to the solar circuit (often a second exchanger for backup heating by the boiler too) – water is heated indirectly, the solar fluid circulates separately in a closed circuit and doesn't come into contact with the domestic water. You can read about which tank type and size suits your home in the article what solar storage tank do I need.
The second component is the pump station, which contains the pump, shut-off valves, thermometers or pressure gauges, and a safety valve – all in one compact unit that simplifies both installation and servicing. That's why the pump station is generally installed right in the utility room next to the tank, not near the collector on the roof, where only the piping itself runs. An example is the ZP2-12 ECO solar pump station – a complete pump group (circulation pump, valves, pressure gauges, safety valve) for circulating the solar fluid between the collector and the tank.
The third component is the control (solar) unit, which compares the temperature at the collector and in the tank using sensors – when the collector is warmer than the tank by a set difference, it switches on the solar group's circulation pump. One of the sensors is placed directly on the collector or in its immediate vicinity, which is another reason the sensor cabling route is already planned alongside the pipework when designing the collector mounting – along the same route the solar piping itself follows. An example of a control unit is the Euroster 813 Solar, which controls the pump based on the temperature difference between the collector and the tank. More detailed information on choosing and setting up controls and pump stations is in the article control units and pump stations for solar systems.

A complete pump group (circulation pump, valves, pressure gauges, safety valve) for circulating the solar fluid between the collector and the tank.
Price: €750.55
The solar system thus supplements the main heat source – a boiler or heat pump – mainly for domestic hot water heating in the summer months. We explain exactly how solar heating works together with the boiler throughout the year and when backup heating switches on automatically in the article solar heating as a boiler supplement.
Filling, venting, and the expansion vessel after mounting the structure
After completing the collector mounting, connecting the pipework, and hooking it up to the tank and pump station, the last step follows – filling and venting the solar circuit. The solar circuit is a closed, pressurized system with its own expansion vessel, which compensates for the volumetric expansion of the heat-transfer fluid at high temperatures – in summer the fluid temperature at the collector can reach high values, especially when the collector's heat temporarily has nowhere to go (for example when the tank is already fully heated), and without an adequately sized expansion vessel the pressure in the circuit could rise dangerously.
The circuit is filled and vented with a manual or electric filling pump through filling valves, similar to a heating circuit – the fluid is pumped into the system upward toward the collector under pressure, while air is simultaneously pushed out through vent valves, which are generally located at the highest point of the circuit, that is, right at the collector or just below it. This is exactly why it's important for the mounting structure to allow safe and convenient access to the vent valve during the first filling, but also for any future top-ups after years of operation – if the collector is mounted so that the valve can only be reached with risky acrobatics on the edge of the roof, it makes routine servicing significantly harder.
Thorough venting is also important because an air bubble trapped at the highest point of the circuit (that is, right at the collector) would block the flow of the heat-transfer fluid and could locally cause the fluid to overheat at that spot. After the first filling and venting, the system starts up and the control unit takes over automatic operation – switching the pump on and off based on the temperature difference between the collector and the tank without any further operator intervention, except for a regular annual check of the pressure, the condition of the antifreeze mix, and the tightness of the joints. We describe common faults and servicing tasks, including periodic top-ups and pressure checks, in detail in the article servicing, filling, and common faults of solar systems.
Real-world examples
Installation sequence from mounting the collector to starting up the circuit in a real-world example.
Family house with a pitched roof covered in fired clay tiles. This is a detached family house with a gable roof at a pitch of about 38°, with one roof plane facing south without any shading obstacles (neither the chimney nor a dormer intrudes on the area considered for the collectors). Two flat-plate collectors are mounted side by side on the roof, attached using roof hooks shaped for the specific type of fired clay tile, hung directly on a batten and anchored with screws into the rafters. The mounting profiles connecting the hooks created a plane that follows the roof pitch, so the collectors don't project into the wind more than necessary. The run to the utility room in the basement was handled with a pre-insulated 2-in-1 flexi pipe, which ran alongside the structure to a shared roof penetration near the gable wall, from where it continued down the facade into the utility room. This eliminated the need for additional pipe insulation directly on the roof, which always poses a risk and a time loss when working at height. The roof penetration was sealed with a special collar compatible with the given tile type, with double overlap of the surrounding tiles for certainty against leaks. The system was connected to a solar tank with two heat exchangers (solar and boiler backup), a pump station, and a control unit comparing the collector and tank temperatures. After the first filling and venting of the circuit (the vent valve was located just below the roof ridge, accessible from a ladder without needing to walk on the roof), the system took over automatic operation and in summer covers the vast majority of domestic hot water consumption without needing boiler backup.Family house with a flat roof (bungalow). The second typical case is a single-story family house with a flat roof and a standard build-up (a load-bearing reinforced concrete slab, thermal insulation, continuous waterproofing membrane). Since the roof has no natural pitch usable for a collector, a separate support structure with adjustable tilt had to be chosen – in this case a mounting kit for collectors on a flat roof up to a 15° tilt, matching the dimensions of the installed collector. Since the owner didn't want to penetrate the continuous waterproofing membrane (so as not to lose the warranty on the roof skin provided by the roofing contractor), the ballasted structure option was chosen – the support frame was loaded with enough concrete pavers, placed according to the structure manufacturer's recommendation, so that its own weight would resist uplift in strong wind, without a single penetration through the membrane. The 15° tilt ensured that rainwater reliably washes dust and pollen off the collector glass surface, so no manual cleaning was needed even after several months of operation. The run to the utility room in this case was handled with a classic stainless steel corrugated pipe routed along the roof surface to a penetration at an existing HVAC shaft, where the penetration was already structurally resolved and no new one needed to be created. This combination – a ballasted structure with no membrane penetration, an existing shaft for the pipe run – allowed the installation with no risk whatsoever to the roof's original waterproofing.
Frequently asked questions about collector mounting
Can the same mounting structure be used for any collector?
No. The structure must match the exact dimensions and weight of the specific collector type and size – bracket spacing, profile length, and the anchoring method differ by manufacturer and model. That's why mounting kits are always sold as a kit "for collector type XY", not as a universal part.
What is the minimum tilt for a collector on a flat roof?
In practice, 15° is commonly chosen as the minimum, mainly for rain self-cleaning and drainage of water from under the structure. A lower tilt increases the risk of dust and dirt sticking to the collector glass long-term, which reduces output.
Does the waterproofing always have to be drilled through when mounting on a flat roof?
No, ballasted structures also exist, which aren't anchored through the roof skin but resist uplift through their own weight or additional ballast. The choice depends on the roof's load capacity, the wind zone, and whether it's advisable to penetrate the existing waterproofing.
Is facade mounting just as effective as roof mounting?
In terms of annual yield, vertical facade mounting is generally less favorable than the optimal roof tilt, but in winter months, when the sun is low above the horizon, vertical placement can deliver surprisingly good output precisely when the household needs it most.
How does the pitched roof covering type relate to choosing the anchoring element?
Fundamentally – different types of roof hooks and penetration elements exist for tiles, metal roofing, and beaver-tail tiles, shaped exactly to the given roofing profile so the penetration can be sealed reliably and the hook safely hung or screwed in.
Where is the solar circuit's vent valve located?
Usually at the highest point of the circuit, that is, right at the collector or just below it. That's why it's important for the mounting structure to allow safe access to this point during first filling and later servicing.
Does the pipe type (flexi pipe vs. copper/stainless pipe) affect how the collector is mounted?
Not the collector mounting itself, but it affects the routing along the structure and the roof penetration – a pre-insulated 2-in-1 flexi pipe is routed as a single unit and doesn't need additional insulation on the roof, which shortens installation time at height.
Why does the solar circuit have its own expansion vessel when the heating circuit has one too?
The solar circuit is a separate, closed pressurized system, isolated from the heating circuit by the exchanger in the tank. The heat-transfer fluid in it reaches high temperatures in summer and needs its own expansion vessel to compensate for volumetric expansion, independent of the heating system.
Can a vacuum tube collector be mounted on the same structure as a flat-plate one?
Not directly – vacuum tube collectors have a different weight distribution (a header and a row of glass tubes instead of a sealed frame), so structures adapted to precisely this shape are used for them, although the principle of anchoring into the roof or facade is conceptually similar.
Related topics
- How to choose a solar water heating system
- Flat-plate vs. vacuum tube solar collectors
- What solar storage tank do I need
- Solar pipework and stainless steel corrugated pipe – how they work
- Control units and pump stations for solar systems
- Solar heating as a boiler supplement
- Solar system installation – step by step
- Servicing, filling, and common faults of solar systems
- Frequently asked questions about solar assemblies and collectors
Have a question about solar systems or collectors?
Can't decide, or dealing with a specific situation in your home? Write to us – we're happy to help.